First, go to the Google Admin Console, and create a new custom SAML app.
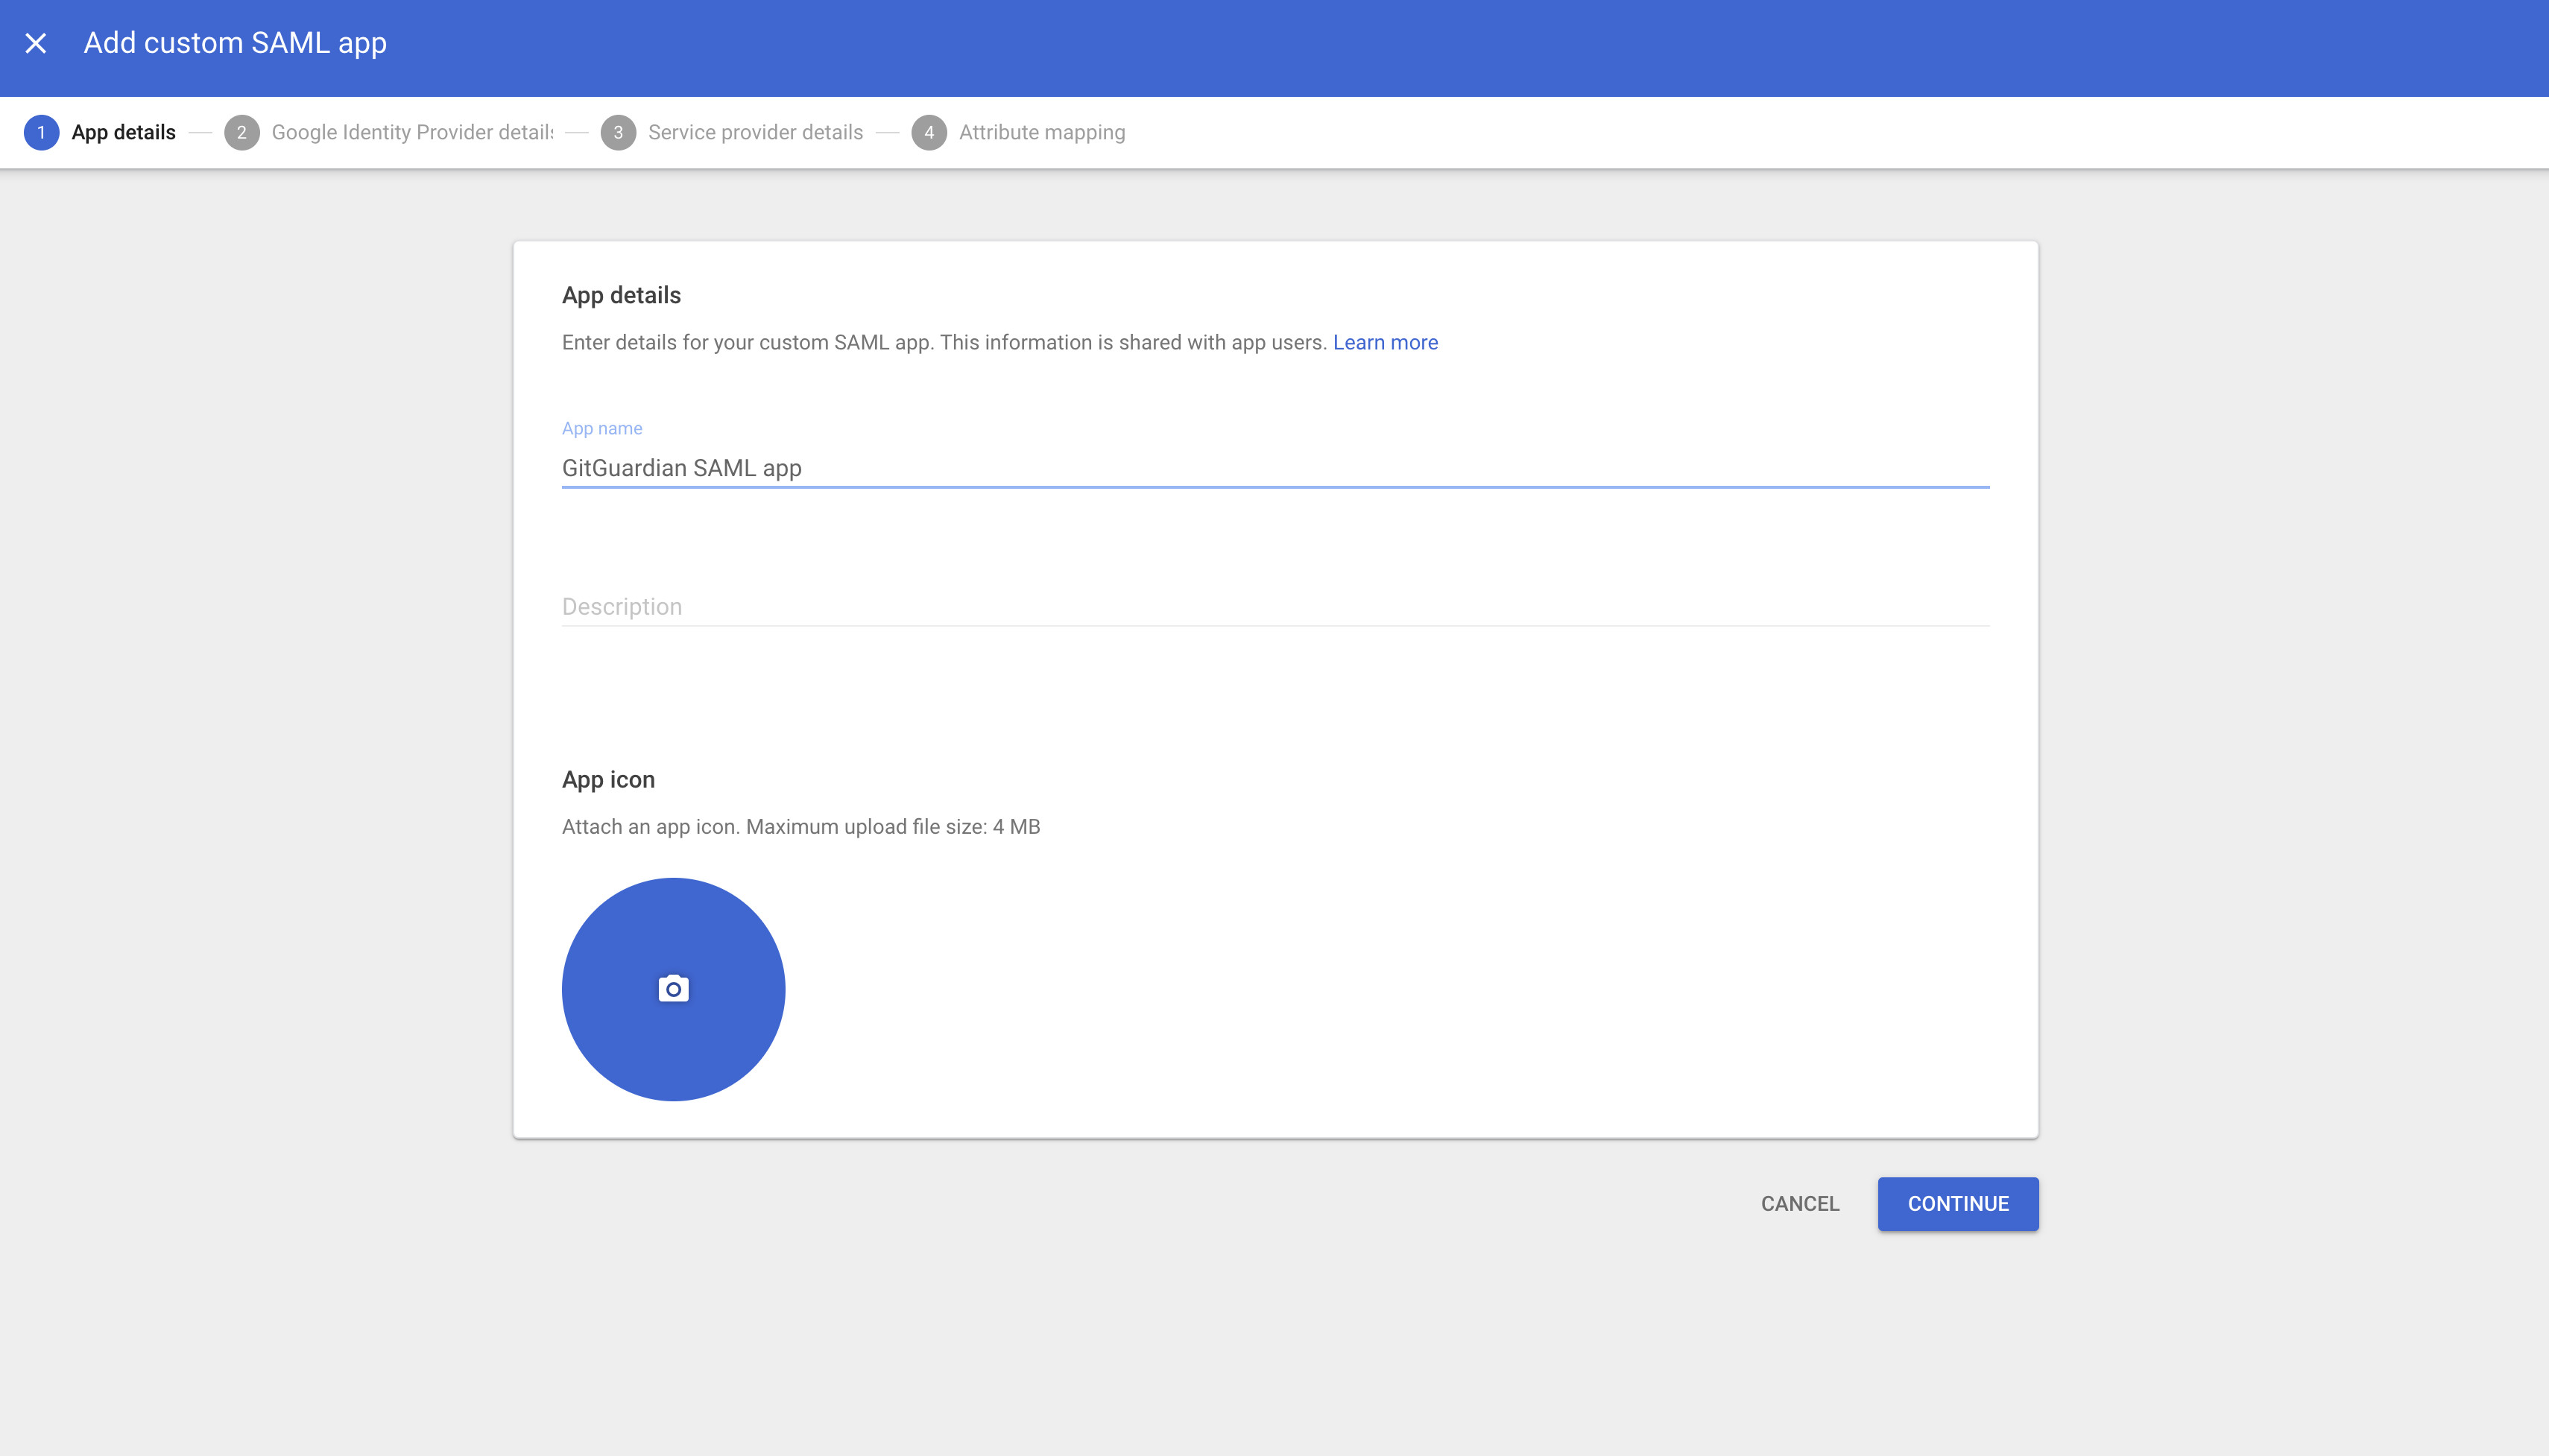
You will land on this page, where you can set your app name and general information for your SAML app that users will see when logging in.
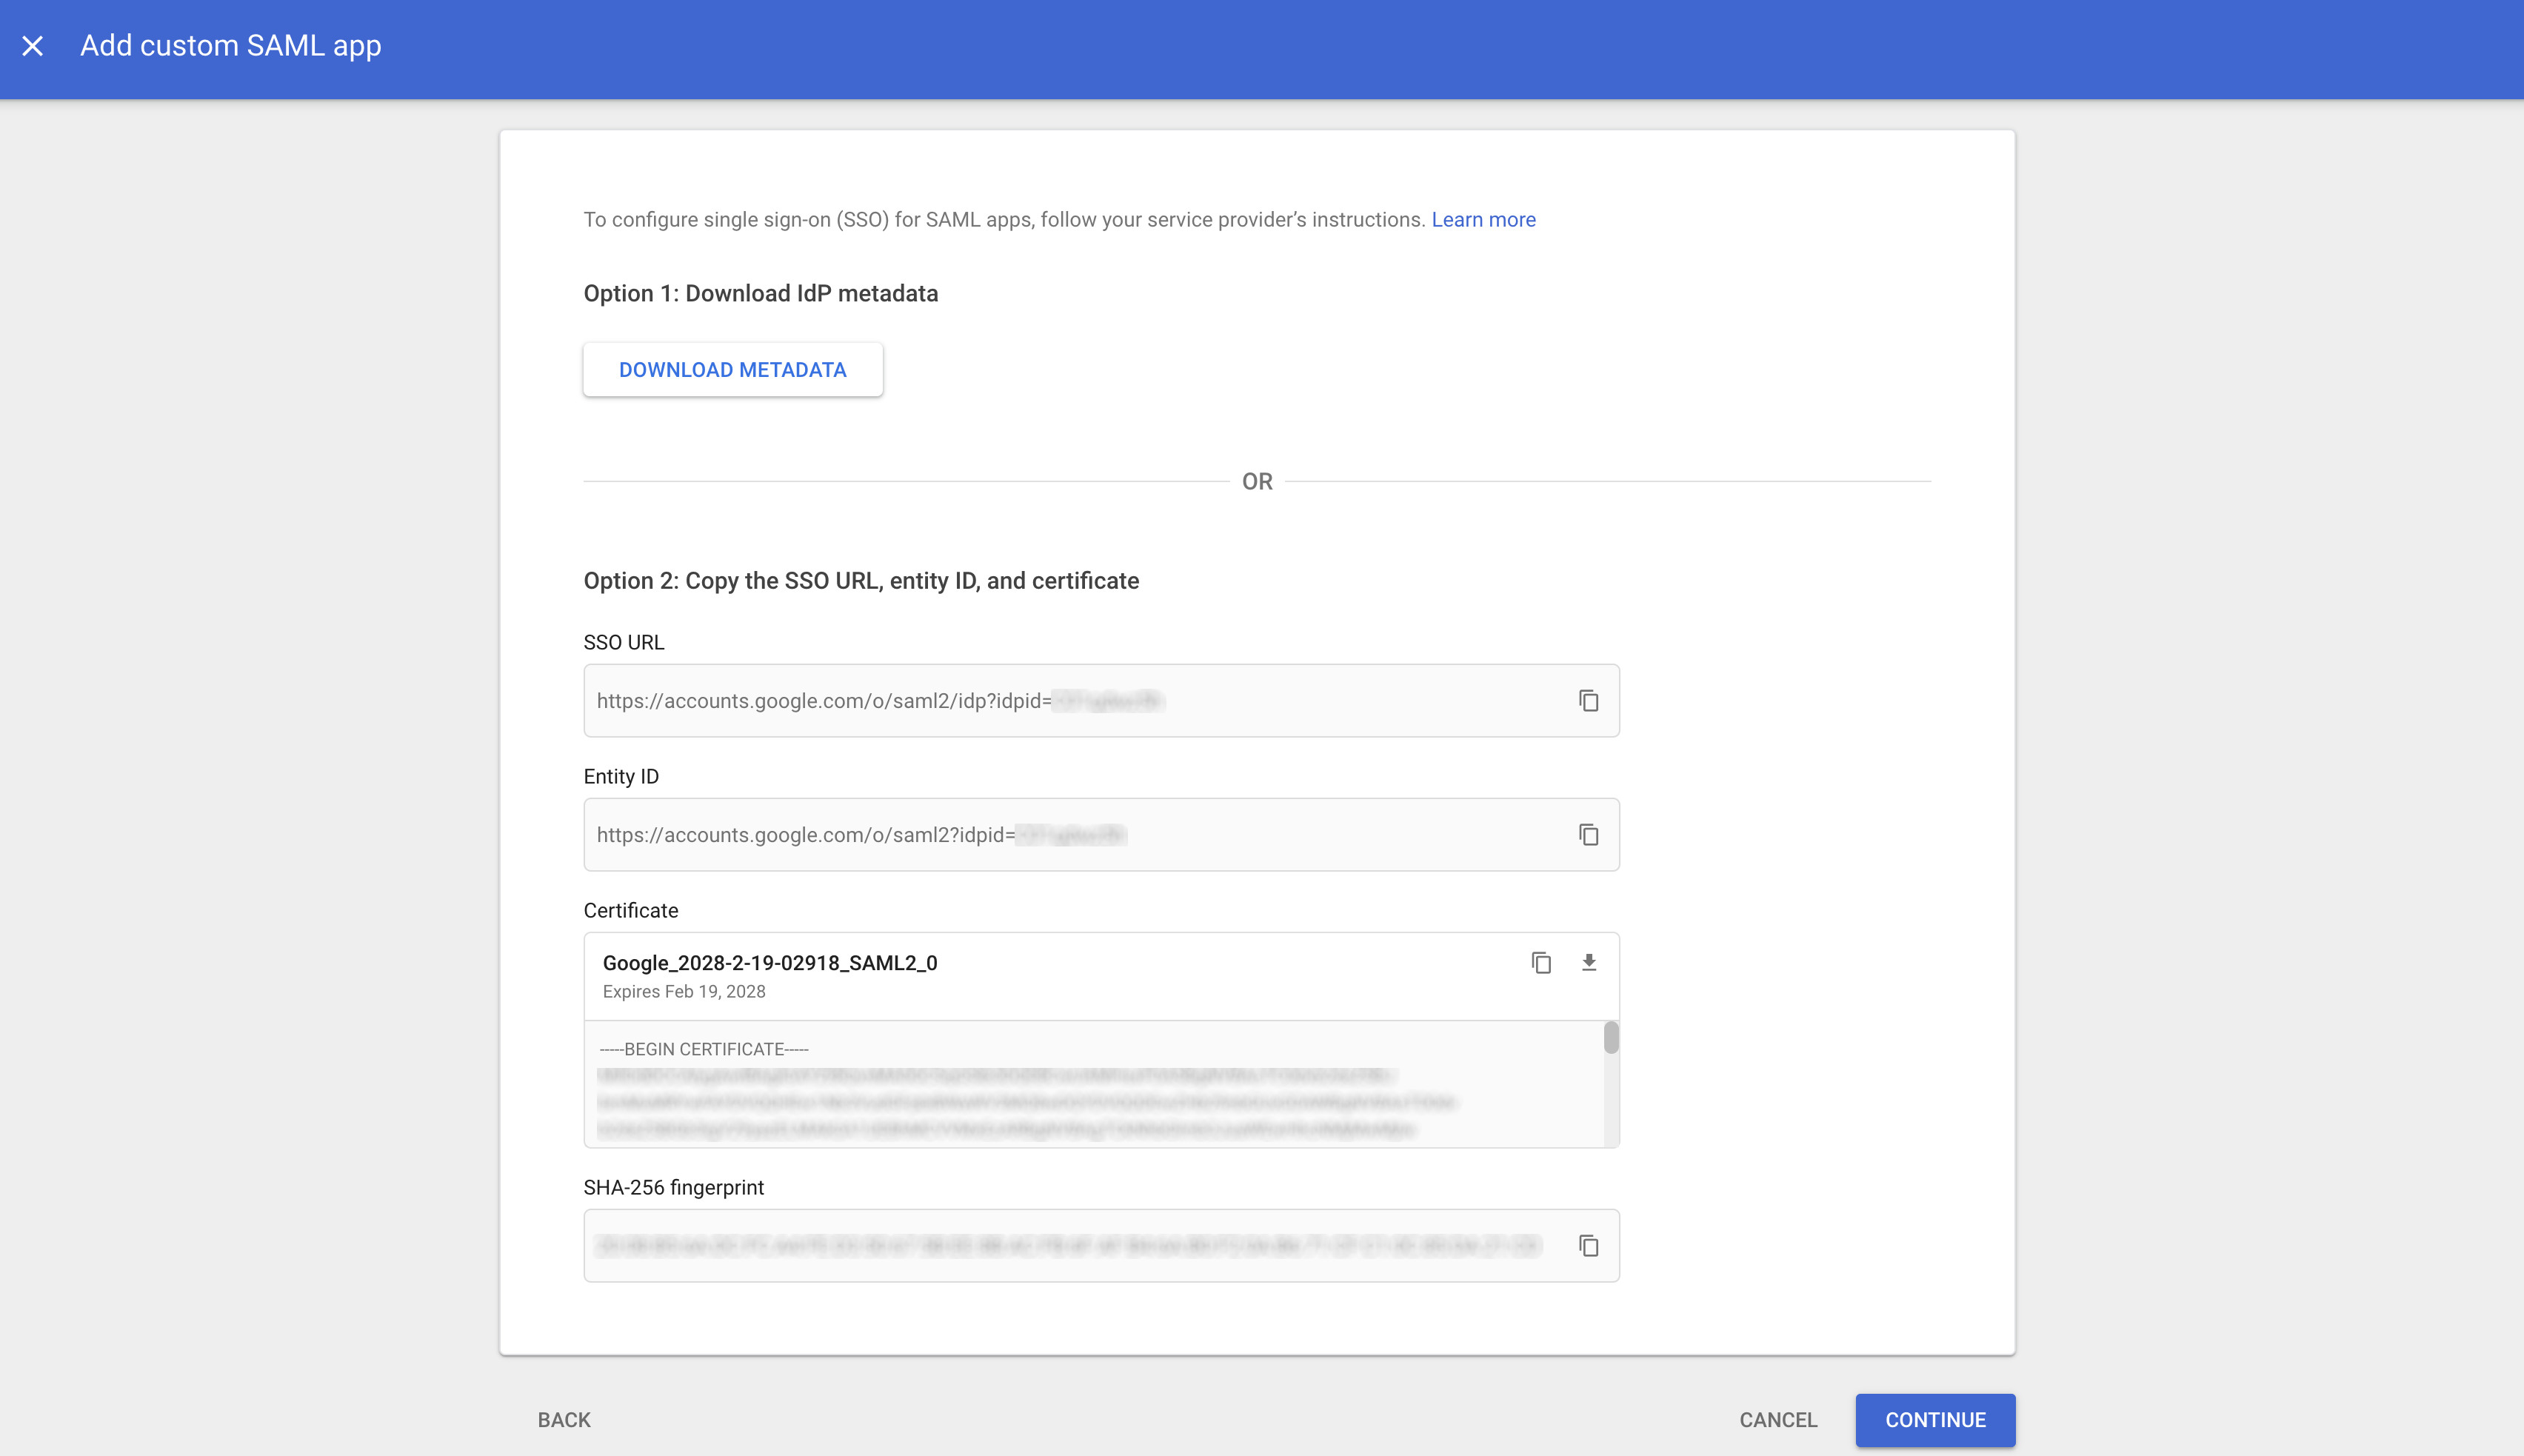
Click on "Continue". Now, you need to configure the Identity Provider in your GitGuardian dashboard. Use these values provided by Google:
Entity Id field is filled with the Entity ID
Single Sign-On URL field is filled with the SSO URL
X509 Cert field is filled with the certificate from Google. Download it, use cat and copy/paste the plaintext value.
On the GitGuardian dashboard, ensure that the checkbox "I have specified that the response assertions with RSA_SHA256 as signature algorithm and SHA256 as digest algorithm" is unchecked.
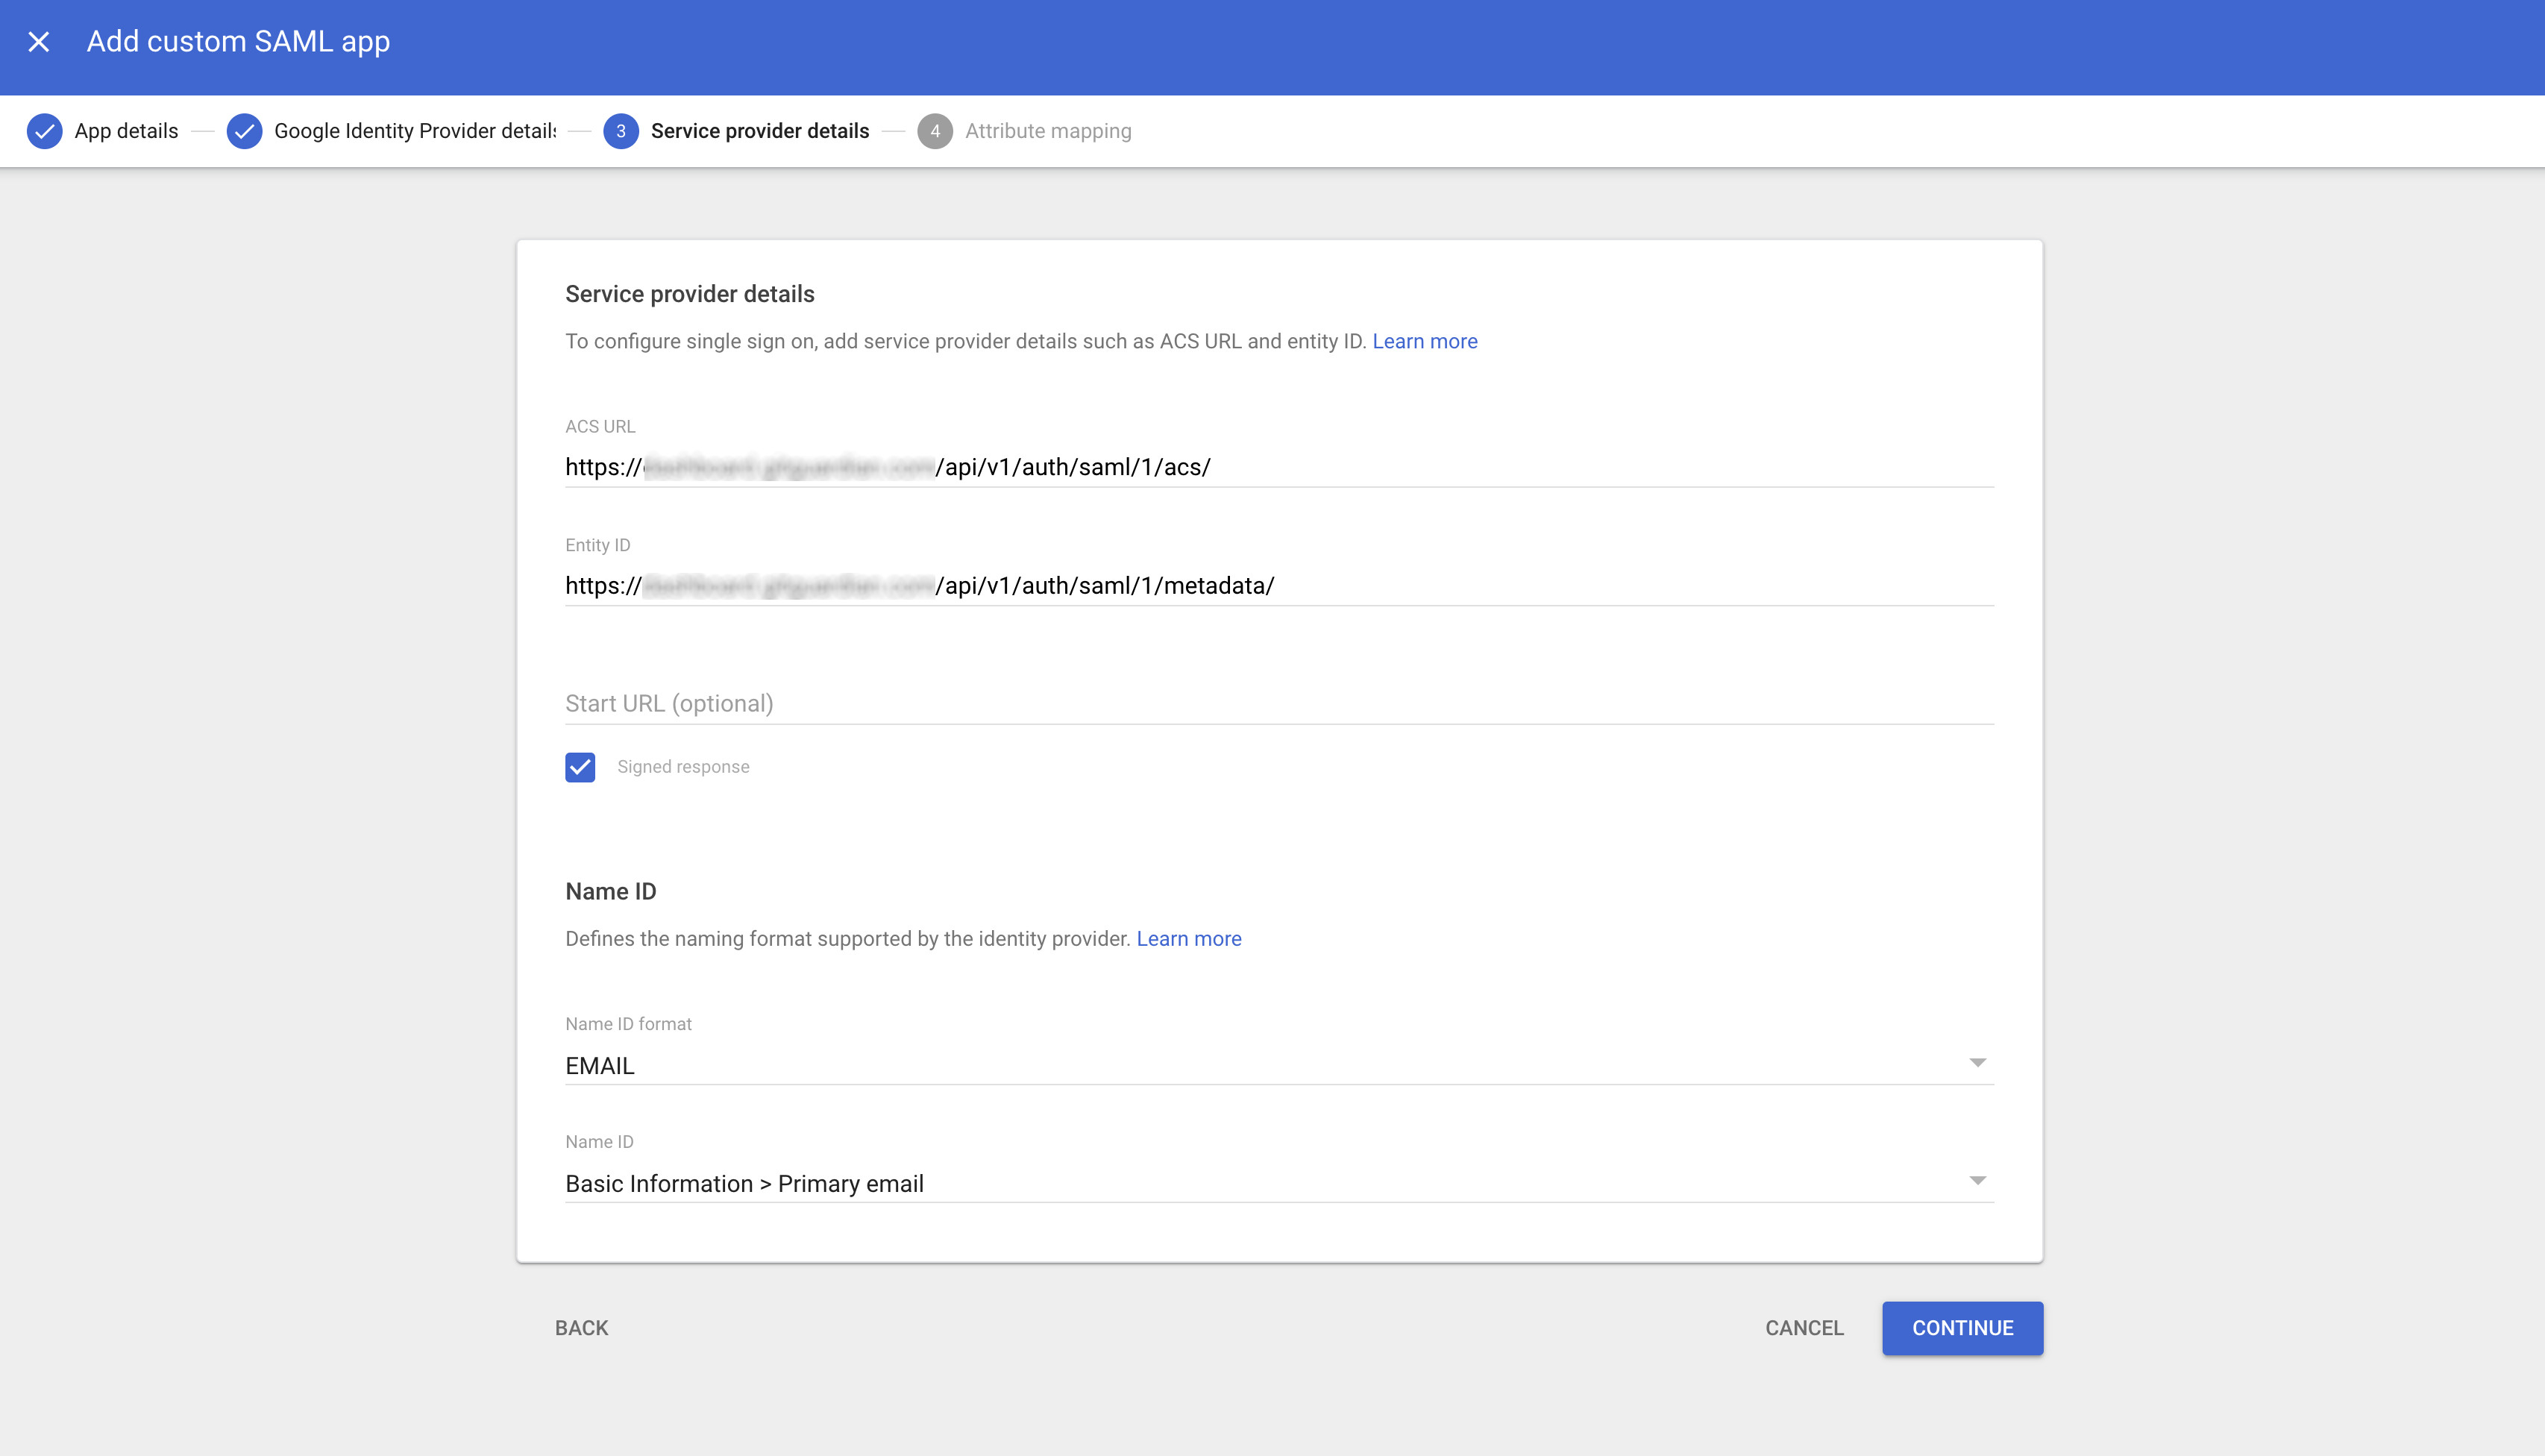
Click on "Continue". You can now configure the Service Provider details provided by GitGuardian within Google:
ACS URL field is filled with the ACS URL value.
Entity ID field is filled with the SP Entity id value.
Signed Response must be checked
Name ID format must be set to EMAIL
Name ID must be set to Basic Information > Primary Email
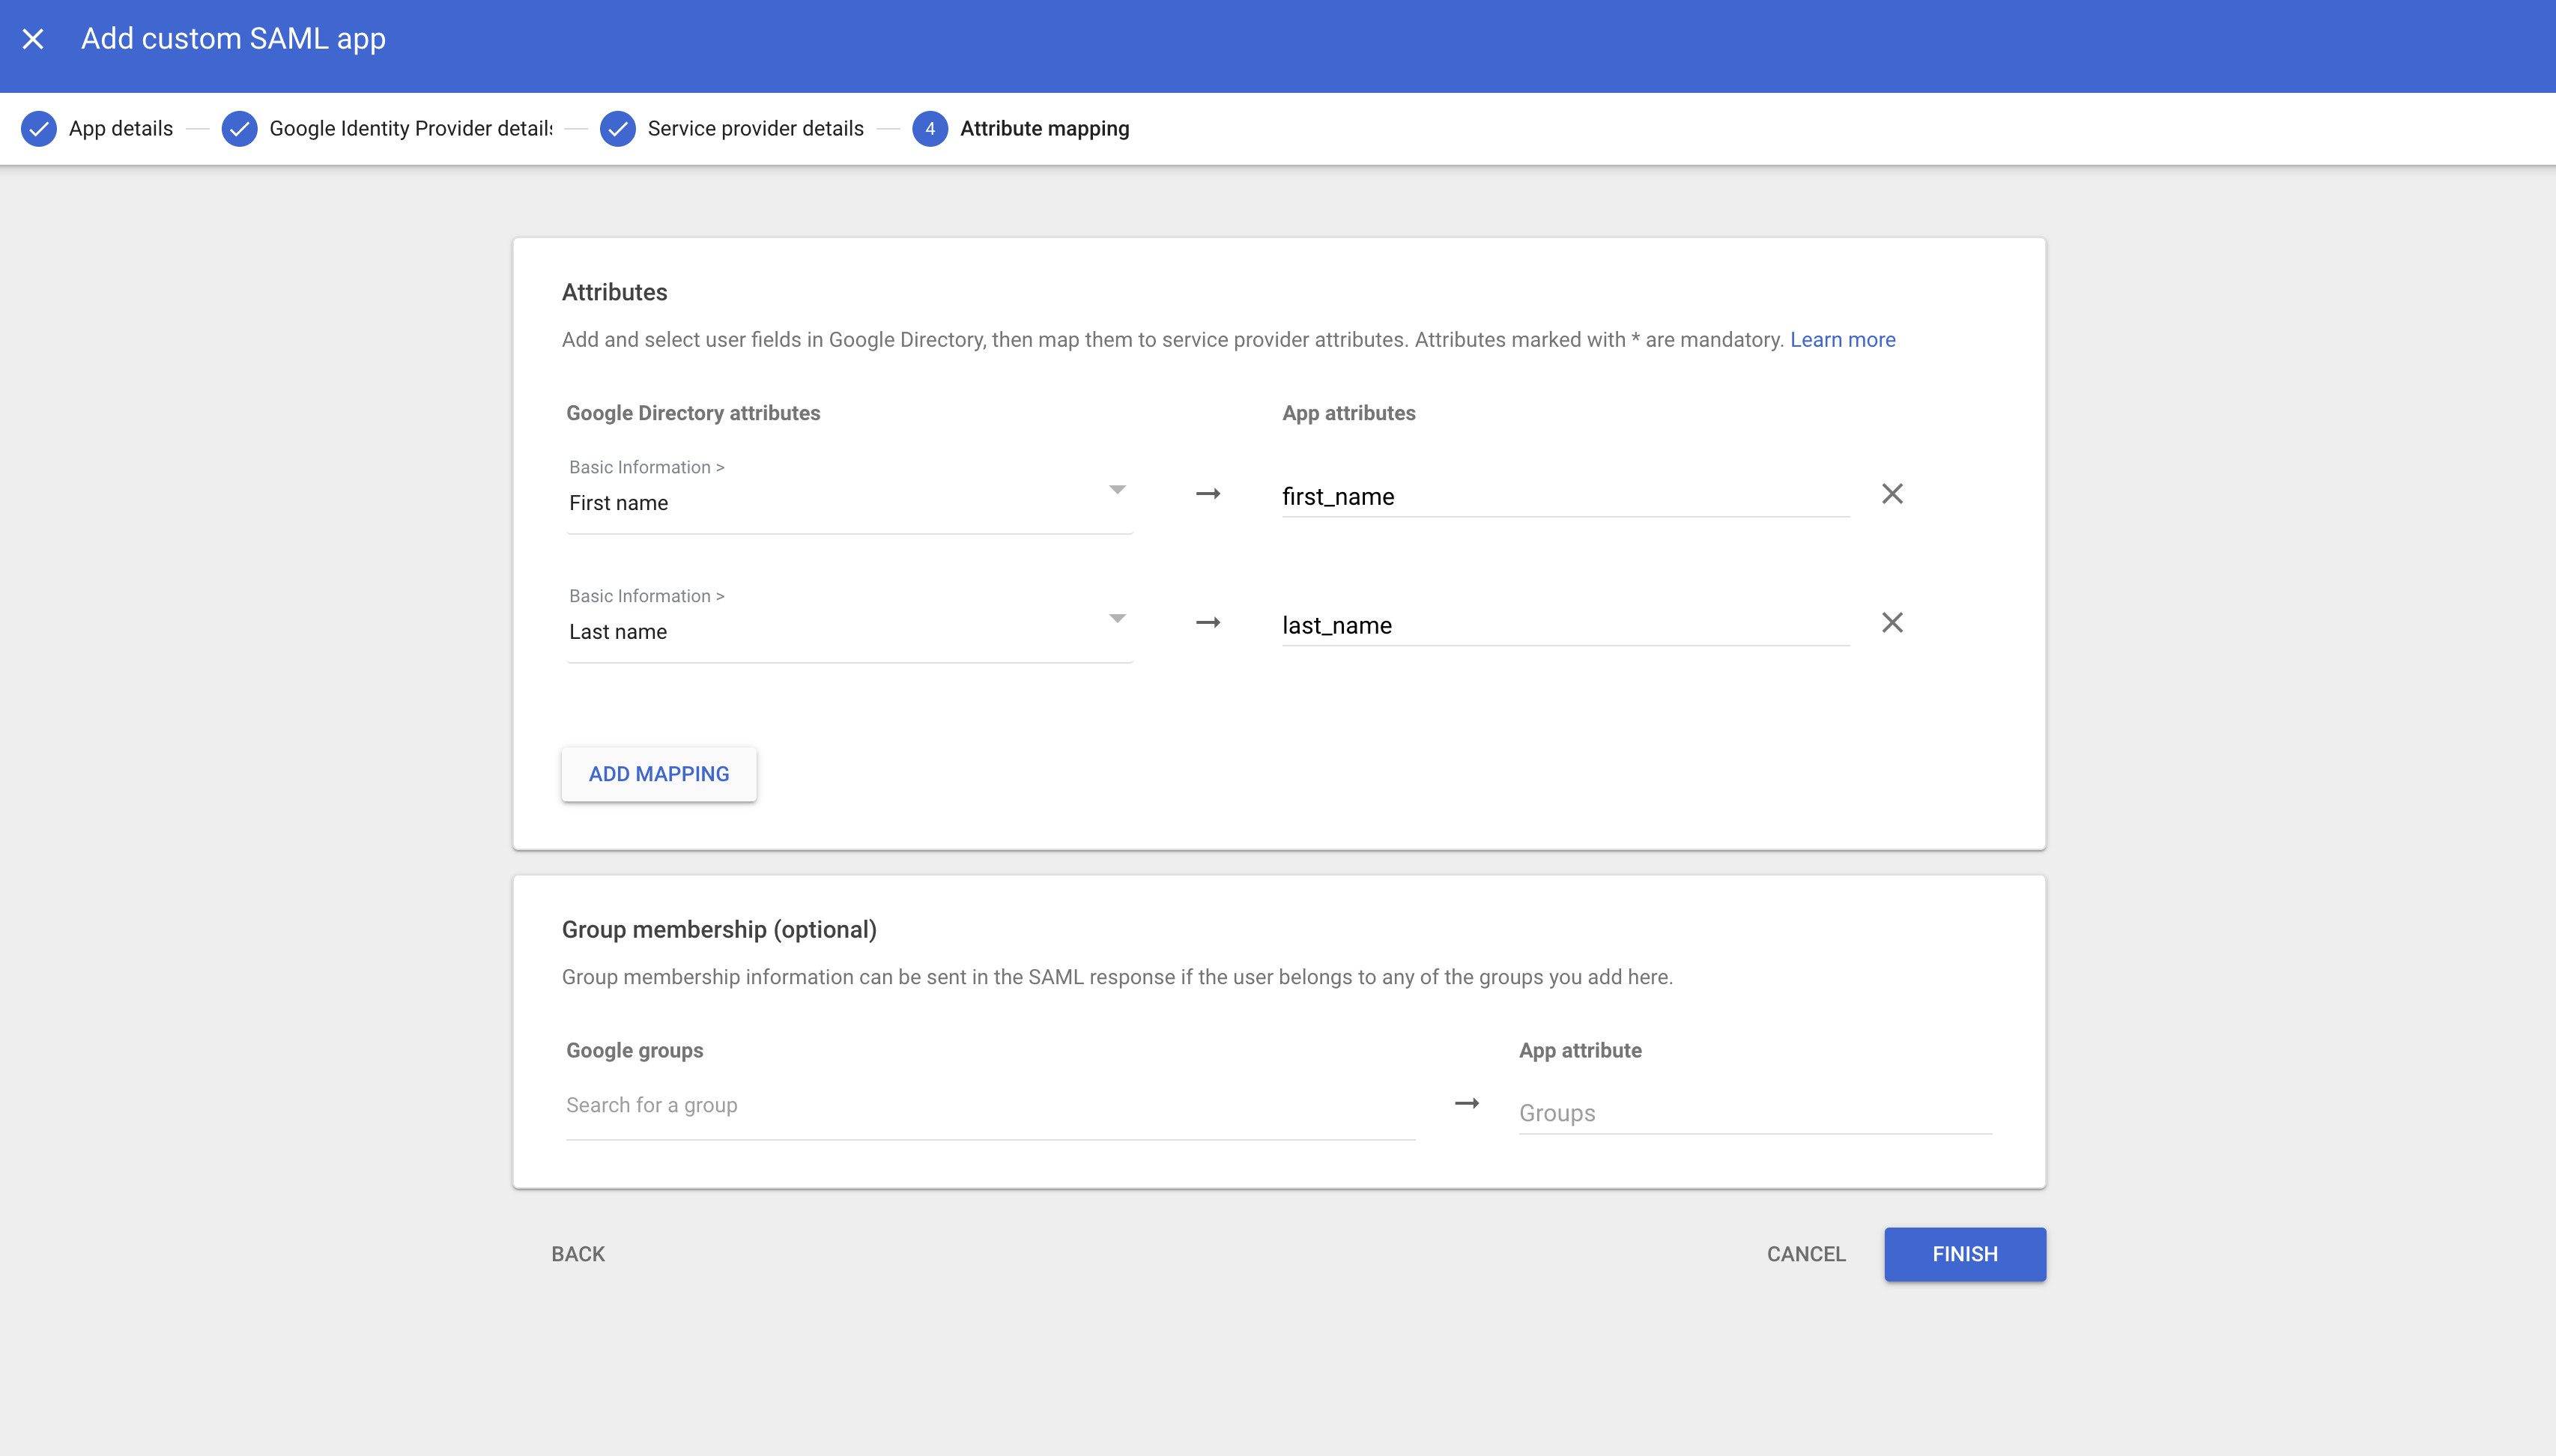
Now, some mappings need to be done, they are quite straightforward:
first_name is mapped to the user first name
last_name is mapped to the user last name
Finish your app configuration by clicking on "Finish". You might need to modify the SAML app user access, which is OFF for everyone by default.