AWS IAM Integration
The AWS IAM integration provides comprehensive visibility into your AWS Identity and Access Management infrastructure, enriching your NHI governance with detailed permission context and security insights.
Overview
This integration is provided directly in Gitguardian platform and does not require to install GitGuardian Scout. It fetches comprehensive AWS IAM data, including all permissions tied to users, roles and groups, and link all those permissions to AWS API keys. This enriches your security graph with detailed context about credential sensitivity and potential blast radius in case of a leak.
Key Features
- Comprehensive Permission Analysis: Fetches all AWS IAM data including policies, roles, users, and groups
- API Key Context: Analyzes permissions tied to AWS API keys to understand their potential impact
- Security Graph Enrichment: Provides detailed context about credential sensitivity and blast radius
- Secure Authentication: Uses OIDC authentication, eliminating the need for long-lived credentials
Getting Started
Follow these steps to configure the AWS IAM integration:
Step 1: Configure OIDC Provider in AWS
Add your GitGuardian instance as an OIDC provider in your AWS account, using these values:
- Provider URL:
- GitGuardian SaaS:
https://api.gitguardian.com - Self-hosted:
https://<your-gitguardian-hostname>/exposed(keep the/exposedpath)
- GitGuardian SaaS:
- Audience:
sts.amazonaws.com
To confirm the exact Provider URL for your instance, open <provider-url>/.well-known/openid-configuration in a browser. The issuer field is the value to use.
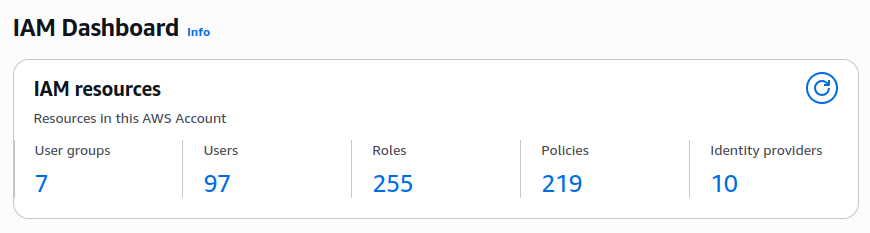
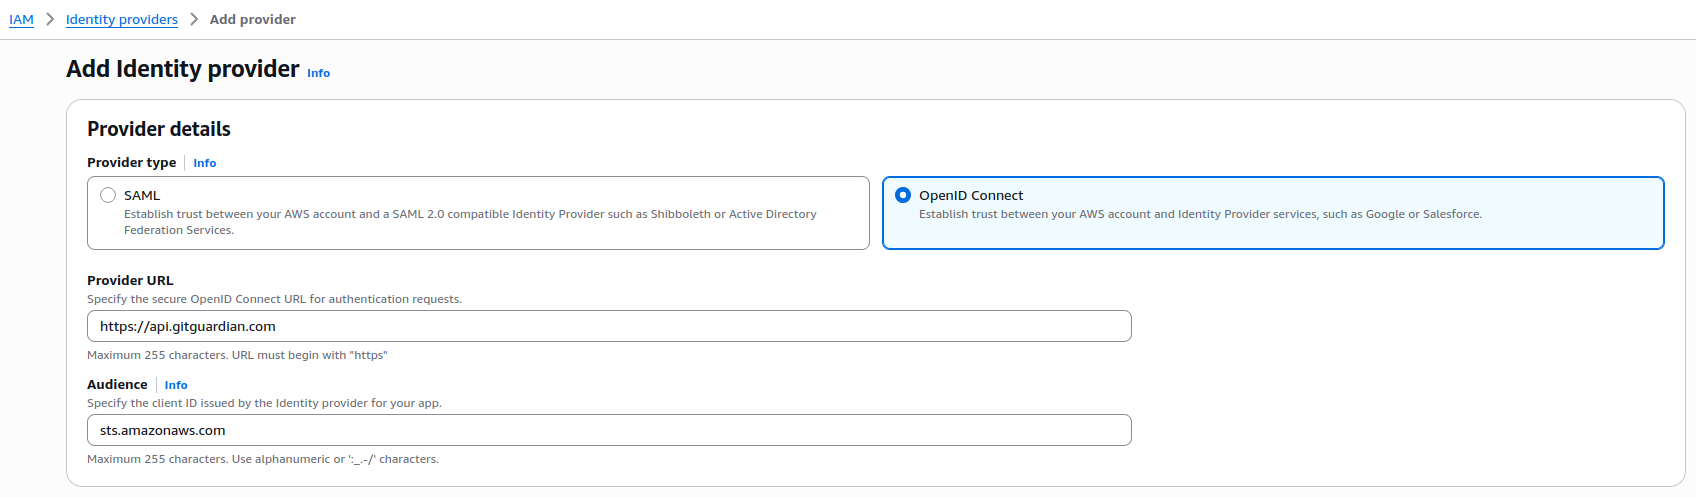
When AWS asks for a certificate thumbprint, use the Get thumbprint button in the console. AWS retrieves the fingerprint from the Provider URL's TLS certificate, so there is nothing to copy from GitGuardian. If you create the provider through the AWS CLI, CloudFormation, or Terraform, supply the thumbprint of the certificate authority for your Provider URL, following AWS's guide on obtaining the thumbprint.
AWS validates tokens by fetching <provider-url>/.well-known/openid-configuration and the public keys at <provider-url>/v1/auth/jwks. Both endpoints must be reachable from the public internet. If your GitGuardian instance is only reachable inside your network, the role assumption fails until you expose them to AWS.
Step 2: Create AWS IAM Role
Create an AWS role that trusts the GitGuardian OIDC provider. This involves setting up both a trust policy and permission policy.
Trust Policy
Configure the trust policy to allow the GitGuardian OIDC provider to assume the role. For enhanced security, include a condition that restricts access to your specific GitGuardian account:
{
  "Version": "2012-10-17",
  "Statement": [
    {
      "Effect": "Allow",
      "Principal": {
        "Federated": "arn:aws:iam::{your-aws-account-id}:oidc-provider/{your-gitguardian-oidc-provider}"
      },
      "Action": "sts:AssumeRoleWithWebIdentity",
      "Condition": {
        "StringEquals": {
          "{your-gitguardian-oidc-provider}:sub": "gitguardian-account-id:{your-gitguardian-account-id}"
        }
      }
    }
  ]
}
Note: Replace the placeholders:
{your-aws-account-id}: Your AWS account ID{your-gitguardian-oidc-provider}: The OIDC provider URL from Step 1, without thehttps://prefix. For GitGuardian SaaS, useapi.gitguardian.com. For self-hosted, keep the/exposedpath, for examplegitguardian.example.com/exposed.{your-gitguardian-account-id}: Your GitGuardian account ID. Find it in your GitGuardian dashboard URL, as the number after/workspace/. On self-hosted instances the default account ID is1.
Example: If your dashboard URL is https://dashboard.gitguardian.com/workspace/123456/, then your GitGuardian account ID is 123456.
The sub condition (gitguardian-account-id:{your-gitguardian-account-id}) ensures that only your specific GitGuardian account can assume this role, providing an additional layer of security.
This can also be done from the UI, by selecting Web Identity when creating the AWS IAM Role.
Permission Policy
Attach the following permission policy to grant the necessary IAM read permissions:
{
  "Version": "2012-10-17",
  "Statement": [
    {
      "Effect": "Allow",
      "Action": [
        "iam:GetAccessKeyLastUsed",
        "iam:GetGroup",
        "iam:GetGroupPolicy",
        "iam:GetPolicy",
        "iam:GetPolicyVersion",
        "iam:GetRolePolicy",
        "iam:GetUserPolicy",
        "iam:ListAccessKeys",
        "iam:ListAttachedGroupPolicies",
        "iam:ListAttachedRolePolicies",
        "iam:ListAttachedUserPolicies",
        "iam:ListGroups",
        "iam:ListPolicies",
        "iam:ListRolePolicies",
        "iam:ListRoles",
        "iam:ListUserPolicies",
        "iam:ListUsers"
      ],
      "Resource": "*"
    }
  ]
}
Step 3: Access GitGuardian Integration Settings
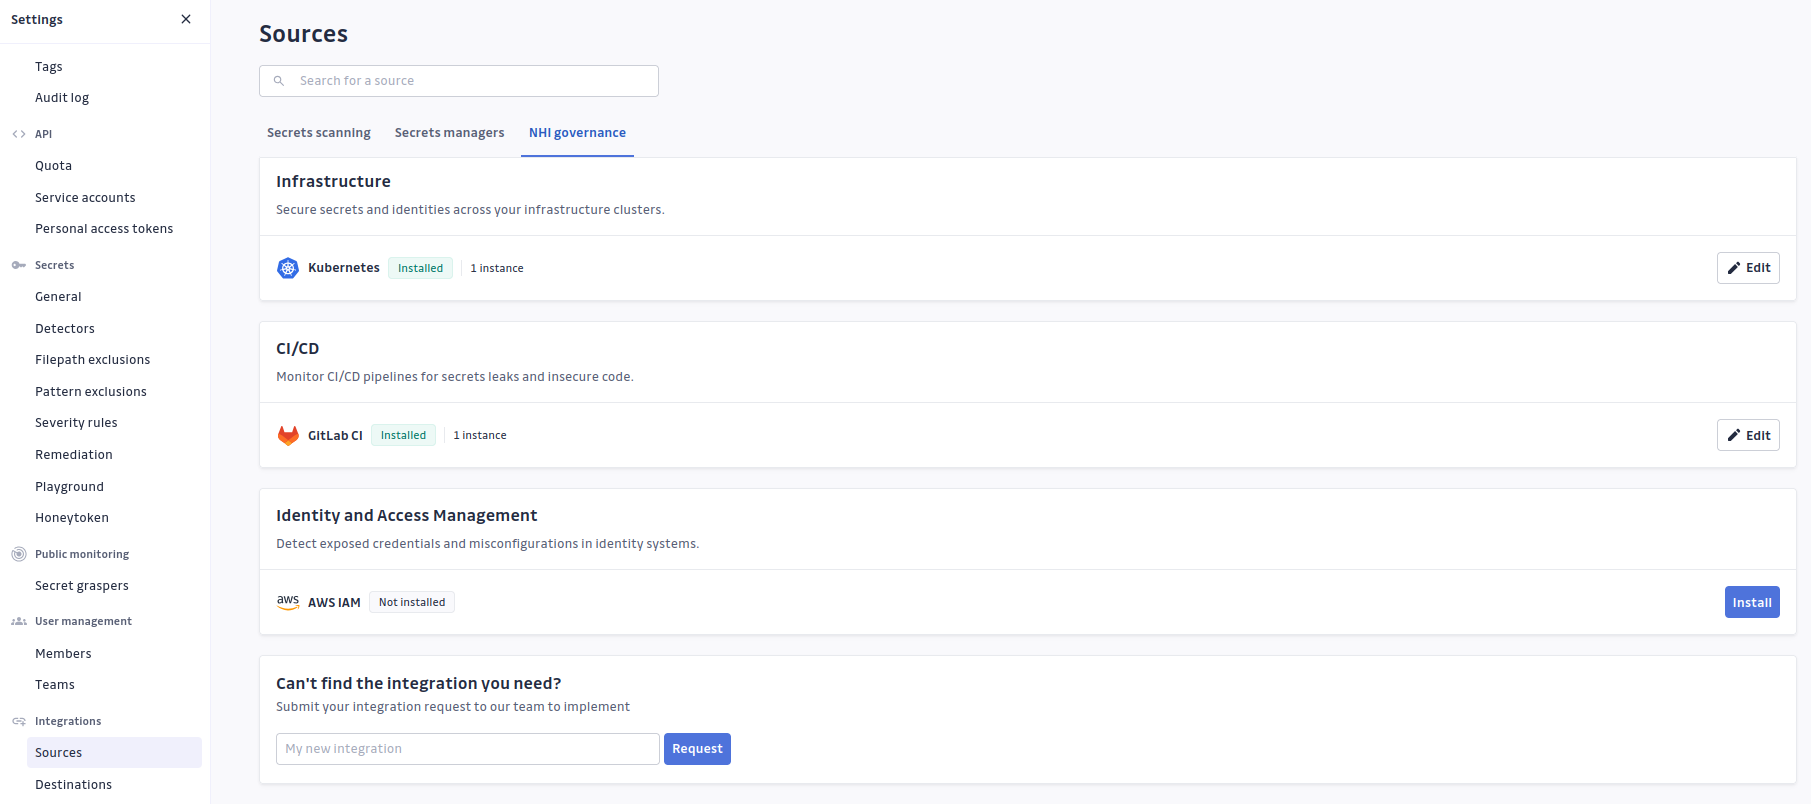
In GitGuardian platform, navigate to Settings > Sources to access the integration configuration page.
Step 4: Add AWS IAM Integration
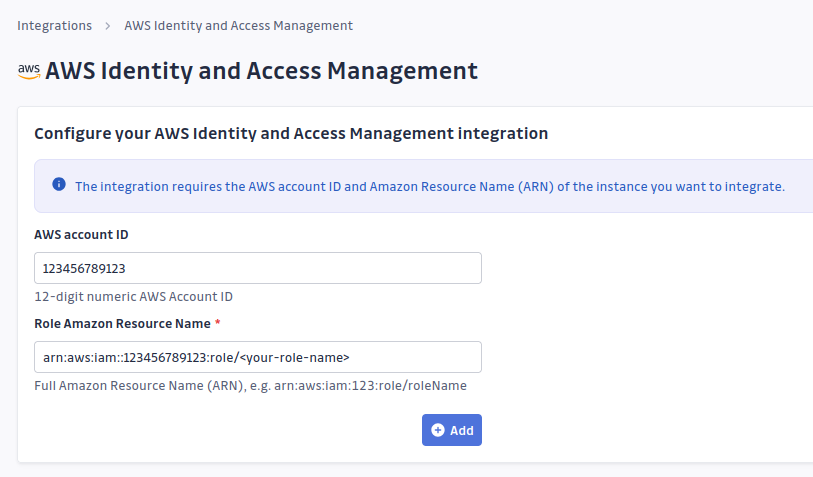
Configure the new AWS IAM integration by providing:
- AWS Account ID: Your AWS account identifier
- Role ARN: The ARN of the role created in Step 2
Completion
You're all set! GitGuardian will start fetching AWS IAM data from your account, enriching your security graph with comprehensive permission context for discovered AWS credentials.
Once the integration is active, you'll be able to view the enriched AWS data in your GitGuardian platform. The NHI inventory will display all discovered AWS API keys with comprehensive metadata:
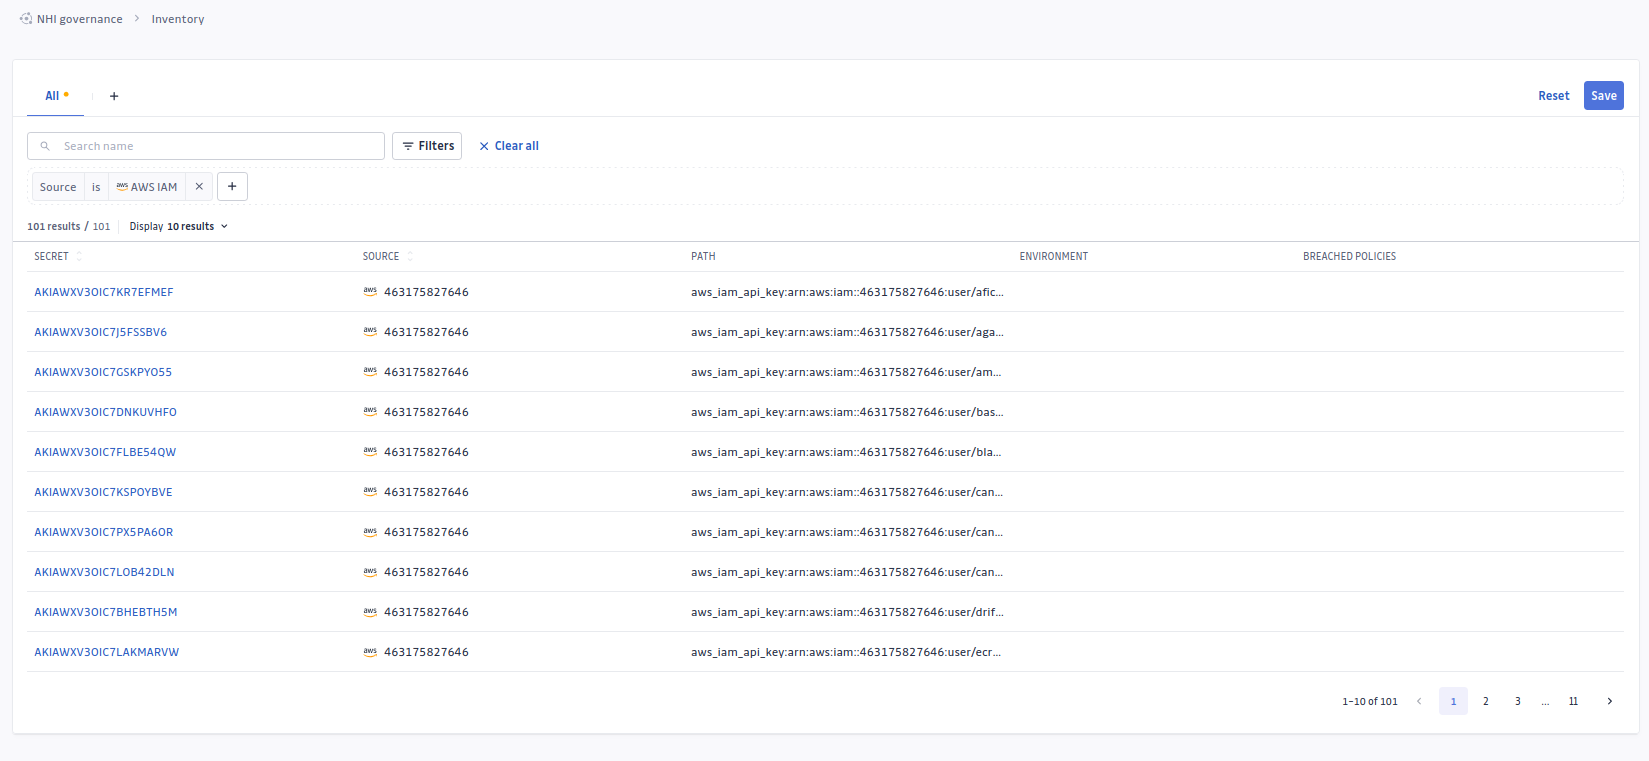
Each AWS API key will have an enriched security graph showing detailed permission analysis:
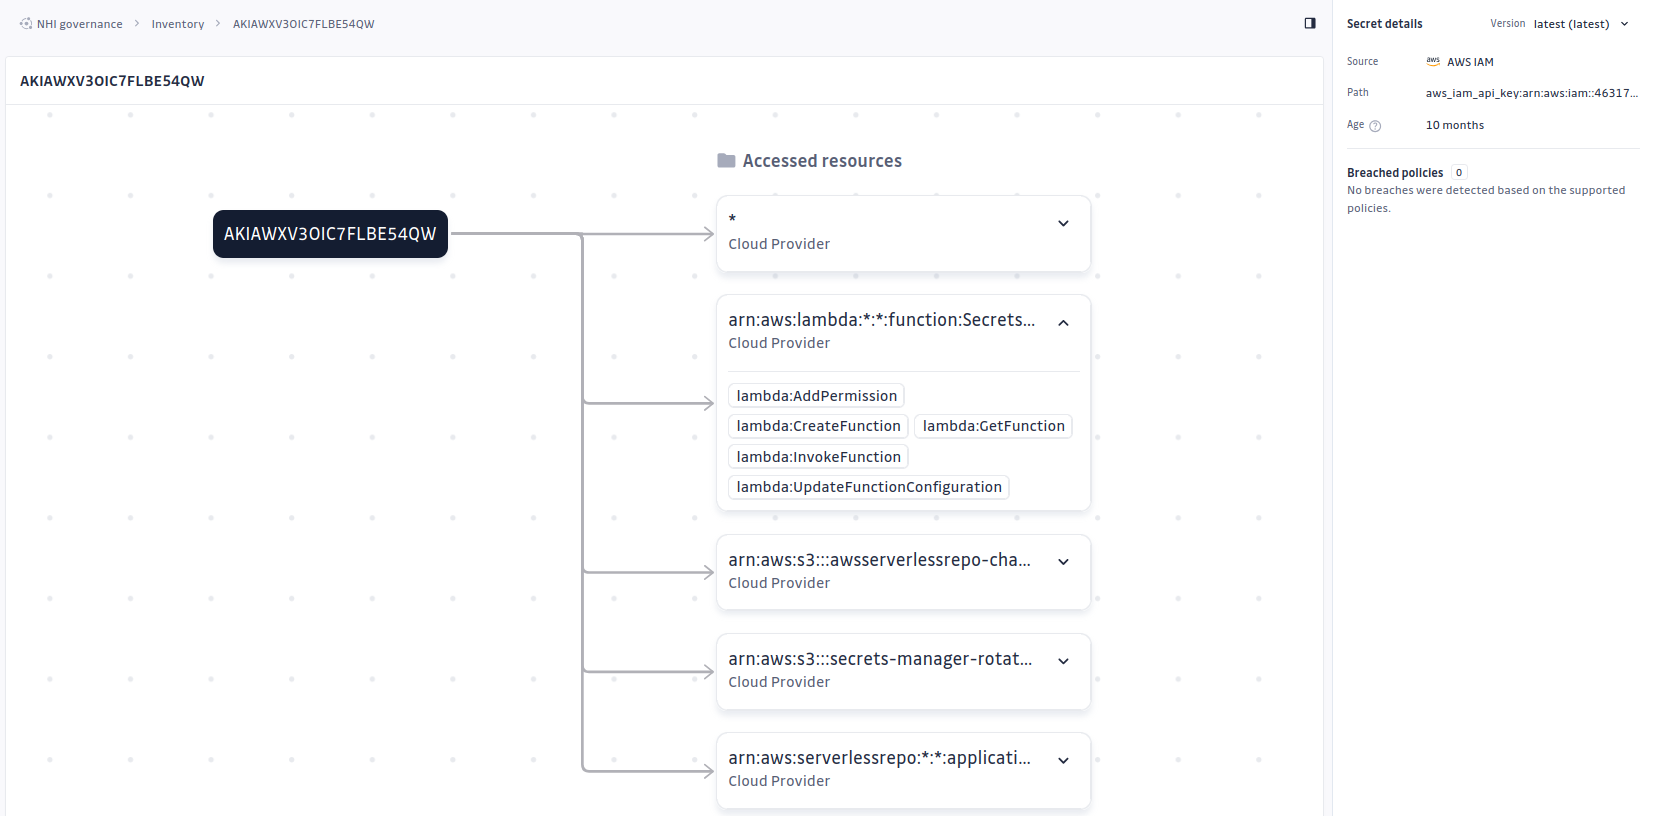
Other Integrations
For information about other integrations including secrets managers, CI/CD systems, and infrastructure sources, please refer to the ggscout documentation.

