Deploy and configure ggscout
Quick Start
The fastest way to test ggscout is to run it locally using the pre-built binary or Python package:
Option 1: Download the Binary (Recommended for Testing)
# Download for Linux x86_64 (GNU libc)
wget https://ggscout-repository.gitguardian.com/ggscout/latest/x86_64-unknown-linux-gnu/ggscout
chmod +x ggscout

# Verify installation
./ggscout --help
Option 2: Use Python Package
# Using uvx (no installation required)
uvx ggscout --help

# Or install with uv
uv tool install ggscout
ggscout --help
Test with a Simple Configuration
Create a minimal ggscout.toml file to test connectivity:
[gitguardian]
api_token = "${GITGUARDIAN_API_KEY}"
endpoint = "https://api.gitguardian.com/v1"
Set your API key and test the connection:
export GITGUARDIAN_API_KEY="your-service-account-token"
./ggscout ping ggscout.toml
If successful, you're ready to configure your first integration! Continue reading for production deployment options.
Overview
ggscout can be executed on-demand as a Command Line Interface (CLI) for testing and development, or deployed in your infrastructure as an autonomous service for production use:
- CLI binary: Best for local testing, development, and manual operations
- Docker Image: Suitable for scheduled jobs on a single host using cron
- Kubernetes/Helm: Recommended for production deployments with automated scheduling and monitoring
The Self-Hosted deployment comes with a ready-to-use Helm chart that you can use to deploy ggscout alongside your GitGuardian instance. Check out the dedicated Self-hosted section.
If your Kubernetes cluster doesn't have direct access to the GitGuardian SaaS platform, you can use GitGuardian Bridge to establish a secure tunnel between your private network and GitGuardian SaaS. See the ggbridge + ggscout example for detailed setup instructions.
GitGuardian Scout (ggscout) is a command-line tool that acts as an outpost in your infrastructure perimeter to collect and synchronize data with your GitGuardian platform. It does not store or transfer any sensitive information - sensitive information is always hashed using the HasMySecretLeaked algorithm.
ggscout supports various integrations with secrets managers, CI/CD systems, and other infrastructure components.
Available Commands
ggscout provides several commands to manage your integrations:
GGScout Commands
fetch-and-send- Combined operation that fetches data and immediately sends it to GitGuardian platformfetch- Run fetchers defined in a configuration file to collect data from your sources, and persist the collected inventory to file storage. This does NOT transfer any data to GitGuardian.send- Send previously collected inventory to your GitGuardian platform instancesync-secrets- Retrieve secrets from GitGuardian platform and write them to configured destinationsping- Test connectivity and send source information to GitGuardian platform
Generic Integration Flow
All ggscout integrations follow a consistent pattern for the fetch and fetch-and-send commands:
1. GitGuardian Authentication
First, if you intend to use any command other than fetch, you need to set up authentication to your GitGuardian platform:
GitGuardian Service Account
ggscout requires specific access rights to communicate with the GitGuardian Platform. Create a service account and select the relevant scopes:
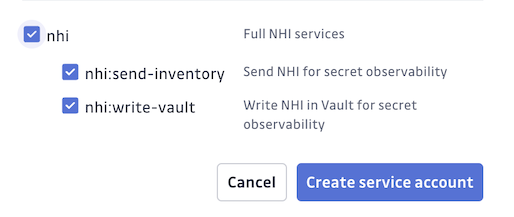
nhi:send-inventoryallows ggscout to send the collected data to GitGuardiannhi:write-vaultallows ggscout to receive write instructions from GitGuardian.
See the Secret synchronization section to learn more.
Configuration example
[gitguardian]
api_token = "${GITGUARDIAN_API_KEY}"
endpoint = "${GITGUARDIAN_API_URL}"
And set these variables in your environment, for instance in a .env file:
GITGUARDIAN_API_KEY="your-api-key"
GITGUARDIAN_API_URL="https://api.gitguardian.com/v1"
2. Configuration
Create a TOML configuration file defining your sources and GitGuardian platform connection:
# Source configuration
[sources.my-source]
type = "source_type"
# Source-specific parameters
param1 = "value1"
param2 = "value2"

# GitGuardian platform configuration (required for `fetch-and-send` or `send` commands)
[gitguardian]
api_token = "${GITGUARDIAN_API_KEY}"
endpoint = "${GITGUARDIAN_API_URL}"
See Configure integrations for more general details on how integrations work.
3. Integration Authentication
Set up authentication for your specific integrations using environment variables or direct configuration:
# Additional source-specific environment variables
export HASHICORP_VAULT_TOKEN="your-vault-token"
export AWS_PROFILE="your-aws-profile"
# ... other integration-specific variables
Note that depending on the integration, there may be other authentication methods available that don't require long-lived secrets, such as:
- Kubernetes service account tokens
- IAM roles and OIDC for cloud providers
- Certificate-based authentication
- OAuth flows with short-lived tokens
Check the relevant page in the Integrations section for more details.
4. Execution
For a first manual usage, you would typically run the following commands:
pingfetchsend
In production, you would configure a recurrent cronjob to run the ping and fetch-and-send commands. See the deployment section below for details.
5. Monitoring
Review the GitGuardian platform to see collected data and manage incidents.
Exit codes
ggscout returns a process exit code you can rely on for monitoring (cron, ECS/Fargate, Kubernetes):
| Exit code | Meaning |
|---|---|
0 | The command completed. For fetch-and-send, the inventory was successfully sent to GitGuardian. |
| non-zero | A blocking error stopped the command. |
A command exits non-zero on blocking errors such as:
- an invalid or unreadable configuration file;
- no source could be initialized (for example, authentication fails for every source);
- every source failed to fetch, so no data could be collected;
- the upload to GitGuardian failed (
fetch-and-sendandsend).
Errors affecting individual secrets, paths, or mounts are non-blocking: they are logged and the run continues with the rest of the data, then sends what it could collect. For example, a token that lacks permission on one path produces:
ERROR ... step="list keys": task errored error=Failed to list mount keys for mount kv2 kv_app ...
This does not fail the command — fetch-and-send still uploads the other secrets and exits 0.
Because partial failures are non-blocking, the exit code alone does not tell you whether ggscout collected fewer secrets than expected. A token that loses access to an entire mount can still exit 0 with a smaller (or empty) inventory. For complete monitoring, also watch:
- log lines containing
task erroredor100% failure rate, and - the collected item count (
Fetched a total of N items) or the inventory size on the GitGuardian platform.
Deployment
Once you have configured ggscout, you can deploy it using various methods depending on your infrastructure needs.
Docker
For production deployments on a single host or when you need scheduled execution without Kubernetes, use the Docker image with a cron job.
GitGuardian provides a public docker image on GitHub Container Registry: ghcr.io/gitguardian/ggscout/chainguard.
The following examples use the latest tag, but you can pin to a specific version for production use.
Consult the list of available releases to choose a version.
Why Chainguard?
The ggscout Docker image is built using Chainguard's distroless base images for maximum security:
- Zero CVEs: Chainguard images are continuously rebuilt from source in secure environments, eliminating known vulnerabilities
- Minimal attack surface: Contains only the ggscout binary and essential runtime libraries - no shell, package managers, or debugging tools
- Secure by design: Runs as nonroot user (UID 65532) and follows distroless principles
What's inside the image:
- Base layer:
cgr.dev/chainguard/glibc-dynamic:latest- minimal runtime libraries - Application layer: ggscout binary (written in Rust) at
/usr/bin/ggscout - Configuration layer: Nonroot user and secure entrypoint
What's NOT included (for security):
- No shell (
/bin/sh,/bin/bash) - No package managers (
apt,yum,apk) - No debugging utilities or text editors
- No system utilities beyond essential runtime libraries
This approach significantly reduces the container's attack surface and eliminates entire classes of vulnerabilities.
You can manually execute the image using the following commands:
# Ping command
docker run --rm -ti -v ${PWD}:/tmp --env-file .env ghcr.io/gitguardian/ggscout/chainguard:latest ping /tmp/config.toml
# Fetch and send command
docker run --rm -ti -v ${PWD}:/tmp --env-file /path/to/config/dir/.env ghcr.io/gitguardian/ggscout/chainguard:latest fetch-and-send /tmp/config.toml
The Docker image embeds the CLI.
Configure a crontab to configure a recurring job with the commands you need to launch.
Below is an example of the execution with crontab.
# Ping command (every minute)
* * * * * docker run --rm -ti -v /path/to/config/dir:/tmp --env-file /path/to/config/dir/.env ghcr.io/gitguardian/ggscout/chainguard:latest ping /tmp/config.toml
# Fetch and send command (every 5 minutes)
*/5 * * * * docker run --rm -ti -v /path/to/config/dir:/tmp --env-file /path/to/config/dir/.env ghcr.io/gitguardian/ggscout/chainguard:latest fetch-and-send /tmp/config.toml
Replace the /path/to/config/dir where you have configured your config file and your .env file.
Example .env:
GITGUARDIAN_API_KEY=my_gitguardian_api_key
GITLAB_TOKEN=my_gitlab_token
HASHICORP_VAULT_TOKEN=my_vault_token
Helm
You can deploy ggscout on a Kubernetes cluster using ggscout Helm chart.
This is the preferred deployment model if you run ggscout as an autonomous collector periodically.
Deployment instructions are available on our public GitHub repository.
The Helm values allows you to define ggscout configuration in YAML. Examples are provided as templates in the repository.
OpenShift Deployment
ggscout supports deployment on OpenShift platforms. When deploying on OpenShift, you need to disable the default security context in the Helm chart configuration.
Add the following configuration to your Helm values.yaml:
securityContext:
  # Enable security Context in deployments.
  # Set to false when deploying on OpenShift
  enabled: false
This configuration is necessary because OpenShift has its own security context constraints that conflict with the default Kubernetes security context settings.
All other configuration options for sources, authentication, and scheduling remain the same when deploying on OpenShift.

