Remediate a leak on public GitHub
If you end up on this page, it is likely that you got an alert from our pro bono alerting service. Don't worry, leaks sometimes just happen... even to the best of us...
This section provides a step by step guide on how to remediate a leak that occurred on public GitHub.
For comprehensive remediation guidance covering both public and internal incidents, see our Public Monitoring Remediation Overview.
⚠️ What you should NOT do:
- Committing on top of the current source code version is not a solution. Bear in mind that git keeps track of the history, the secret will still be visible in previous commits.
- Only taking down the involved repository is not a correct solution. The leaked credentials will still be exposed in forks of the repository, and attackers could still access it in mirrored versions of GitHub.
✅ Step by step guide to remediate the leak
- Step 1: Assess the impact and revoke the exposed secret.
- Step 2: Clean the git history (optional, see warnings below).
- Step 3: Inspect logs and verify security.
🔒 Step 1: Assess impact and revoke the secret (~ 5-10 min)
First, quickly assess the situation:
- Confirm this secret actually belongs to your organization
- Understand what resources this secret can access
- Determine the privilege level and potential impact
Then, revoke the secret - this is the only way to ensure no attacker will access the involved service.
How to revoke:
- Having been alerted by GitGuardian, you can navigate to the corresponding GitGuardian detector's documentation, all information about revocation are available in the
Revoke the secretsection of the selected detector. - If you found out about the leak without GitGuardian and it is not a secret type handled by one of our detectors, have a look at the relevant provider's documentation. You can usually revoke your credentials in the same section you issued them.
- If you leaked corporate credentials or credentials you cannot revoke by yourself, we highly recommend you get in touch with your security team immediately. It's OK to make mistakes, hiding them is often a bigger problem.
Whether you managed to revoke the credentials or not, move to step 2 to mitigate the leak and remove evidence of it.
🧹 Step 2: Repository cleanup (~ 10 min) - OPTIONAL
⚠️ Important: Once you have revoked the secret, you should typically stop here. The secret is now useless to attackers, and your security incident is resolved.
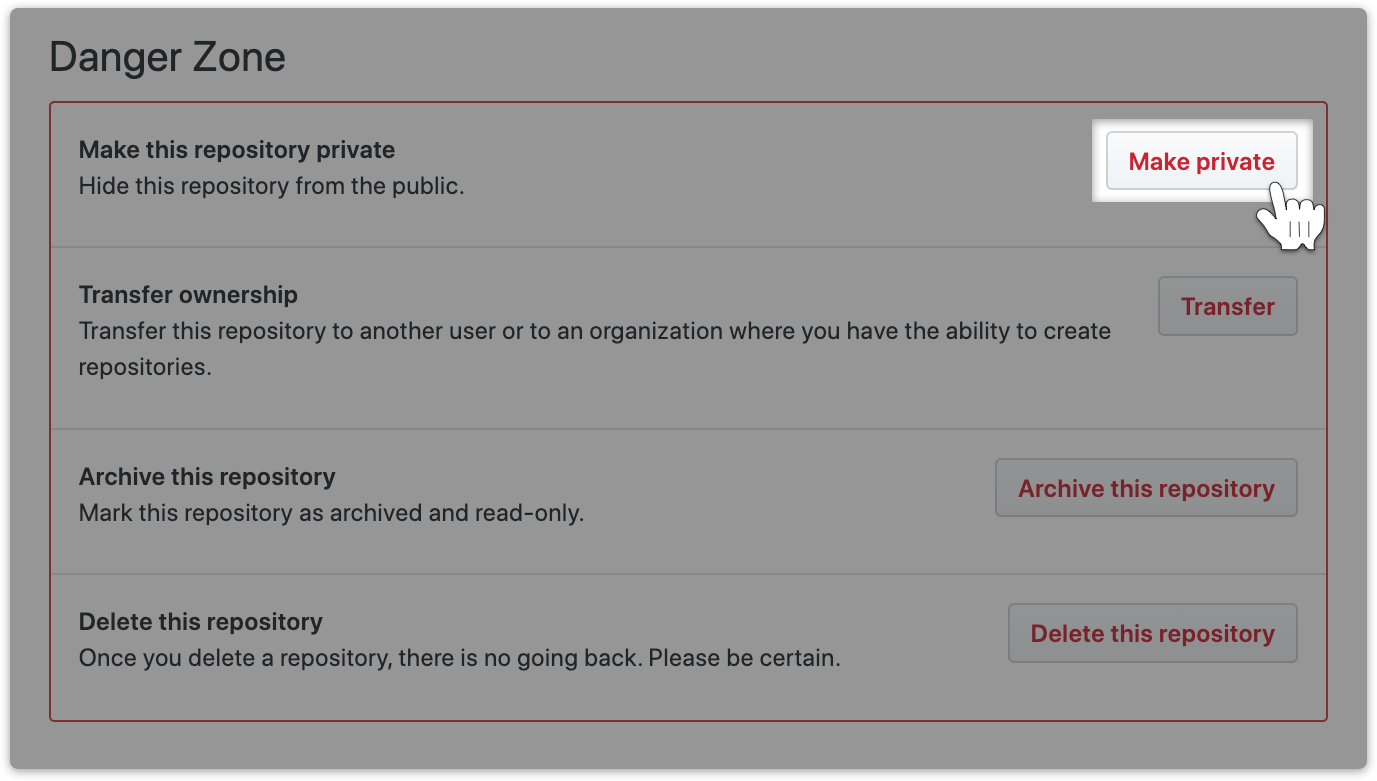
Emergency visibility reduction (if revocation failed): If for any reason you could not revoke the leaked credentials, the quickest action to remove the credentials from most attackers' sight is to make the repository private. Although your credentials are probably mirrored in some other place on the internet, that's already a good way to buy you some time.
How to make repository private:
Go under the settings section of your GitHub project and choose the change visibility button at the bottom.
Git history rewriting (proceed with extreme caution):
Rewriting git history is generally not recommended as it can disrupt team workflows and often leaves references to the leaked commits. This is not a trivial action to conduct and may break contributing developers' workflow and can accidentally delete legitimate data. For matters of brand image, you may want to clean the git history to remove any evidence of the leak, but bear in mind that this action is not sufficient as the secret can still be visible to attackers, either in forks of the involved repository, or on mirrored versions of GitHub.
If you still decide to rewrite history:
- You can use tools like git-filter-repo to rewrite the history of a project. You can refer to this GitGuardian's blogpost for detailed instructions.
- Once you fixed your git history and pushed it to the remote server. Be aware that this may result in an orphan leaky commit remaining on GitHub. You can get in touch with GitHub support to permanently delete this data.
🔎 Step 3: Monitor and verify security (~ 5-10 min)
Inspecting your logs will give you a quick idea of whether the compromised credentials were used by an attacker or not, and what exactly happened there.
How to check for unauthorized access:
- If the involved provider is handled by GitGuardian's detection engine, you can look in the
Check for suspicious activitysection of the concerned detector's documentation. - Otherwise, the API provider usually gives insights on when the credentials were last used in the settings page. If the compromised credentials are database credentials or private keys, you may want to look in relevant server logs.
What to look for:
- Unusual access patterns or timing
- Access from unfamiliar IP addresses or locations
- Unexpected API calls or data access
- Any activity after the suspected exposure time
If you find evidence of unauthorized access:
- Document all suspicious activity
- Consider this a confirmed security breach
- Follow your organization's incident response procedures
- Consider engaging cybersecurity professionals if needed
🏁 Finally
Congratulations, now you should be covered. As you know mistakes can happen and GitGuardian is here for you. You just have to sign-up for free and benefit from GitGuardian's real-time alerting to be protected in the future. You can also scan your history to verify that you don't have other secrets buried in your code.
If you are more of a CLI person, you can have a look at GitGuardian CLI. This CLI application can run in your local environment, or in a CI environment to detect more than 300 types of secrets.

