Custom tags
Using custom tags
Custom tags offer a flexible way to organize and manage objects such as incidents and honeytokens within your workspace. Unlike GitGuardian tags, which are predefined and automatically applied to objects, custom tags allow you to define your own labels in the form of keys and values. You can assign these custom tags to incidents and honeytokens, enabling you to filter and search for them based on specific characteristics relevant to your organization.
For more information on GitGuardian tags for incidents, refer to the GitGuardian tags documentation.
Limitations apply to custom tags, depending on your plan:
- Personal: Max tags per workspace: 100 (10 keys × 10 values), Max tags per resource: 1
- Business and Trial: Max tags per workspace: 2,500 (50 keys × 50 values), Max tags per resource: 10
- Character limit per tag: 100 (50 for key, 50 for value)
Categorize your incidents
Custom tags provide a flexible way to organize incidents. You can create your own custom tags in the form of keys and values, assign them to incidents, and use them to filter and search for incidents based on specific characteristics. Note that you must have "Can edit" permissions or be a manager to assign or remove custom tags from incidents.
Categorize your honeytokens
Custom tags provide a flexible way to organize honeytokens. You can create your own custom tags in the form of keys and values, assign them to honeytokens, and use them to filter and search for honeytokens based on specific characteristics.
Manage custom tags�
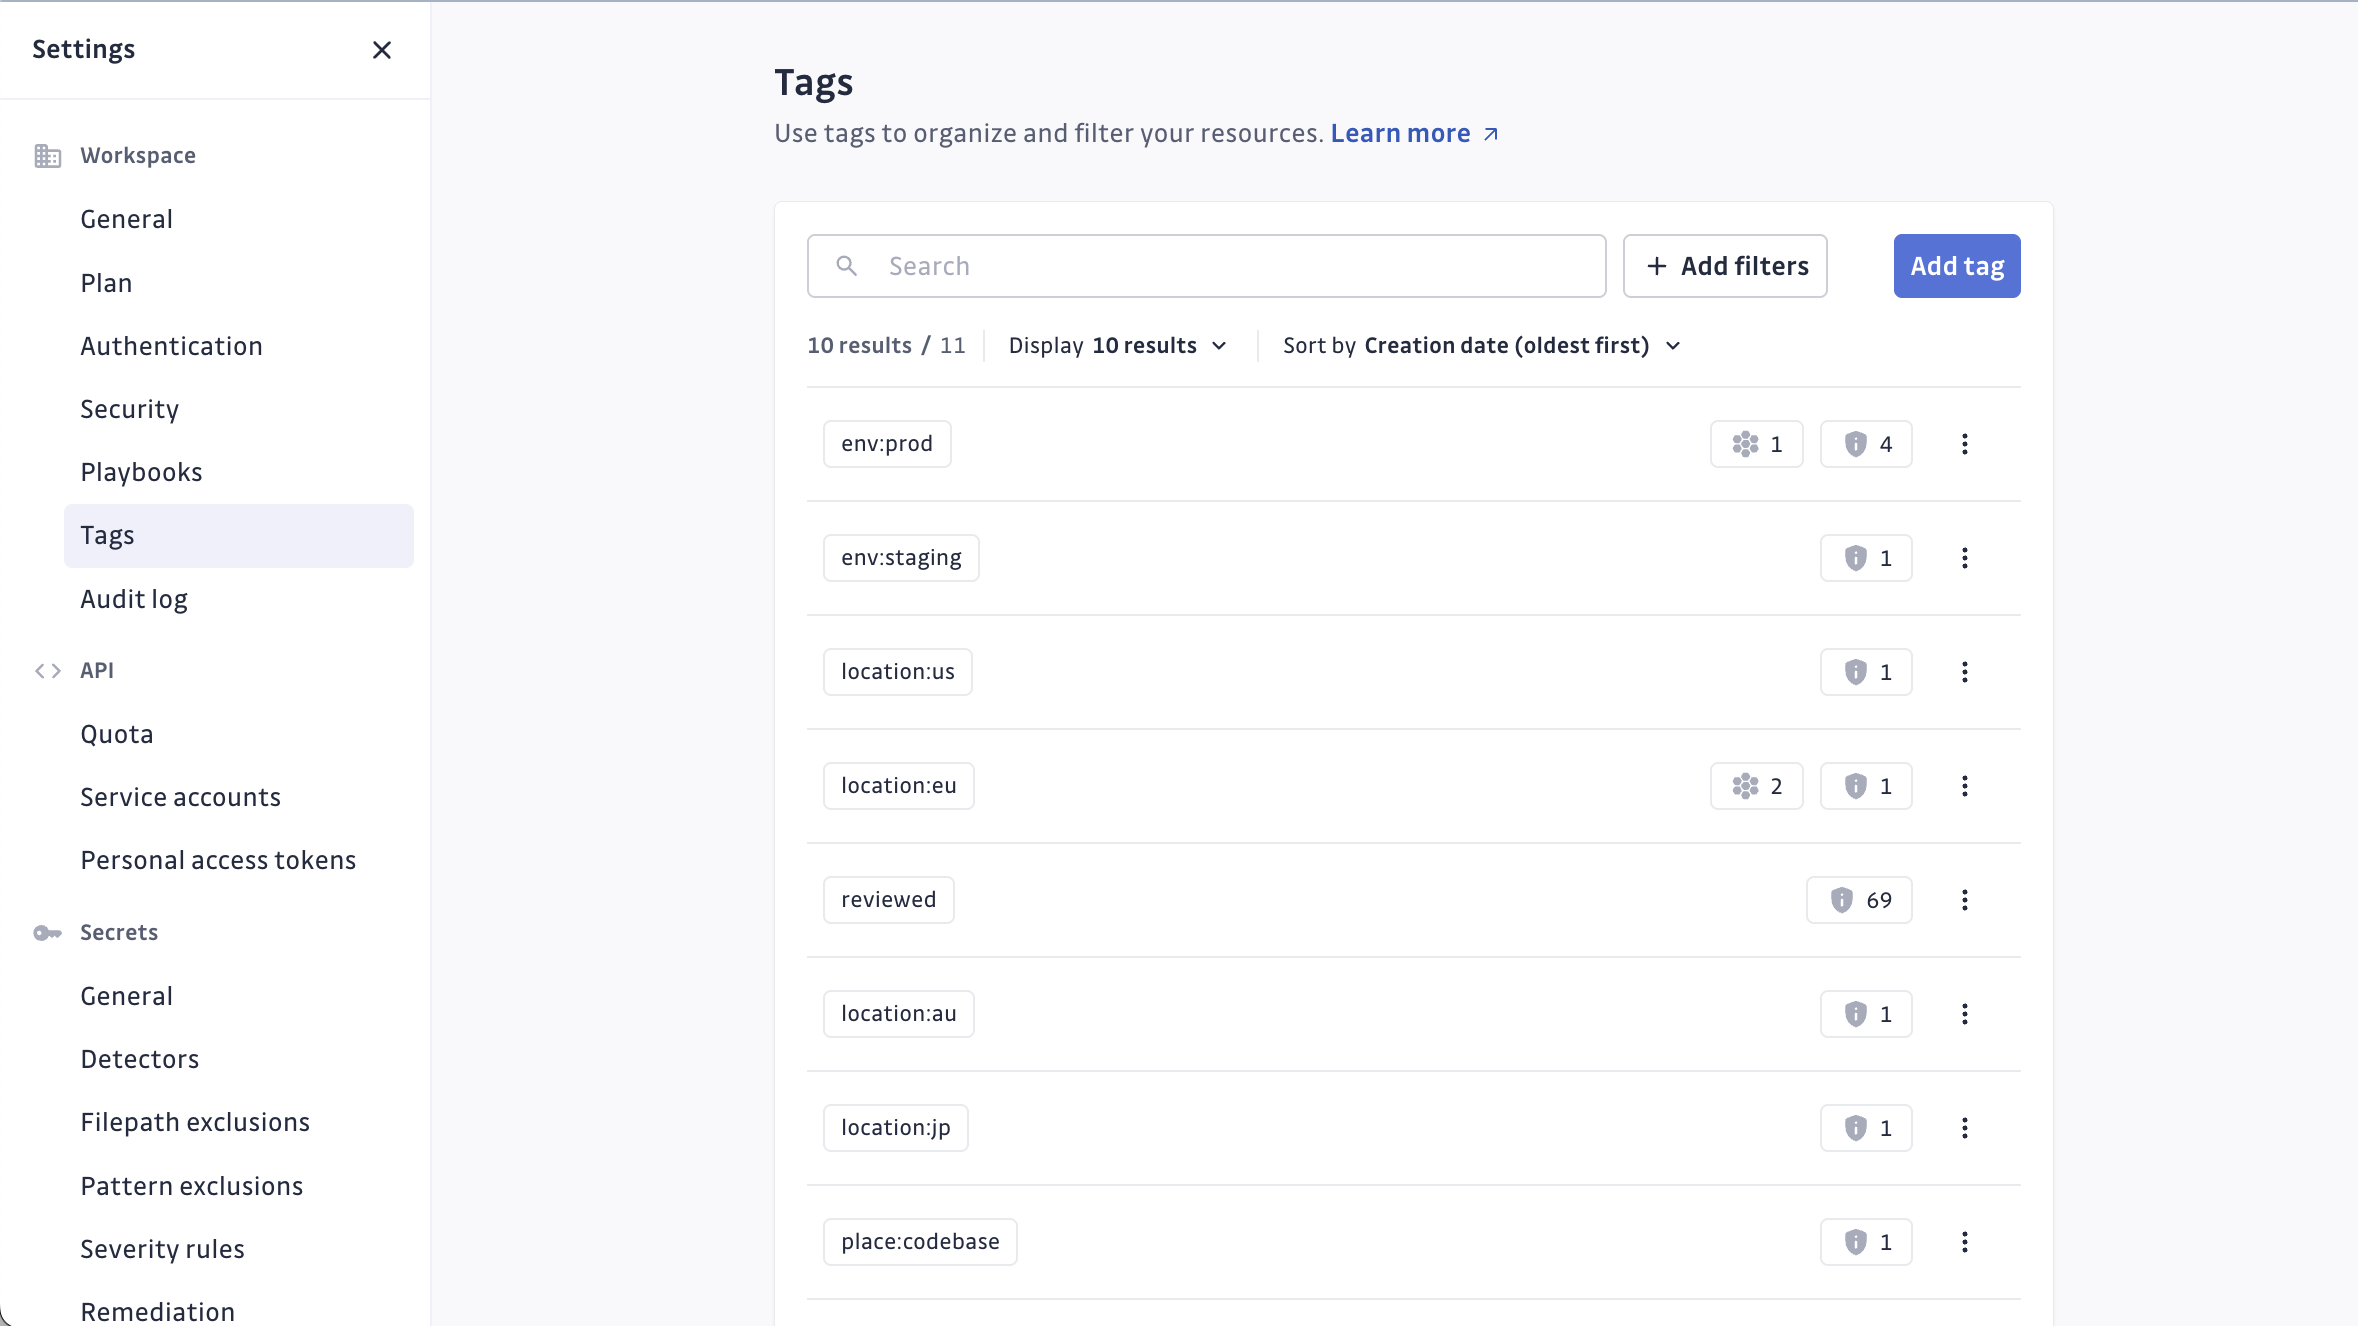
Go to Settings > Workspace > Tags to access the Tags settings page. From here, you can view the existing tags and see how many incidents or honeytokens are categorized under them. Note that you must be a manager to manage custom tags.
Create custom tags
You can create new keys and values from the Tags settings page. Note that you can create a single-word tag.
Edit or delete custom tags
On the Tags settings page, to the right of the tag's name, click the ![]() menu, then select Edit or Delete to bring up the option to edit or delete the tag. Note that deleting a tag is not reversible, even if it is used in incidents or honeytokens. However, it is still possible to delete it, which will remove it from any incident and honeytoken.
menu, then select Edit or Delete to bring up the option to edit or delete the tag. Note that deleting a tag is not reversible, even if it is used in incidents or honeytokens. However, it is still possible to delete it, which will remove it from any incident and honeytoken.
Similarly, if you edit a tag, the modification will be applied to all incidents and honeytokens that use that tag.
Examples of use
- Create an
envkey with values such asprod,test,staging, etc. - Create a
placekey with values such ascodebase,docker,jenkins,jira,slack, etc., to represent the location where the honeytoken is deployed. - Create a
teamkey with values representing your teams and indicating which scope is covered by a honeytoken. - Create a single
reviewedtag to indicate that closed incidents have been reviewed and validated after resolution.
Python3 example
Here is a Python3 example of how to automate applying a custom tag from a custom webhook:
-
Create a Service Account Token in GitGuardian with custom tag and incidents read and write permissions.
-
Receive a new occurrence via a custom webhook:
Example of the webhook payload
{"source": "GitGuardian","timestamp": "2025-03-23T09:10:24.594597Z","action": "new_occurrence","message": "A new occurrence has been detected for this incident.","target_user": "GitGuardian","incident": {"id": 31605,"date": "2025-03-16T08:23:40Z","detector": {"name": "aws_iam","display_name": "AWS Keys","nature": "specific","family": "Api","detector_group_name": "aws_iam","detector_group_display_name": "AWS Keys"},"secret_hash": "xxx","secret_revoked": false,"occurrence_count": 5,"status": "assigned","regression": false,"assignee_email": "bruce.wayne@charadriidae.org","severity": "high","validity": "not_checked","ignored_at": null,"ignore_reason": null,"resolved_at": null,"gitguardian_url": "https://dashboard.gitguardian.com/workspace/1/incidents/xxx","share_url": null},"occurrence": {"id": 1234,"incident_id": 1243,"kind": "RLTM","sha": "xxx","author_name": "GitHub","author_info": "noreply@github.com","date": "2025-03-23T09:10:23.529812Z","presence": "visible","url": "https://github.com/charadriidae/wrybill-new-zealand/commit/123#diff-xxx","matches": [],"filepath": "TestJS.js","change_type": "addition","source": {"id": 710,"url": "https://github.com/charadriidae/wrybill-new-zealand","type": "github","full_name": "wrybill","health": "at_risk","open_incidents_count": 5,"closed_incidents_count": 0,"visibility": "private","last_scan": {"status": "finished","date": "2025-02-18T17:07:59.079520Z"},"external_id": "github_id"}}} -
Apply a custom tag depending on the source URL (e.g., if it contains
"wrybill", apply the custom tagbird:wrybill).Refer to the GitGuardian API documentation for incidents.
Example of the API call to apply a custom tag
PATCH https://api.gitguardian.com/v1/incidents/secrets/31605{"custom_tags": [{"key": "bird","value": "wrybill"}]}Example of the python script
import osimport requests# Set the GitGuardian service account token and API base URL outside the functionGITGUARDIAN_API_KEY = os.getenv("GITGUARDIAN_API_KEY")GITGUARDIAN_API_BASE_URL = os.getenv("GITGUARDIAN_API_BASE_URL", "https://api.gitguardian.com") # Default to the main GitGuardian API URL, use https://my-gg-instance.com/exposed/v1 for self-hosted# Function to apply a custom tag based on the incident_iddef apply_custom_tag(incident_id, tag_key, tag_value):url = f"{GITGUARDIAN_API_BASE_URL}/v1/incidents/secrets/{incident_id}"headers = {"Authorization": f"Token {GITGUARDIAN_API_KEY}","Content-Type": "application/json"}data = {"custom_tags": [{"key": tag_key,"value": tag_value}]}# Send the PATCH request to apply the custom tagresponse = requests.patch(url, json=data, headers=headers)if response.status_code == 200:print(f"Successfully applied custom tag: {tag_key}:{tag_value}")else:print(f"Failed to apply custom tag. Status code: {response.status_code}, {response.text}")# Function to process and extract data from the webhook payloaddef process_webhook(webhook_payload):# Extract incident ID and URL from the webhook payloadincident_id = webhook_payload.get('incident', {}).get('id')secret_url = webhook_payload.get('occurrence', {}).get('url')if incident_id and secret_url:return incident_id, secret_urlelse:print("Error: Missing incident ID or URL in the webhook.")return None, Nonedef main(webhook_payload):# Retrieve the incident_id and secret_url from the webhook payloadincident_id, secret_url = process_webhook(webhook_payload)if incident_id and secret_url:# Check if the secret_url contains the string "wrybill"if "wrybill" in secret_url:# Apply the custom tag "bird:wrybill"apply_custom_tag(incident_id, "bird", "wrybill")else:print("No matching URL found for tag application.")else:print("Invalid webhook payload.")

