Configure SCIM
System for Cross-domain Identity Management (SCIM) lets you manage GitGuardian users and teams directly from your Identity Provider (IdP). Based on changes in your IdP, SCIM automatically creates, updates, deactivates, and deletes users, and creates/manages teams from IdP groups.
SCIM supports user and team provisioning/deprovisioning for Okta, Microsoft Entra ID, and JumpCloud.
Prerequisites
- SCIM requires Single Sign-On (SSO) to be configured first.
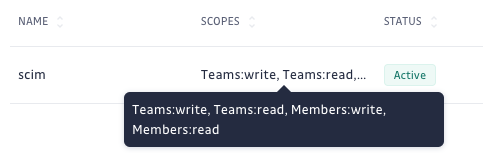
- SCIM requires a Service Account Token with
members:write, andteams:writeaccess.
SCIM Features
GitGuardian supports:
- Manage the full user lifecycle: provision, activate, deactivate, and delete based on your IdP.
- Provision and manage teams from IdP groups.
Prepare for SCIM Setup
Generate API Token in GitGuardian
Before configuring SCIM in Okta, you need to create a service account token in GitGuardian:
-
In your GitGuardian dashboard, navigate to API > Service accounts.
-
Click Create service account.
-
Enter a name (e.g., "IdP SCIM") and select the following permissions:
members:writeteams:write
-
Click Create and copy the generated token. This will be used in the IdP setup steps.
Enable SCIM in GitGuardian
- Navigate to Settings > Authentication in your GitGuardian workspace.
- Under SCIM, toggle the option to enable SCIM integration.
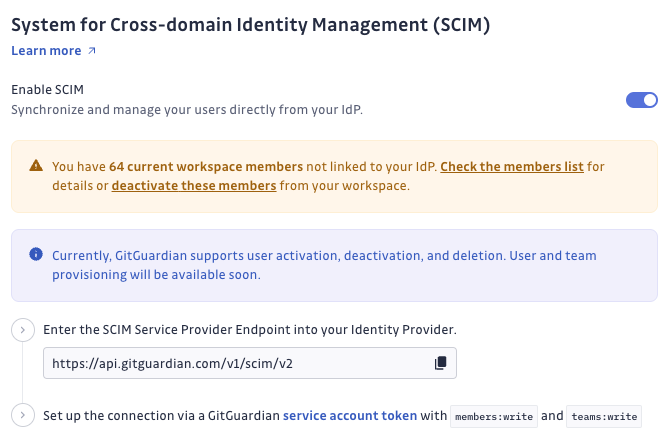
- Follow the instructions in the Set up SCIM in your IdP section.
Once SCIM is enabled, your users can be synchronized with your IdP, and user deprovisioning can occur automatically.
You may see a message indicating that some users are not linked to your IdP. These users won't be managed by SCIM.
- Review the Members List: Check the unlinked users.
- Deactivate if Necessary: Manually deactivate any users who shouldn't have access.
This typically happens for users added before SCIM was enabled or not assigned in your IdP. SCIM only manages linked users.
Set up SCIM in your IdP
To configure SCIM, you will need to provide the SCIM endpoint and configure the corresponding SCIM settings in your IdP. Here's a high-level overview for common IdPs:
Follow the specific steps for your IdP to enable SCIM integration. Most IdPs provide an option to configure SCIM via their API or dashboard settings. You will need to provide:
- GitGuardian SCIM Endpoint:
https://api.gitguardian.com/v1/scim/v2(orhttps://gitguardian.mycorp.local/exposed/v1/scim/v2for self-hosted) - API Token: Use a GitGuardian service account token with
members:writeandteams:writepermissions.
Each IdP's SCIM configuration page will have specific instructions. Refer to the documentation for your IdP for details on how to enter the SCIM endpoint and configure API credentials.
Google only supports automatic provisioning for specific apps, so SCIM cannot be used for provisioning with Google at this time. However, we are planning to support SCIM for Google and publish our app in the future.
The scim-for-keycloak plugin has a bug that causes confusion with the externalId value, which is used for making SCIM requests to GitGuardian, so it won't work with our SCIM integration. For more details, see the issue here.
Set up procedures
Okta
You can configure SCIM using either the GitGuardian app from the Okta Integration Network (recommended) or a custom SAML app.
If users are assigned to the Okta app before SCIM is enabled, they won't be deactivated in GitGuardian when later unassigned. To ensure proper deactivation:
- Duplicate the original Okta group (same members).
- Assign the duplicate group to the app.
- Unassign the original group from the app.
Okta OIN app
If you've installed the GitGuardian app from the Okta Integration Network, SCIM provisioning is built-in and Okta Verified.
Supported features
- Create users: Provision new users from Okta to GitGuardian
- Update user attributes: Sync user profile changes from Okta
- Deactivate users: Deactivate users when unassigned or disabled in Okta
- Import users: Import existing GitGuardian users into Okta
- Push groups: Sync Okta groups as GitGuardian teams
Configuration steps
-
In Okta, navigate to your GitGuardian application and go to the Provisioning tab.
-
Under Settings > Integration, you will see that the provisioning integration is partner-built by GitGuardian.
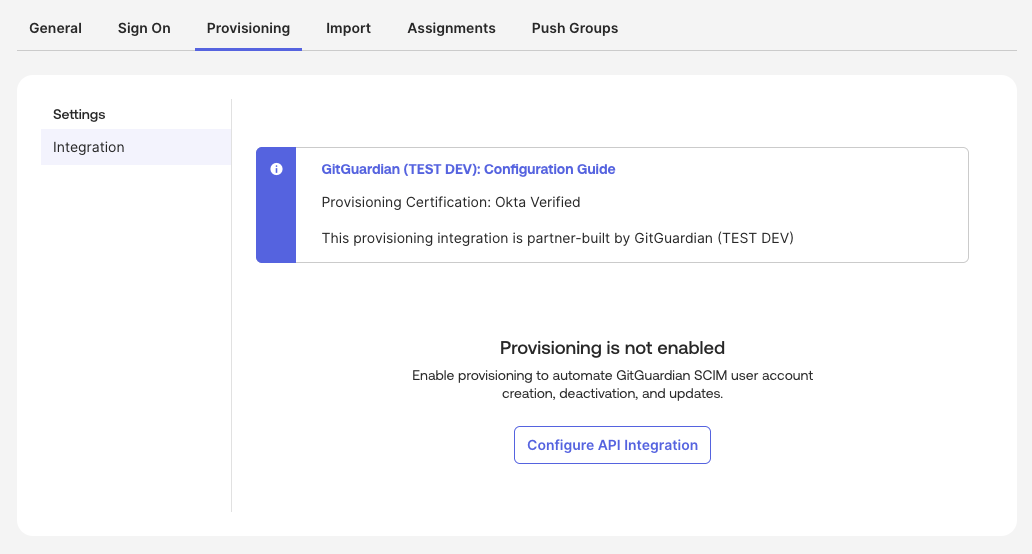
-
Click Configure API Integration.
-
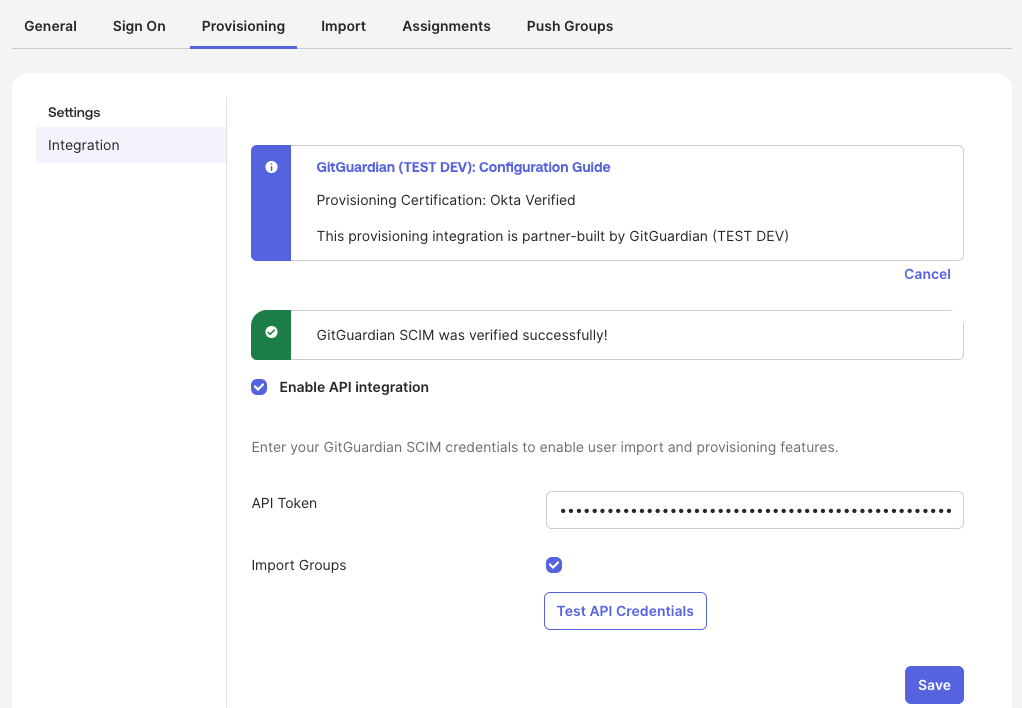
Check the box for Enable API integration.
-
Enter your GitGuardian SCIM credentials:
- API Token: Paste the service account token generated above.
- Import Groups: Check this option if you want to sync groups as teams.
-
Click Test API Credentials to verify the connection. You should see "GitGuardian SCIM was verified successfully!".
-
Click Save.
-
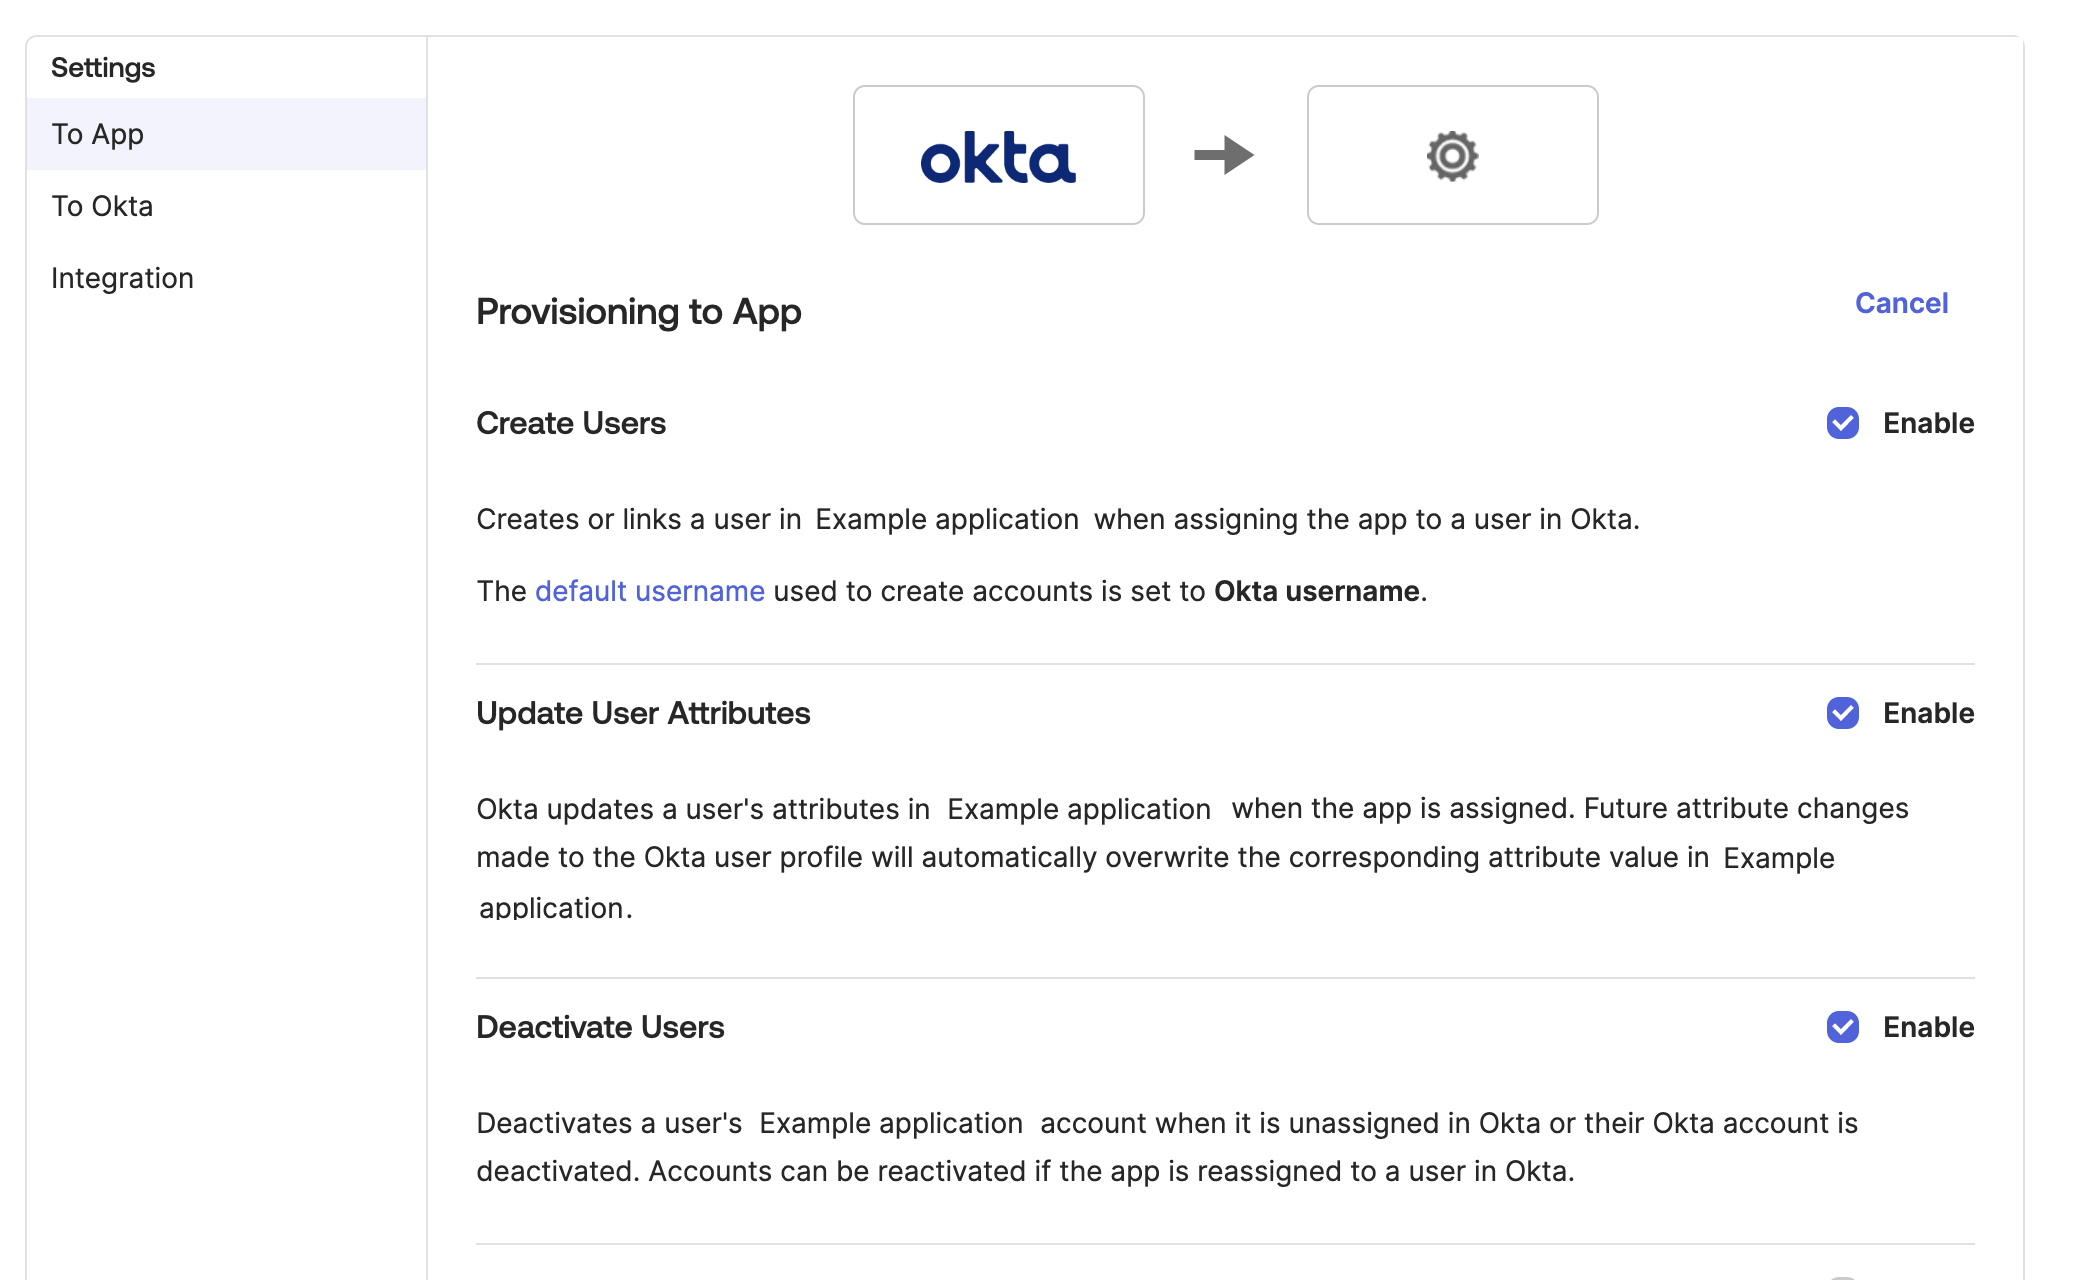
Go to Settings > To App and enable Create Users, Update User Attributes, and Deactivate Users.
cautionMake sure to disable Set password when creating new users (enabled by default).

-
Click Save.
-
Go to the Assignments tab to assign users.
-
Go to the Push Groups tab to sync Okta groups as GitGuardian teams.
Okta custom SCIM
If you're using a custom SAML application, follow these steps to enable SCIM:
-
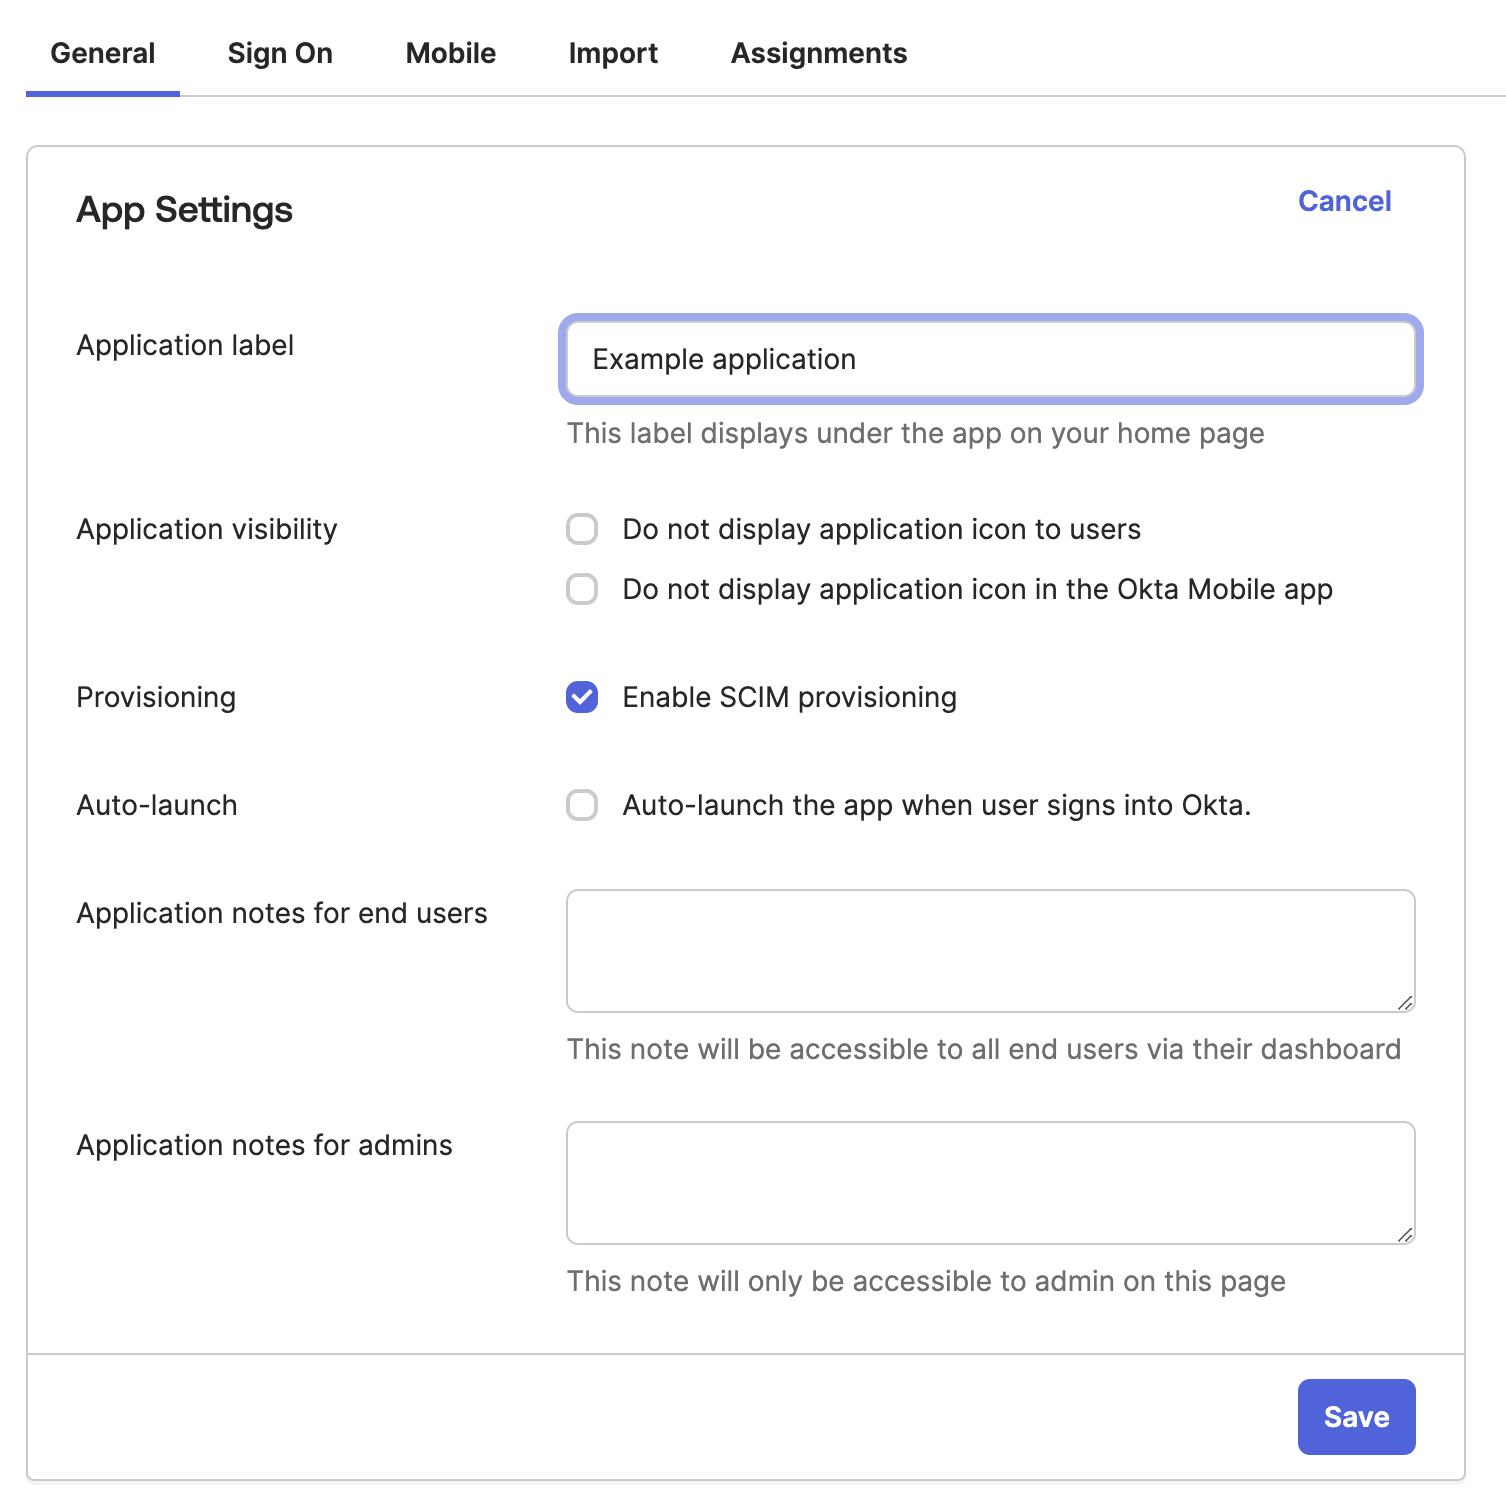
In Okta, navigate to the General settings of your GitGuardian app and check the box for Enable SCIM provisioning.
-
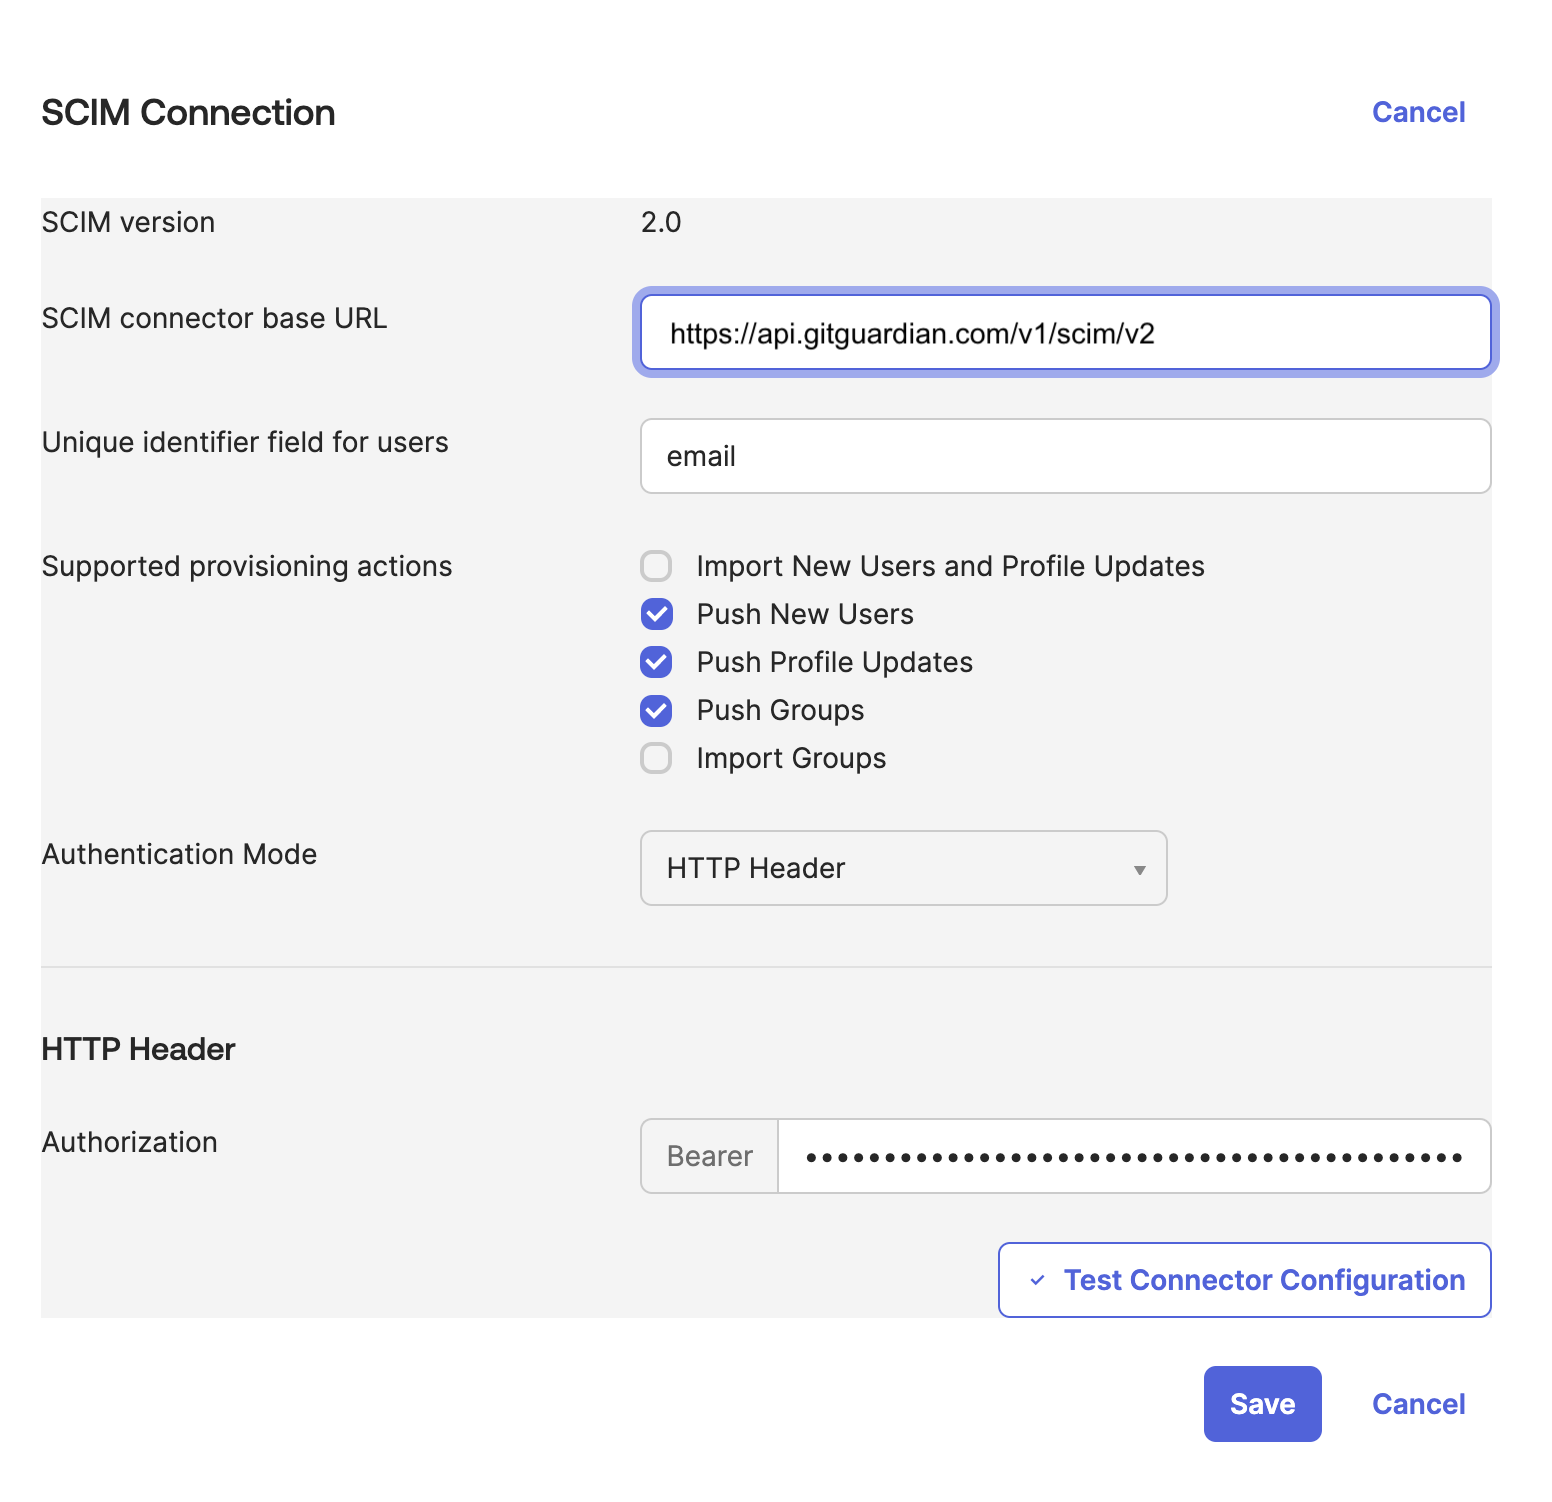
In the Provisioning settings of your Okta app, configure the following:
- Set the SCIM Connector Base URL to:
https://api.gitguardian.com/v1/scim/v2(orhttps://gitguardian.mycorp.local/exposed/v1/scim/v2for self-hosted). - Use email as the unique identifier field for users. Username field must be an email.
- Enable the Push New Users, Push Profile Updates and Push Groups settings.
- Select HTTP Header for authentication mode and add the service account token in the Authorization HTTP header.
- Set the SCIM Connector Base URL to:
-
Check the Create Users, Update User Attributes and Deactivate Users options under the Provisioning to app settings.
-
Finally, in Assignments, assign the users. In Push Groups, assign the groups you want to sync with GitGuardian.
Microsoft Entra ID
When a user is unassigned from the GitGuardian app in Entra ID, no deactivation request is sent. To deactivate, the user must be disabled in Entra ID.
Configuration steps
- In Microsoft Entra ID (formerly Azure Active Directory), navigate to the Enterprise Applications section.
- Select your GitGuardian app, then go to Provisioning and set the Provisioning Mode to Automatic.
- Enter the following credentials:
- Secret Token: Paste the service account token generated above.
- Tenant URL:
https://api.gitguardian.com/v1/scim/v2(orhttps://gitguardian.mycorp.local/exposed/v1/scim/v2for self-hosted).
- In the Attribute Mappings section under Provision Microsoft Entra ID Users, configure the following mappings to match GitGuardian's SCIM requirements:
- Target Object Actions: Set actions to
Create,UpdateandDeletefor the target object. - Attribute Mappings:
userName: Map this touserPrincipalNameactive: Map this toSwitch([IsSoftDeleted], , "False", "True", "True", "False")name.givenName: Map this togivenNamename.familyName: Map this tosurnameexternalId: Map this toemail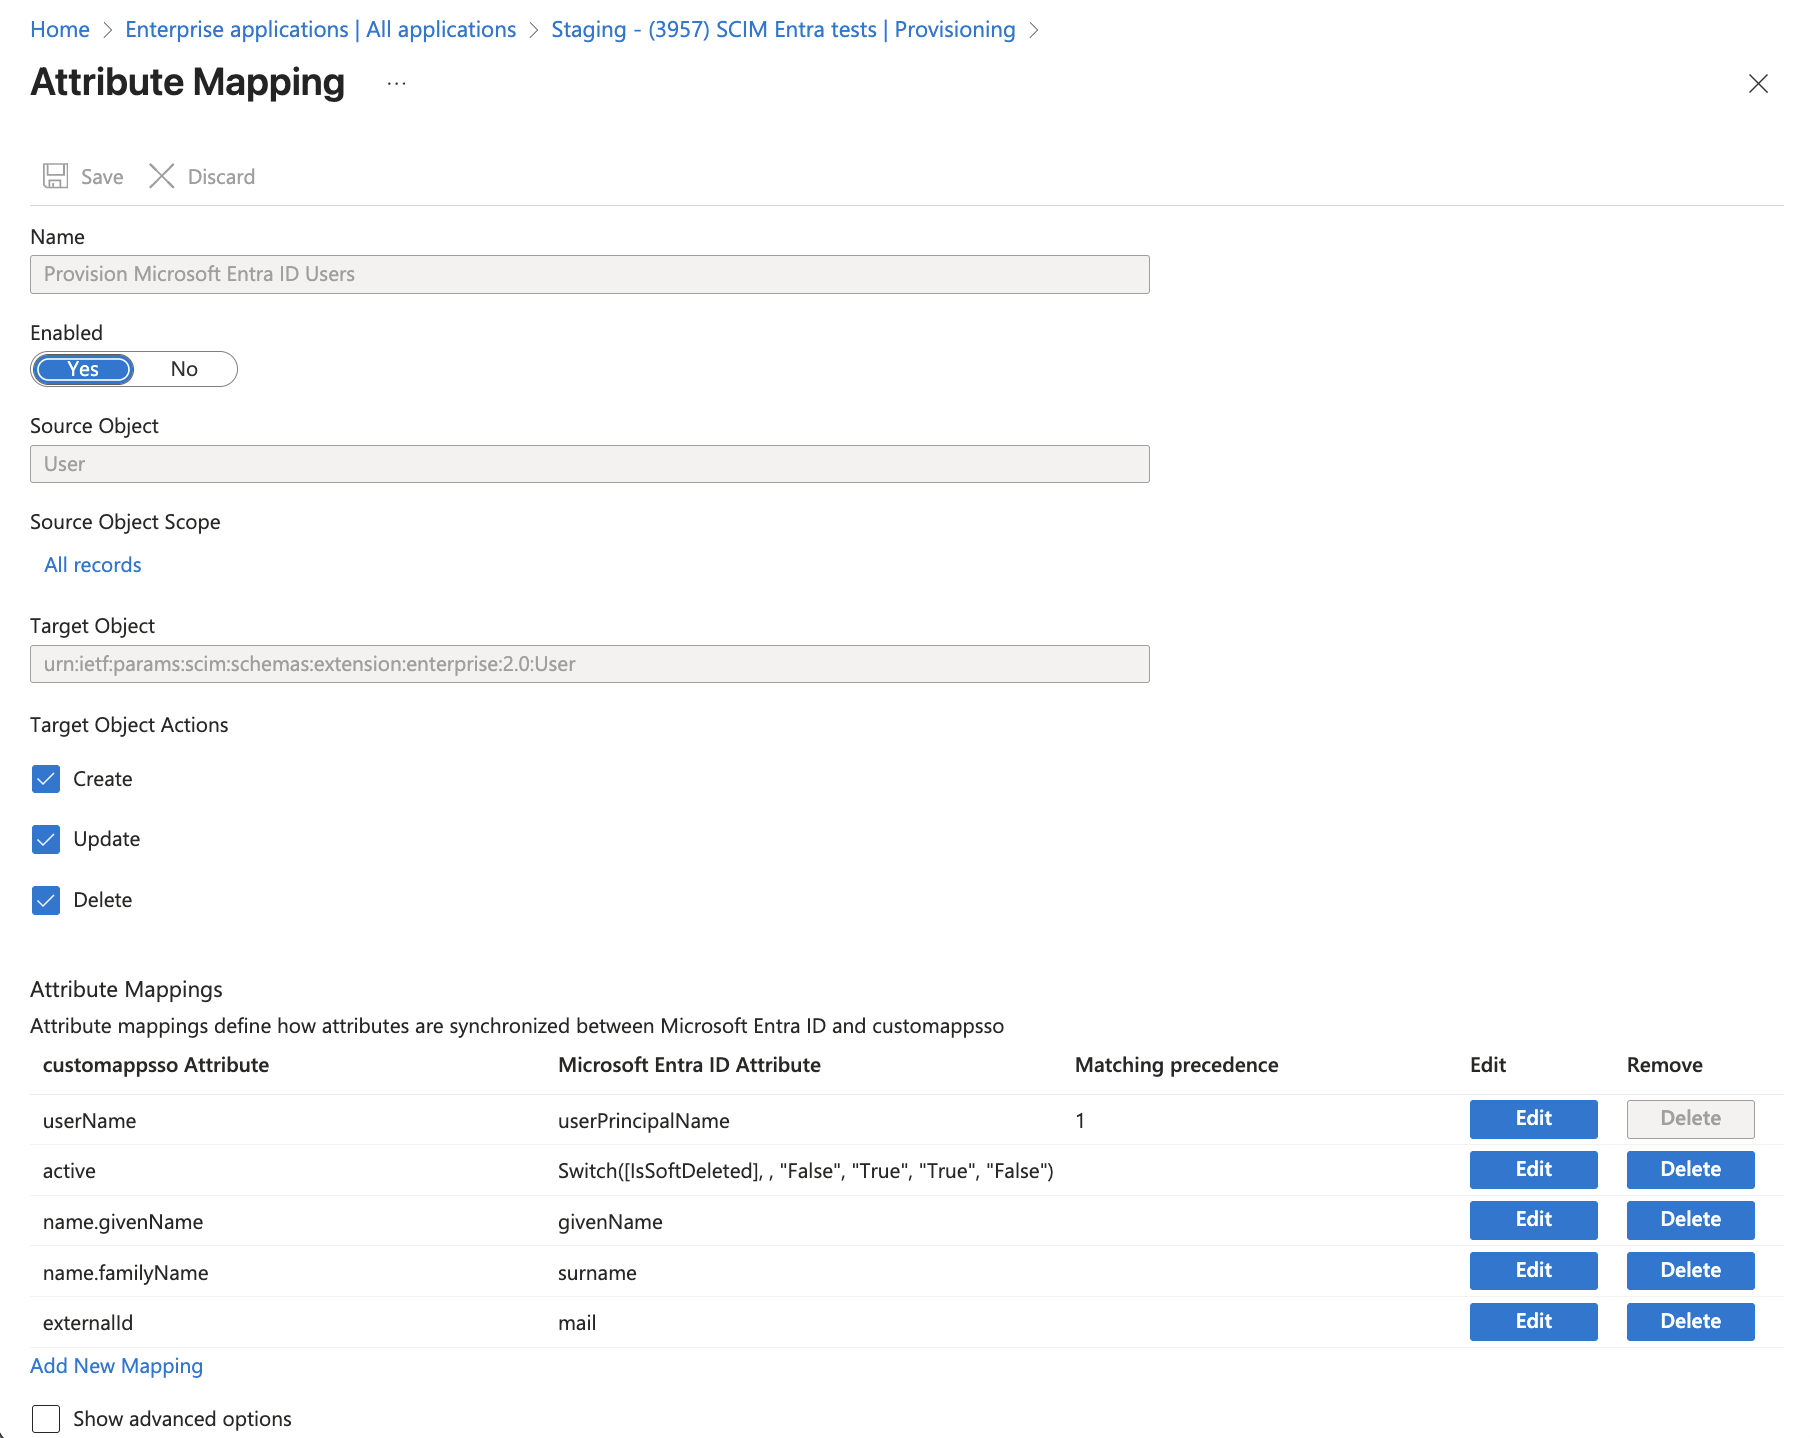
- Target Object Actions: Set actions to
- In the Attribute Mappings section under Provision Microsoft Entra ID Groups, configure the following mappings to match GitGuardian's SCIM requirements:
- Target Object Actions: Set actions to
Create,UpdateandDeletefor the target object. - Attribute Mappings:
displayName: Map this todisplayNameexternalId: Map this toobjectIdmembers: Map this tomembers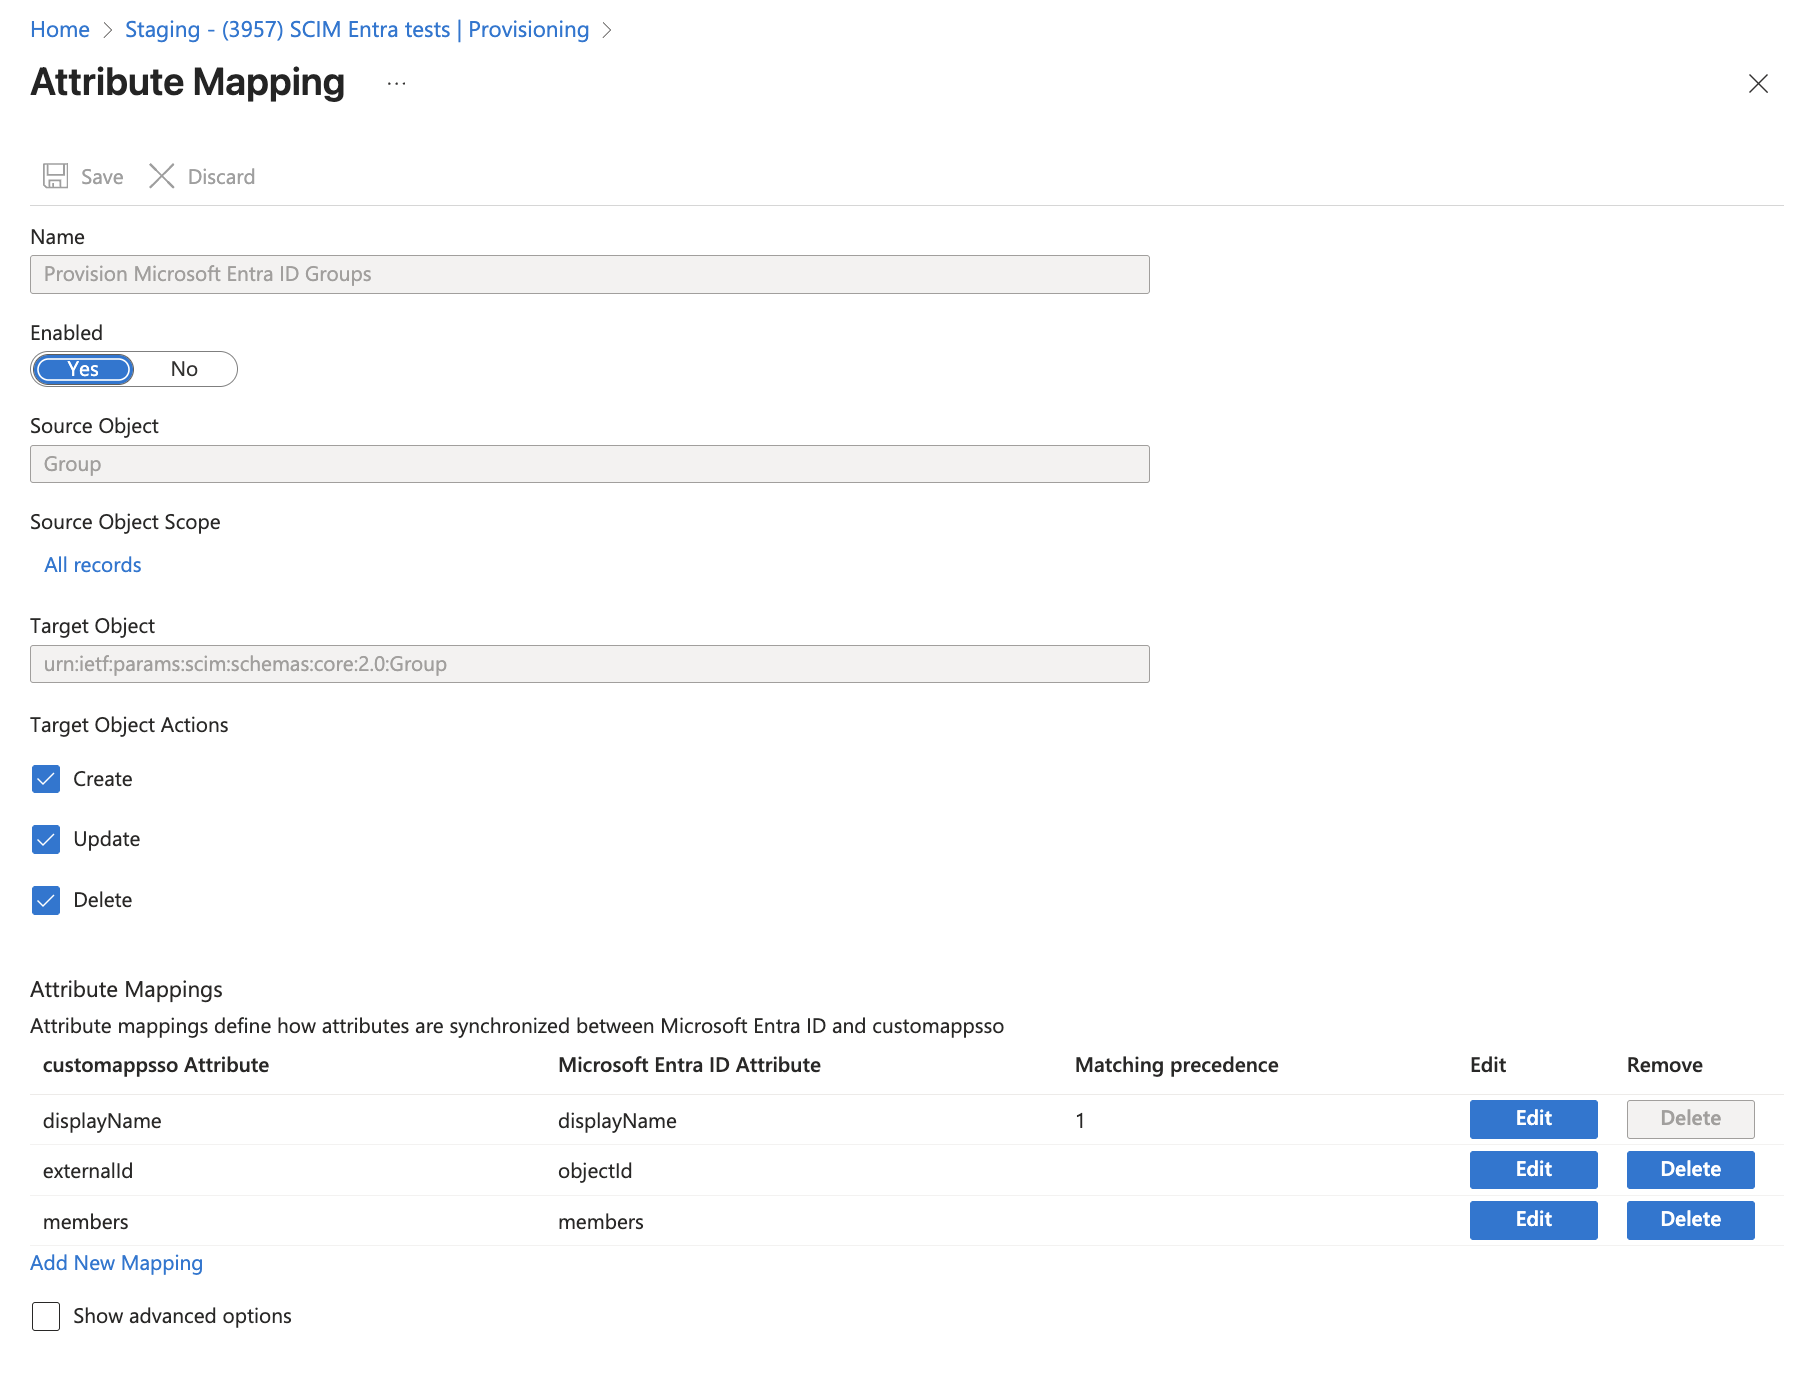
- Target Object Actions: Set actions to
- Save the mapping and sync the users and teams.
JumpCloud SCIM
Auto-adding users to the All-incidents team does not function with JumpCloud SCIM. To include users in this team you will need to create a JumpCLoud Group named "All-incidents team" and assign users to this group within JumpCloud.
Configure JumpCloud SCIM Settings
- Enable the SCIM toggle in the GitGuardian Authentication page.
- Open the SSO Application for GitGuardian in JumpCloud
- Select the Identity Management tab.
- Verify API Type "SCIM API" is set.
- Verify Authentication Method is set to "Bearer Token"
- Copy the SCIM Service Provider Endpoint value to the Base URL field in JumpCloud.
- Place the Service Account Token you generated above into the Token Key field in JumpCloud.
- Place a testable email in the Test User Email field.
- Remove ALL the default Export Attribute Mappings, and replace them with the following
JumpCloud Attribute SCIM Attribute Type email userName Direct email externalId Direct firstname name.givenName Direct lastname name.familyName Direct - Save and Sync the mappings.
- Click "Test"
- Click "Apply" to activate SCIM.
SCIM settings
Once SCIM is enabled, additional settings are available in your Authentication settings page to control the behavior of SCIM-provisioned members.
Default team membership permission
This setting controls the incident permission level assigned to members synchronized via SCIM when they are added to a team. The available options are:
- Can view: Members can view incidents assigned to their team.
- Can edit: Members can view and edit incidents assigned to their team.
By default, this is set to Can edit. You can change this at any time from the Authentication settings page.
Enable notifications for SCIM operations
When enabled, GitGuardian sends notifications whenever SCIM updates affect users or teams in your workspace. This includes events such as:
- User provisioning or deactivation
- Team creation, update, or deletion
- Membership changes
This setting is disabled by default. Toggle it on if you want members to stay informed about SCIM-driven changes.
FAQ
Can I use SCIM for provisioning teams?
Yes, SCIM supports team provisioning for Okta, Microsoft Entra ID, and JumpCloud. Teams are automatically created and managed in your workspace when groups are added or updated in your IdP. Ensure your service account token has teams:write permissions.
How do I link GitGuardian to my IdP for SCIM?
You will need to configure SCIM in your IdP by entering the provided SCIM endpoint and API token. Each IdP has its own process for linking SCIM integrations. Follow the relevant setup instructions for your IdP.
Does GitGuardian support Just-In-Time (JIT) provisioning with SCIM?
SCIM now supports user provisioning, activation, deactivation, and deletion. JIT provisioning via SSO is also available, while SCIM gives you more control over the user lifecycle for provisioning, activation, deactivation, and deletion.

