Search and filter
The search bar at the top of every listing page (Incidents, Public incidents, Perimeter, Audit logs, and most settings tables) is the single entry point for finding what you need. It supports four search modes that you can mix and match in the same query:
- Structured filters — pick a filter, choose a value.
- Raw text search — type any text to match across file paths, commit authors, and source names.
- Search by secret value — paste a secret to check whether GitGuardian has already detected it.
- Natural language search (AI Filters) — describe what you want in plain English. Available only when AI Filters are enabled.
1. Build filters with the dropdown
Click the search bar to see all available filters for the current page. Type the start of a filter name (severity, assignee, integration, etc.) and pick a value from the suggestions.
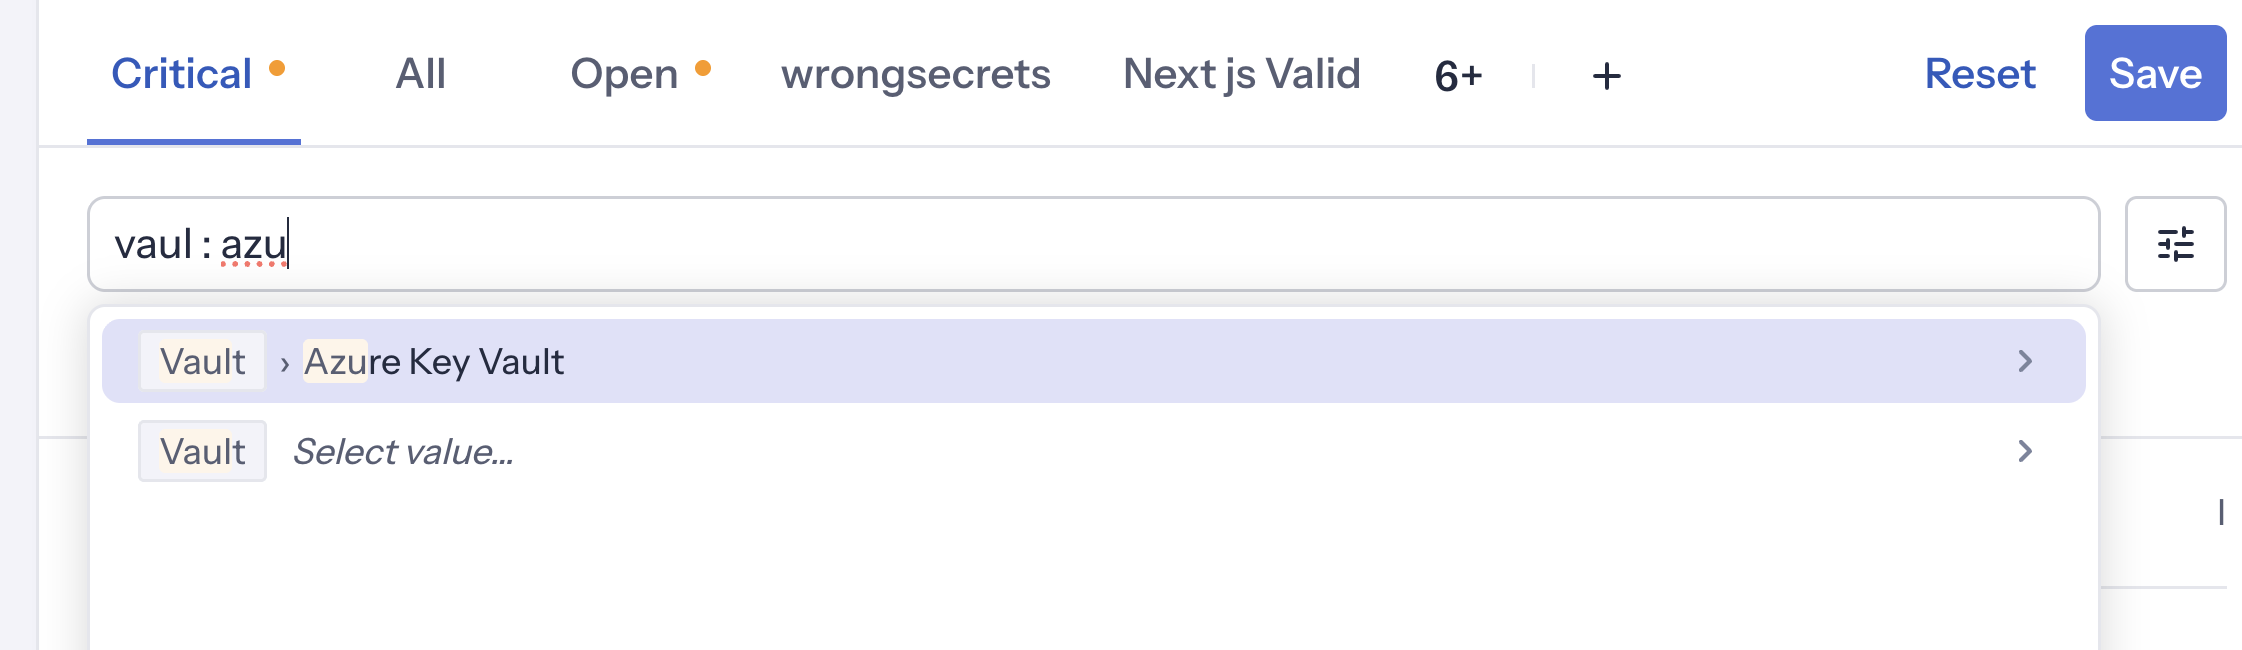
You can also type values directly without naming the filter — the search bar matches the most likely filter:
| Type this | Result |
|---|---|
critical | Suggests Severity: Critical or Source criticality: Critical |
integration : github | Applies the GitHub integration filter |
vaul : azu | Partial matches work — suggests Vault: Azure Key Vault |
occurrence = 5 | Use >, <, = operators on numeric filters |
occurrence > 5 | Filter incidents with more than 5 occurrences |
Use : or = to separate the filter name from its value (e.g. severity : critical or severity = critical). Spaces around the separator are optional. The same syntax works with operators (>, <, =) for numeric filters.
2. Search by raw text
When you type free text that doesn't match a filter name, the search bar searches across three properties of every incident at once:
- Occurrence file path — the file where the secret was found.
- Occurrence author — the developer (git committer name) who introduced the secret.
- Source name — the repository, channel, drive, or project name where the leak was detected.
This is the fastest way to answer questions like "did anything leak in our config files?" or "what's on John's plate?" without picking a specific filter.
By file path
Type any portion of a file path. The matching incidents have at least one occurrence whose path contains the text.
| Prompt | What it matches |
|---|---|
Occurrence path : .env | Incidents with an occurrence in any .env file |
Occurrence path : docker-compose.yml | Incidents from a docker-compose.yml file |
Occurrence path : config/secrets | Incidents under the config/secrets folder |
By commit author
Type a developer name (or email fragment). The matching incidents have at least one occurrence introduced by that author.
| Prompt | What it matches |
|---|---|
Occurrence author : john | Every leak introduced by an author whose git name contains "john" |
Occurrence author : @contractor.com | All commits made by contractors with that email domain |
By source name
Type any portion of a source name. The matching incidents come from a source whose display name contains the text.
| Prompt | What it matches |
|---|---|
Source name : main-business-app | Incidents in repositories matching that name |
Source name : backend | Incidents from every backend service |
Raw text search and structured filters compose. Severity: Critical occurrence path : .env returns critical incidents that leaked through a .env file.
3. Search by secret value
If you want to verify whether a specific secret value is already known to GitGuardian, paste it into the Secret value filter (or as raw text after selecting that filter).
The value is hashed locally in your browser before being sent to the server. The plaintext secret is never transmitted, never stored, and never sent to any AI model. The search is performed against hashed secrets only.
Use this when:
- A developer reports a leaked credential and you want to check if GitGuardian already raised an incident for it.
- You want to confirm that a rotated secret no longer appears in your monitored perimeter.
- You need to correlate a third-party alert with an existing incident.
4. Natural language search (AI Filters)
Natural language search is part of the AI Filters feature and shows up in the search bar only when AI Filters are activated for your workspace. See AI settings for the workspace toggle and self-hosted prerequisites (a configured LLM provider, either GitGuardian-managed or your own Amazon Bedrock setup).
When AI Filters are enabled, you can type a full sentence directly in the search bar and GitGuardian translates it into the right combination of filters — no special mode to activate.
How to use it
- Click the search bar on any supported page.
- Type a sentence in plain English and press Enter, for example:
Open critical unassigned incidents related to cloud providersValid AWS keys introduced by contractors under infra/ since JanuarySources with open incidents and no honeytoken
- Review the applied filters in the filter bar. You can keep, adjust, or remove any filter just like manual ones.
Natural language also covers the same dimensions as raw text search — file paths, commit authors, and source names — and combines them with any other filter on the page:
Critical incidents in .env files committed by Alice in the last monthIncidents in the backend repos introduced by anyone on the data team
Suggestions and history
While you're typing in the search bar, GitGuardian shows:
- Suggestions — curated example prompts for the current page, useful when you're getting started.
- History — your most recent prompts, so you can re-run a successful query in one click. You can clear the history at any time.
Date presets
When your prompt refers to a familiar time range, the AI maps it to the same named preset you would pick manually — so the filter shows as a pill labelled Last week rather than as a custom range. Supported phrasings include yesterday, last week, last month, last 3 months, last 6 months, last year, and current year.
Operators
On surfaces that support filter operators, AI Filters can return comparison operators (>, <, =, contains) so prompts like more than 5 occurrences or path contains .env resolve to the right filter expression.
Provide feedback
Each AI result has thumbs-up and thumbs-down buttons. Use them to tell us whether the filters matched your intent. You can add a short comment to explain what worked or what was off — that feedback helps us improve the suggestions and prompt examples.
Examples
Common triage and investigation workflows, expressed both with structured filters and with natural language (when AI Filters are enabled).
Find critical leaks introduced by contractors��
- Filters:
Severity: Critical+Occurrence author : @contractor.com - Natural language:
Critical incidents introduced by anyone with a @contractor.com email
Triage what leaked in .env files this week
- Filters:
Occurrence path : .env+Date: Last week - Natural language:
Incidents found in .env files in the last 7 days
Check whether a specific token is already known
- Filters:
Secret value: <paste the token>(hashed locally before search) - Natural language:
Find incidents with this token: ghp_xxxxxxxxxxxxxxxxxxxx
List open incidents in a specific repository
- Filters:
Source name : main-business-app+Status: Triggered+Status: Assigned - Natural language:
Open incidents in the main-business-app repository
Focus on unassigned high and critical incidents
- Filters:
Assignee: No assignee+Severity: High+Severity: Critical - Natural language:
Unassigned high and critical incidents
Investigate AWS leaks under a specific folder
- Filters:
Detector: Amazon AWS+Occurrence path : infra/ - Natural language:
AWS keys leaked under the infra/ folder
Audit one developer's incidents over a period
- Filters:
Occurrence author : alice+Date: Last 3 months - Natural language:
Incidents introduced by Alice in the last 3 months
Whenever an example combination matches your team's recurring workflow, save it as a view. Views always run the same deterministic filter set, no AI prompt required.
AI Filters limits
- Languages — optimized for English. Other languages may work but with reduced accuracy.
- Coverage — the AI can only return filters that exist on the current page. If a concept has no matching filter, it is ignored.
- Failures — if the AI cannot interpret your prompt, the page returns an error and your existing filters are unchanged. Rephrase the request or use the standard filter menu.
On self-hosted, AI Filters require an LLM provider to be configured by your administrator. GitGuardian supports a managed inference profile or your own Amazon Bedrock setup. See AI settings and Bring Your Own Cloud — AWS Bedrock for configuration.
For details on which data is sent to the model and how it is handled, see the AI Management Policy.

