
Install on Airgap (legacy)
You are now on a GitGuardian legacy architecture page.
Looking for the new GitGuardian application Airgap page? Please visit the Airgap page.
For information on the new architecture, as well as determining whether you are using the new or the legacy GitGuardian architecture, explore the New GitGuardian Architecture page.
GitGuardian can be installed in an airgapped environment. Both the embedded cluster and existing cluster installations are supported.
Before starting the installation, ensure to review the system and network requirements, and download your license.
KOTS-based installation
Airgap installation on an Embedded cluster
Download and install the Kubernetes cluster
First, you will need to set up the cluster. kURL allows you to download a bundle beforehand, and run the install using it. There are two places to download it. The first and recommended one is the download portal where you can also download your license and the application bundle. The second one is with this link, which can be useful for automation purposes:
curl -LSO https://kurl.sh/bundle/gitguardian-seal-prod.tar.gz
Then, copy the archive to your server using for example scp. Go to your
server, with ssh, or another tool. Extract the archive:
scp gitguardian-seal-prod.tar.gz ${your-server-address}:.
ssh ${your-server-address}
tar -xvzf gitguardian-seal-prod.tar.gz
You can now install the cluster:
cat install.sh | sudo bash -s airgap
Once the installation finishes, the KOTS Admin Console will be available on
http://${your-server-address}:8800. If needed you can set up an SSH tunnel to
access it locally on http://localhost:8800:
ssh -N -L 8800:${your-server-ip}:8800 ${your-server-ip}
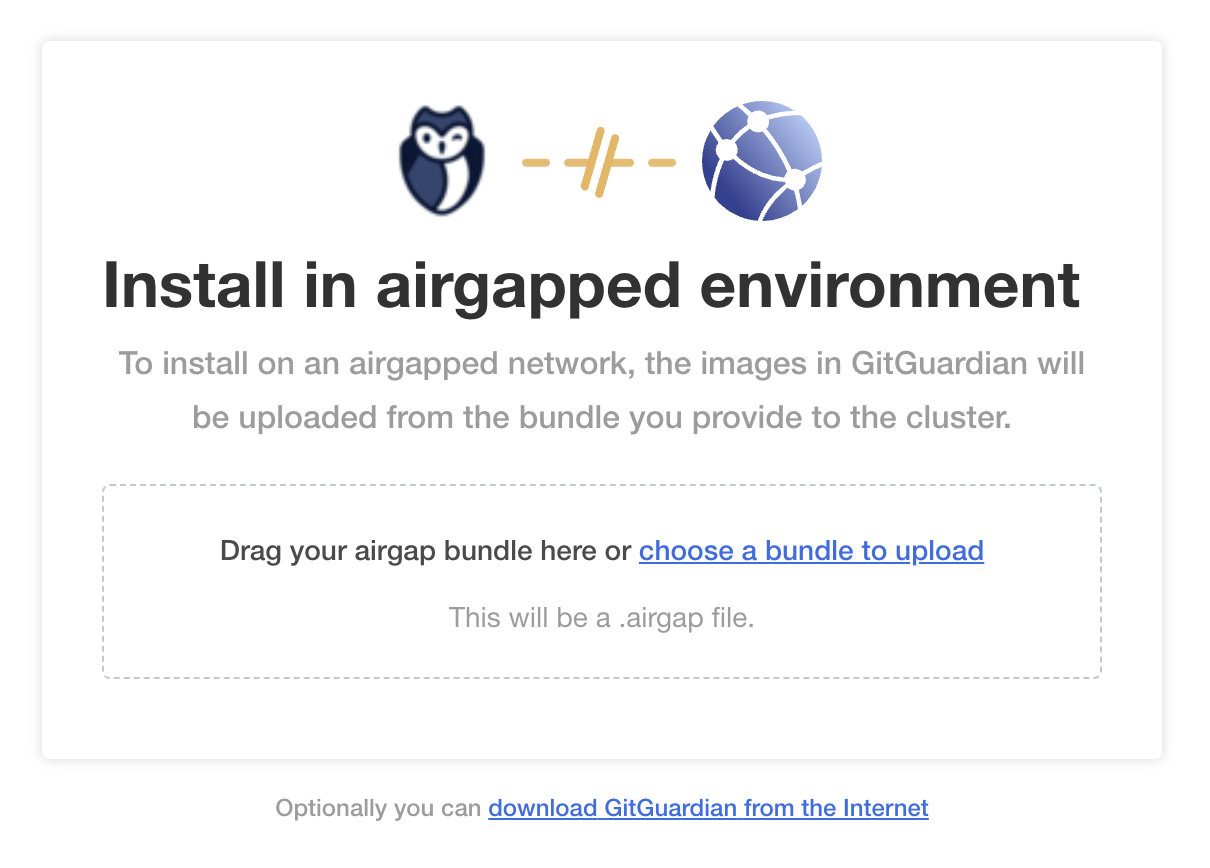
Upload the application bundle to the KOTS Admin Console
First, you will need to download the license and the application bundle from the
Replicated download portal. The filename should end with .airgap.
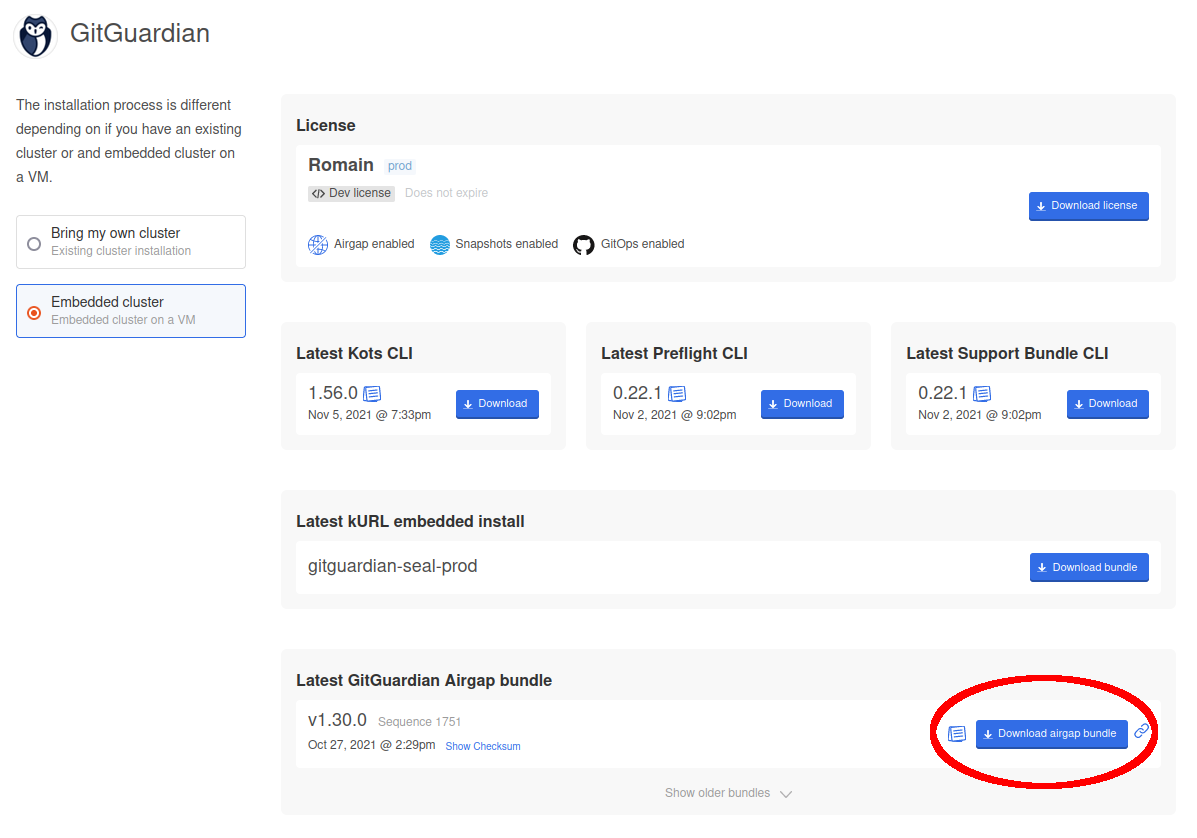
Upload your license on the KOTS Admin Console. Then upload the application bundle.
Follow the rest of the instructions here to complete the installation.
Upgrades
To upgrade the cluster itself, please download the latest kURL bundle,
follow the installation instructions above:
copy the bundle, extract it, and run the install.sh script.
Then, you will need to upgrade the KOTS application running in the cluster:
kubectl kots admin-console upgrade --namespace <namespace>
If needed, specify the Kubernetes namespace with --namespace (default namespace is used if not specified).
To upgrade the application, first download the latest application bundle on the download portal. Then go to your KOTS Admin Console on the "Version History", and click on "Upload new version". Upload the bundle and deploy it.
Airgap installation on an Existing cluster
Download and install the KOTS Admin Console
First, install the kubectl KOTS plugin on your machine:
curl https://kots.io/install | bash
Then, you need to download the latest bundle for the KOTS Admin Console. There are two places to download it. The first and recommended one is the download portal where you can also download your license and the application bundle. The second one is the release assets on GitHub. In both cases, make sure to match your locally installed KOTS plugin version. You can check it by running:
kubectl kots version
Now you need to upload these images to your registry using a user with write access to your internal registry:
kubectl kots admin-console push-images ./kotsadm.tar.gz \
  ${private.registry.host}/gitguardian \
  --registry-username ${rw-username} \
  --registry-password ${rw-password}
The username and password for the registry are not stored anywhere.
Finally, you can run the install command for the KOTS Admin Console:
kubectl kots install gitguardian \
  --kotsadm-namespace gitguardian \
  --kotsadm-registry ${private.registry.host} \
  --registry-username ${ro-username} \
  --registry-password ${ro-password}
A Kubernetes secret will be used to store these credentials.
An automatic port-forward is launched, you can now access the KOTS Admin Console on http://localhost:8800.
Upload the application bundle to the KOTS Admin Console
First, you will need to download the license and the application bundle from the
download portal. The filename should end with .airgap.
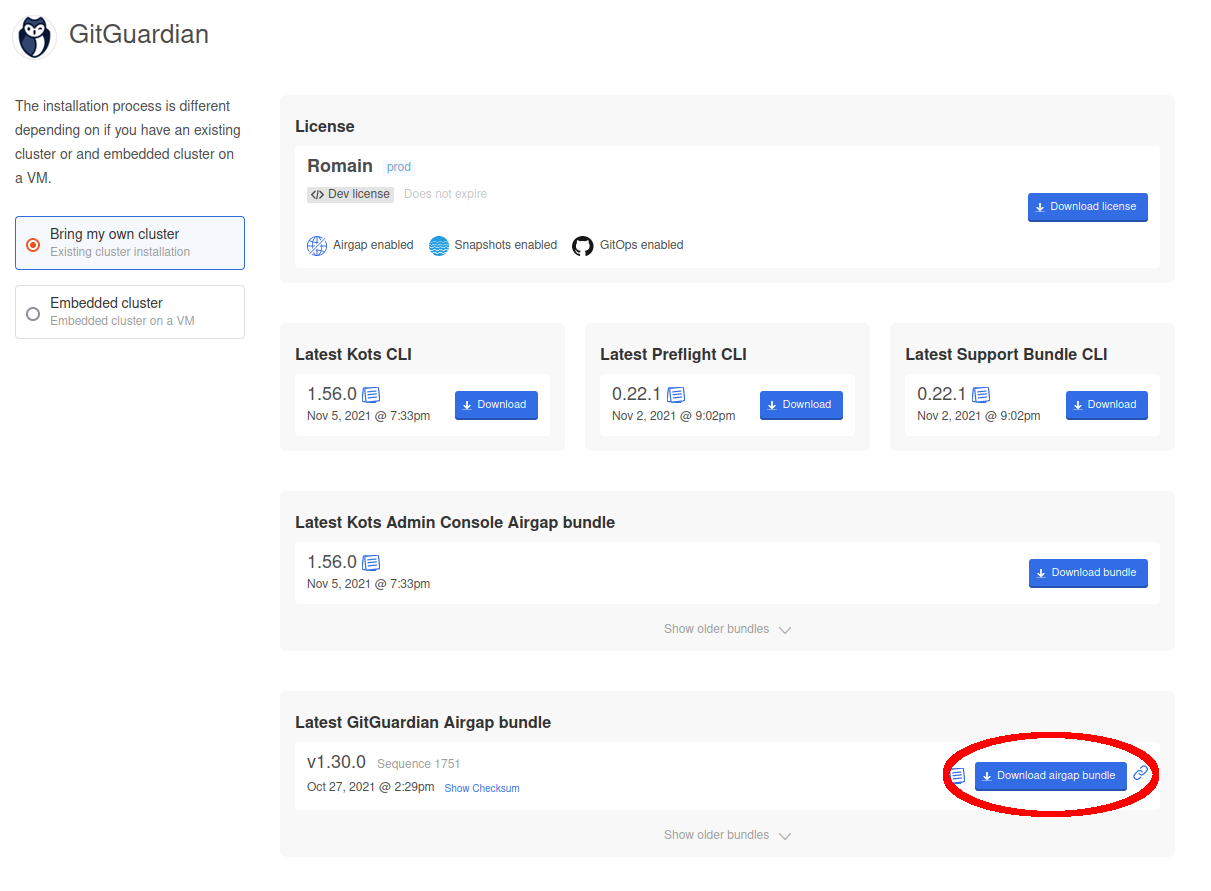
Upload your license on the KOTS Admin Console.. Then follow the instructions to set up the registry for the application itself and upload the application bundle.
Follow the rest of the instructions here to complete the installation.
Upgrades
To upgrade the KOTS admin interface, follow the installation instructions above: install the latest version of the KOTS plugin of your machine, download the latest KOTS bundle and upload these images to your registry. Then, instead of running the installation command, you will need to upgrade the KOTS application running in the cluster:
kubectl kots admin-console upgrade -n gitguardian
To upgrade the application, first download the latest application bundle on the download portal. Then go to your KOTS Admin Console on the "Version History", and click on "Upload new version". Upload the bundle and deploy it.
Was this page helpful?


