Integrate ServiceNow
Monitor ServiceNow for exposed secrets in tickets, knowledge articles, and service management workflows.
Why Monitor ServiceNow?
ServiceNow serves as the central IT service management platform where IT teams document incidents, manage changes, and maintain knowledge bases. During incident response and troubleshooting, IT staff frequently embed system credentials, configuration details, and service account information in tickets, change requests, and knowledge articles, creating persistent security vulnerabilities within critical IT documentation.
Capabilities
| Feature | Support | Details |
|---|---|---|
| Historical Scanning | ✅ (Supported) | Analyze existing tables and records histories |
| Incremental Scanning | ✅ (Supported) | Regular scheduled scanning for new content |
| Monitored Perimeter | ✅ (Supported) | Granular monitoring of tables |
| Team Perimeter | ✅ (Supported) | Team-based access control |
| Presence Check | ❌ (Not Supported) | All occurrences considered present |
| Source Visibility | ❌ (Not Supported) | All tables show as private |
| File Attachments | ❌ (Not Supported) | File attachments are not scanned |
What we scan:
- Incident and service request descriptions
- Change request documentation
- Knowledge base articles and procedures
- Workflow configurations and scripts
Plan requirements: Available for GitGuardian Enterprise plan. Try it for free with a 30-day trial - any detected incidents remain accessible after the trial ends.
Detector coverage: To minimize false positives, Generic High Entropy Secret and Generic Password are disabled. All other detectors are enabled.
Setup your ServiceNow integration
Prerequisites:
- Owner or Manager account on your GitGuardian Dashboard
- ServiceNow admin permissions to create user accounts with API access
- Network connectivity between GitGuardian and your self-hosted services. Check out GitGuardian Bridge to enable secure connections between GitGuardian SaaS and your self-hosted services in private networks.
GitGuardian integrates with ServiceNow via a dedicated User with read-only access to your tables. You can install GitGuardian on multiple ServiceNow instances to monitor your tables.
1. Create a new user
- Login to your ServiceNow instance
- Go to Organization > Users and click New to create the new user required for authentication
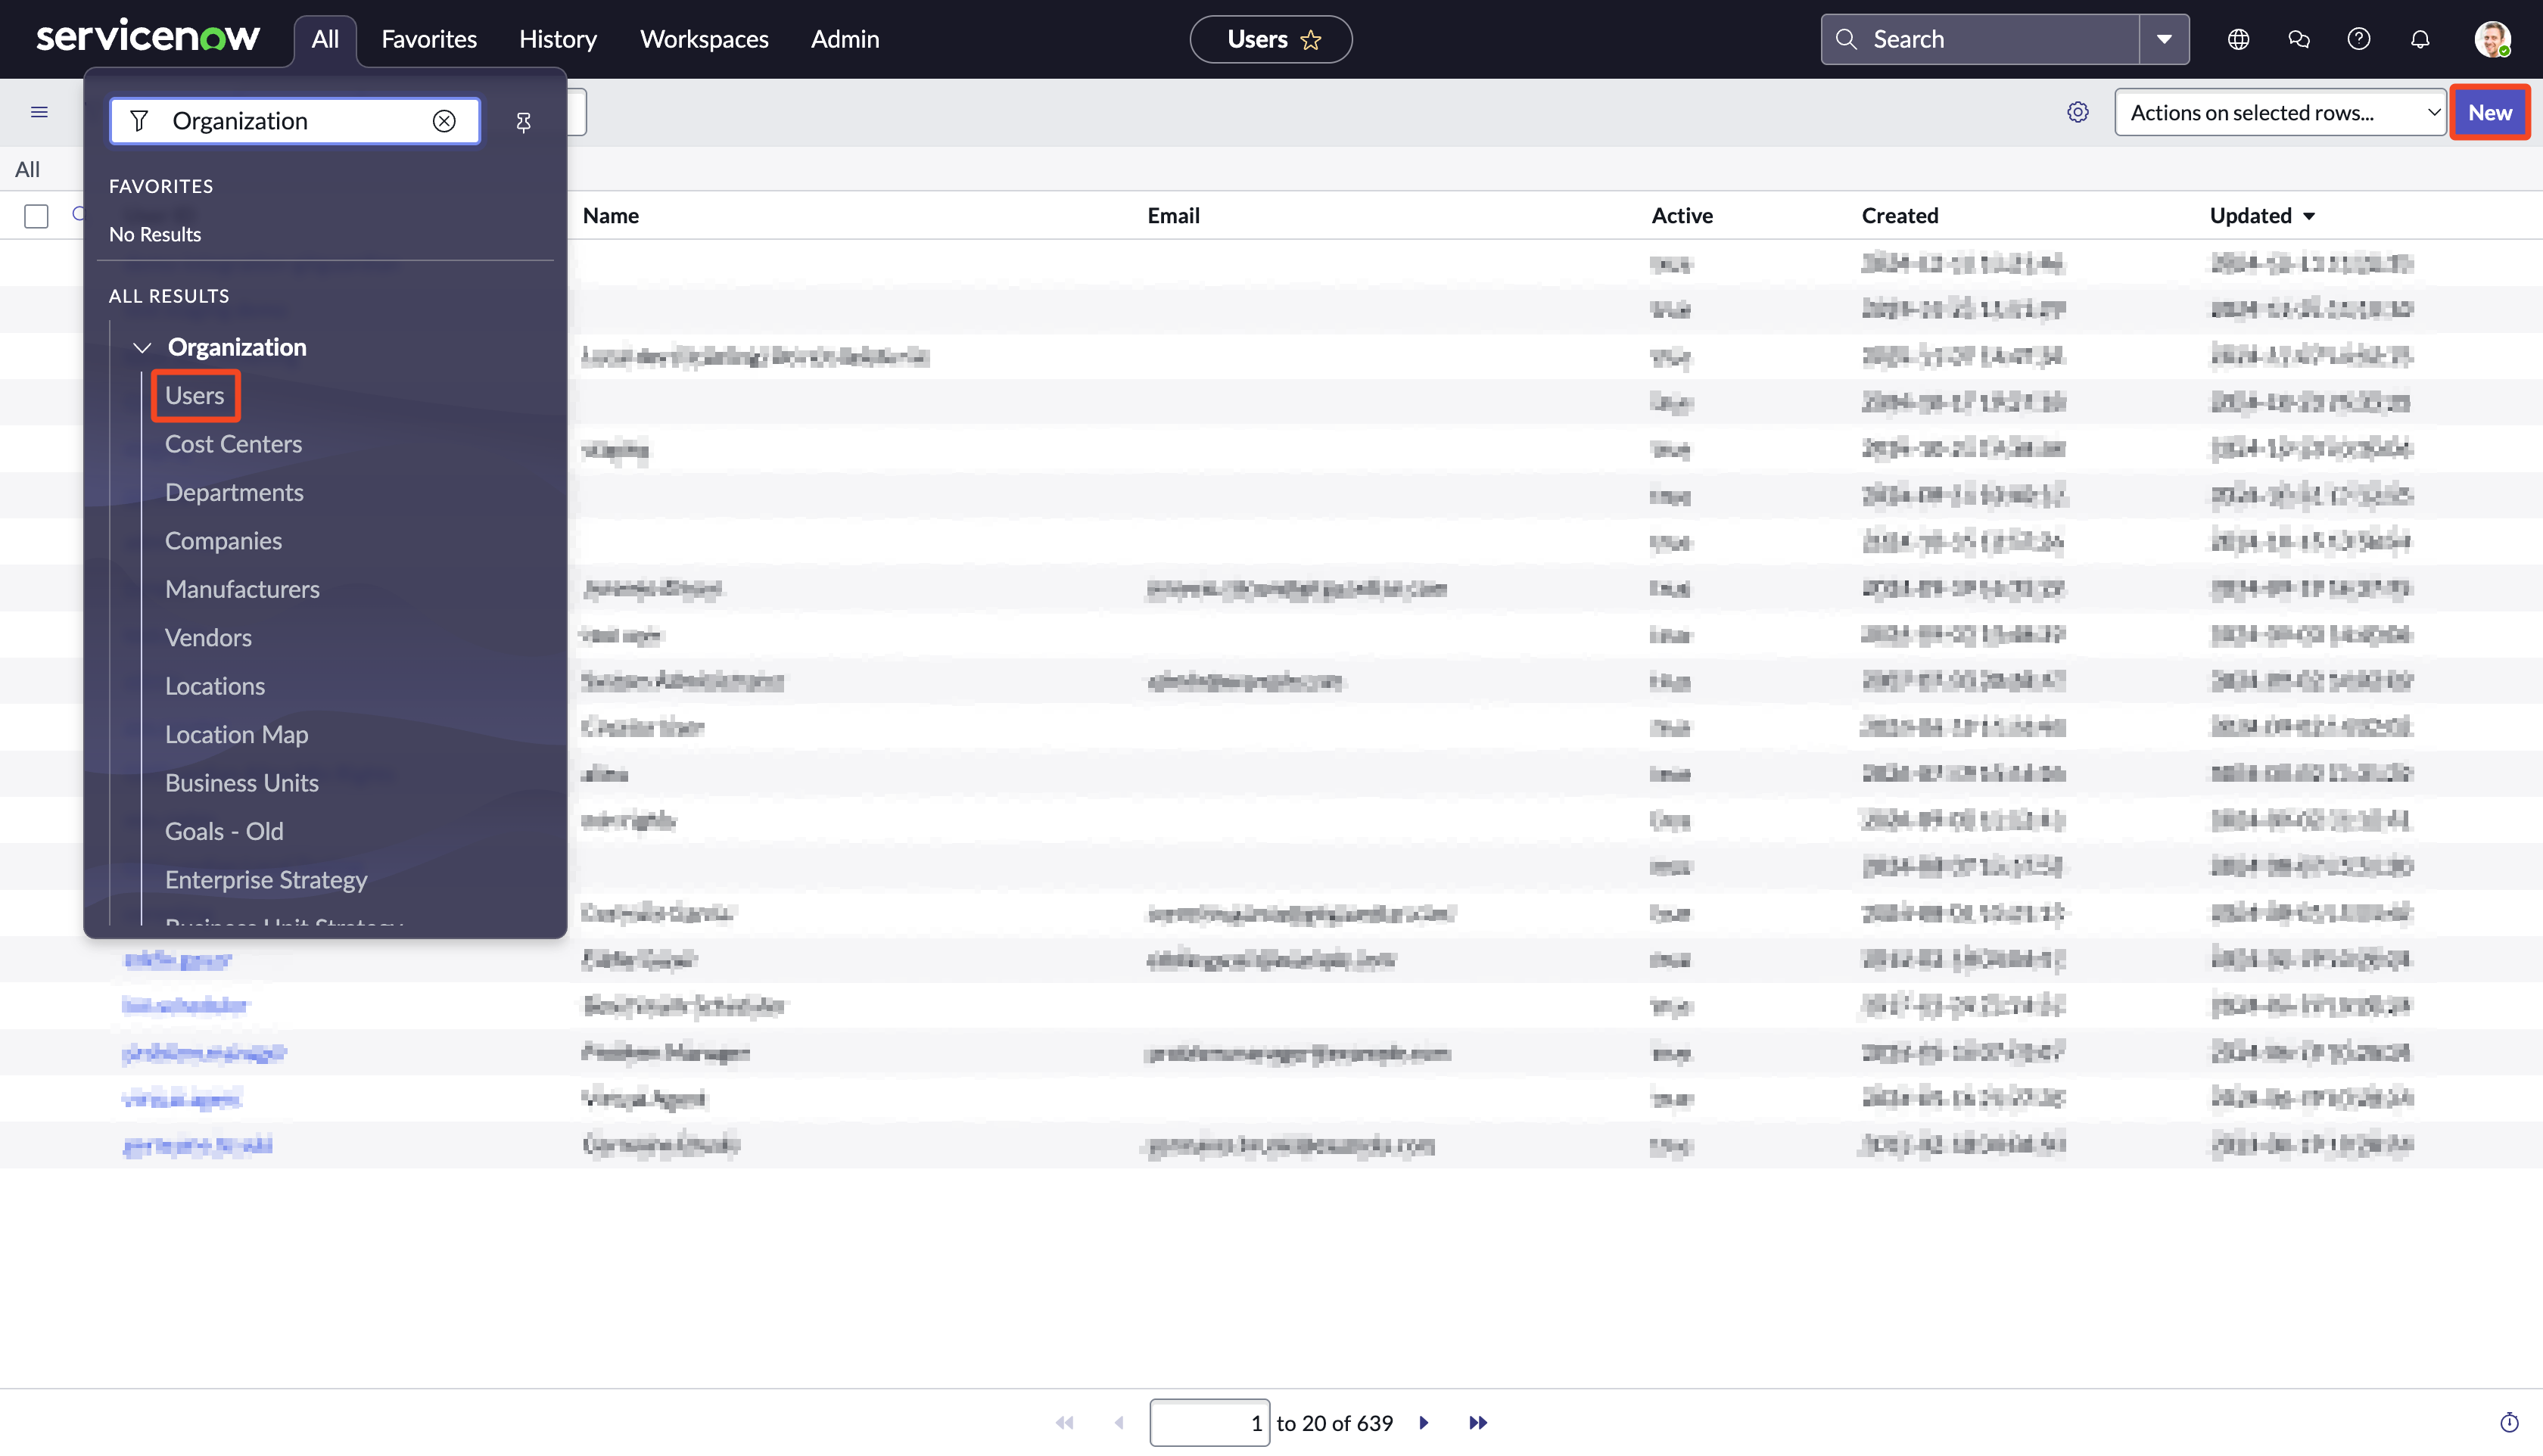
- Set a User ID (e.g.:
GitGuardian) and click Submit to create it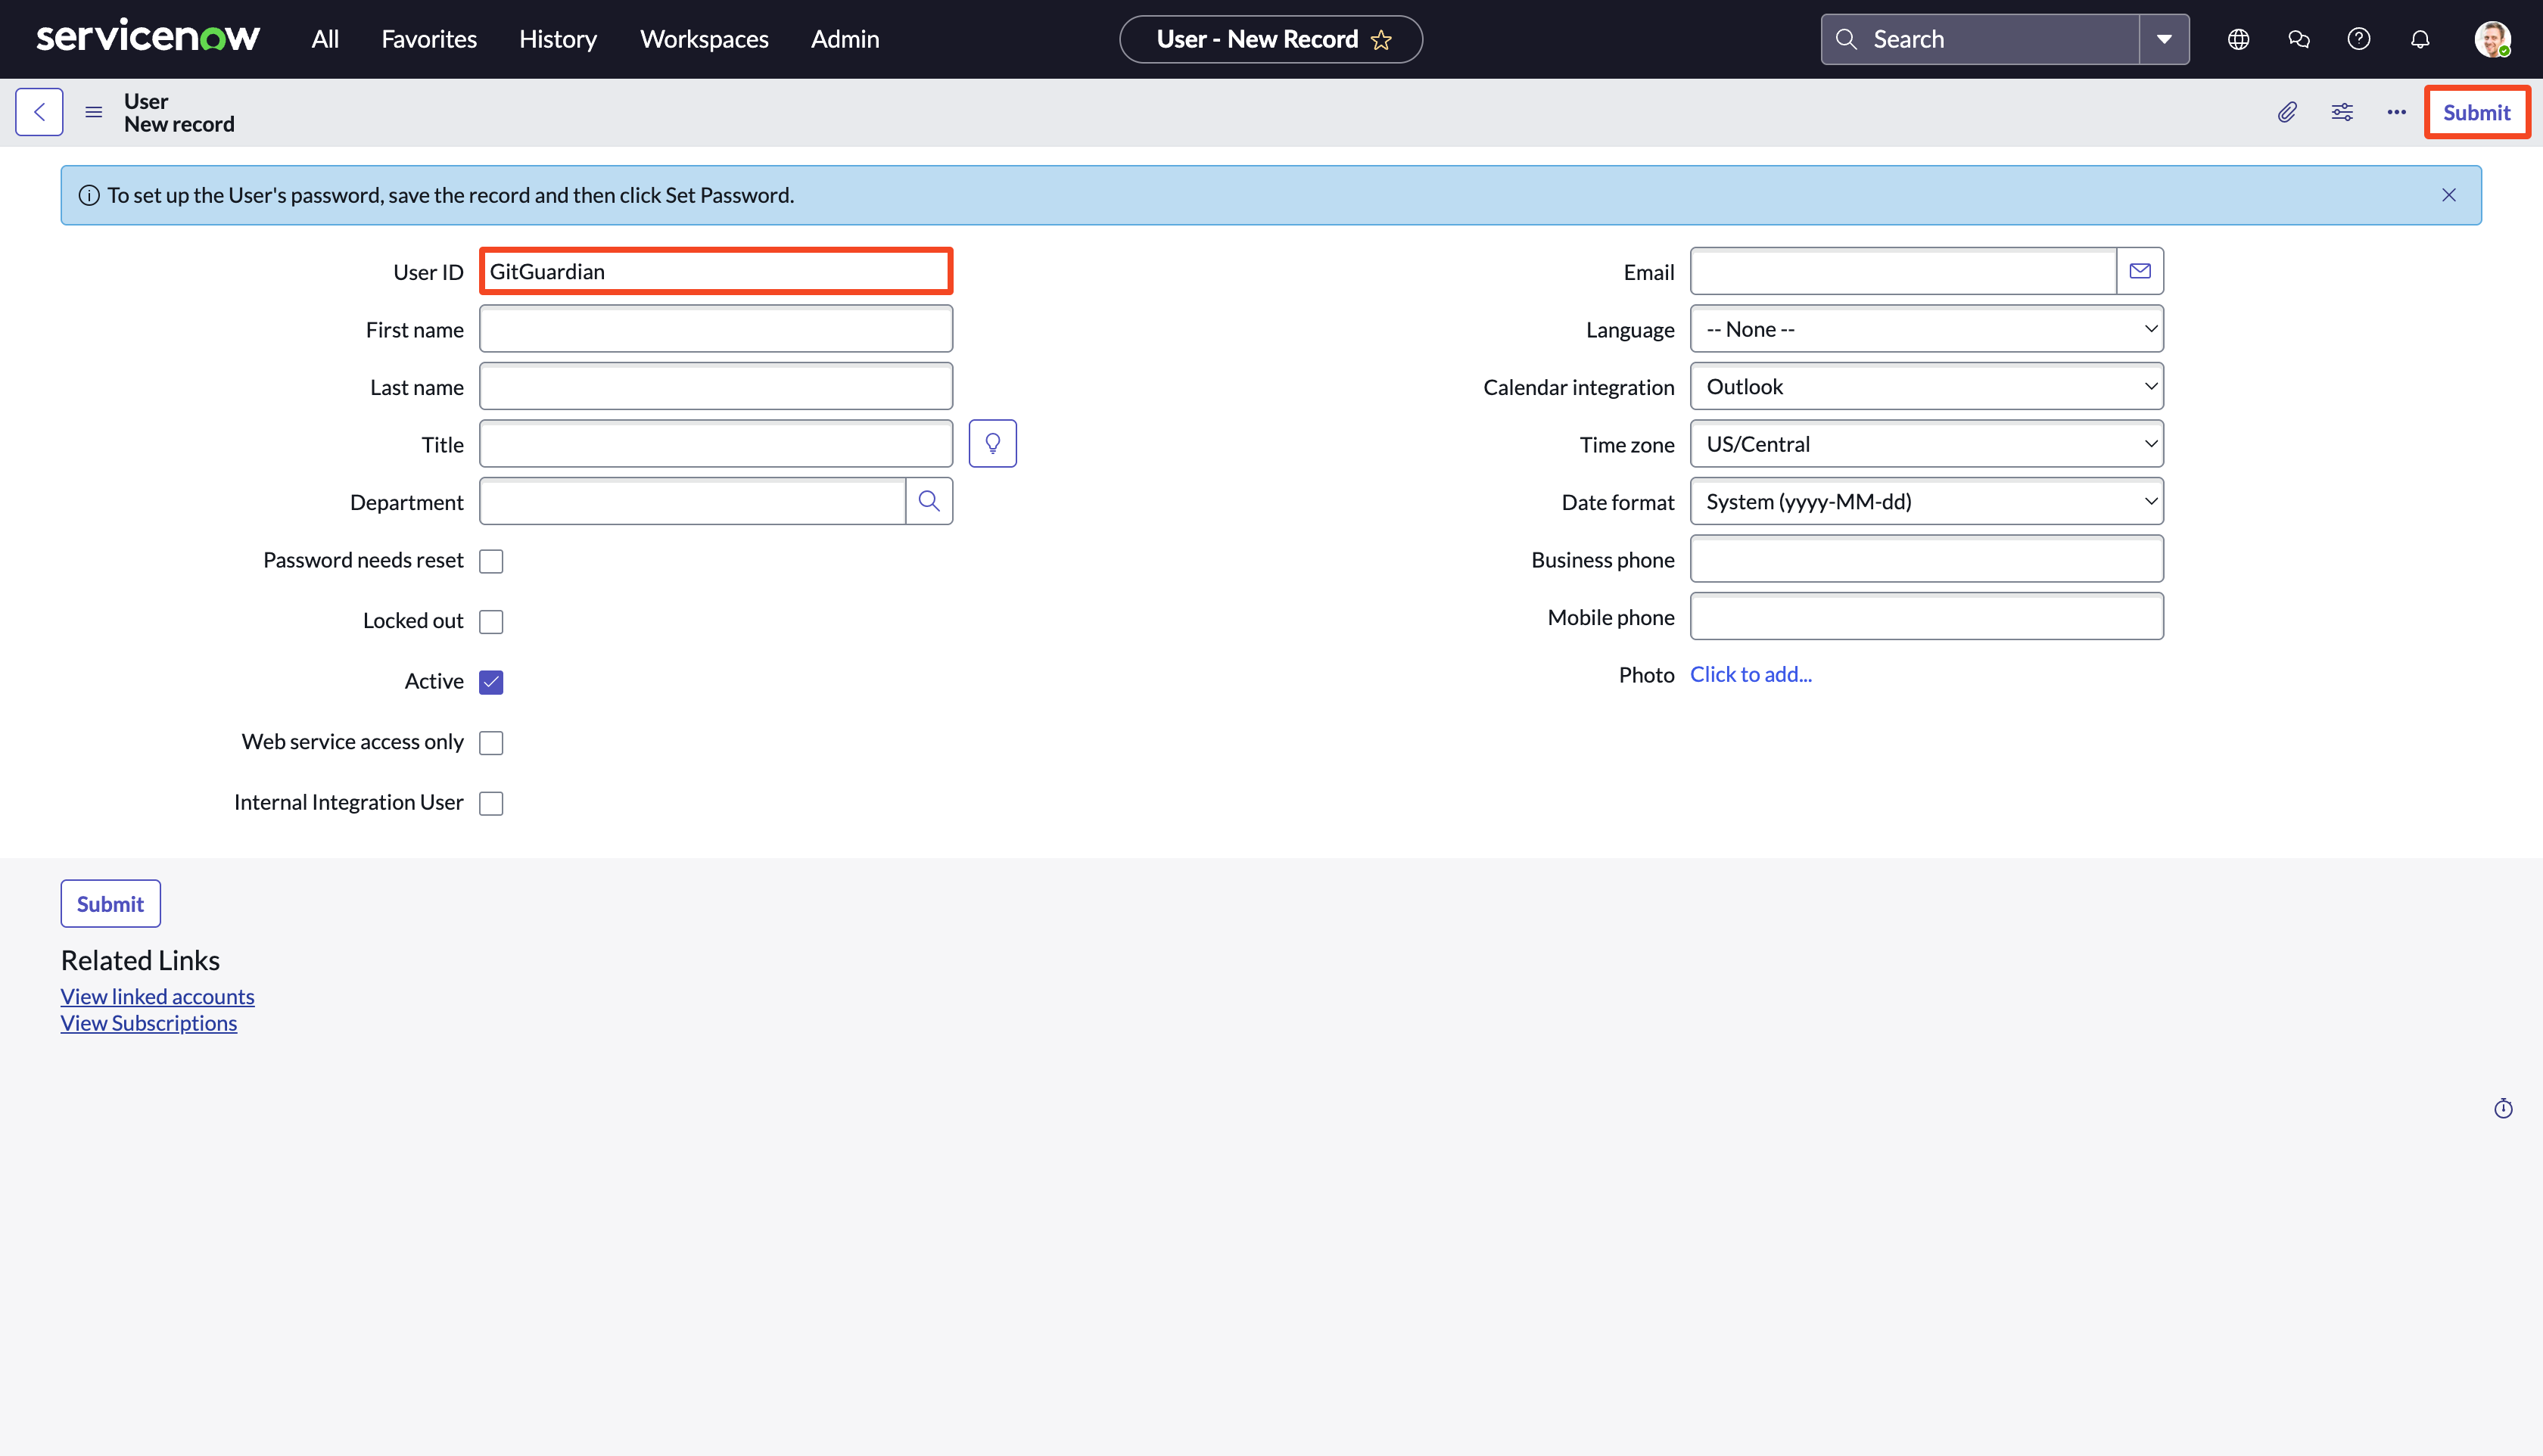
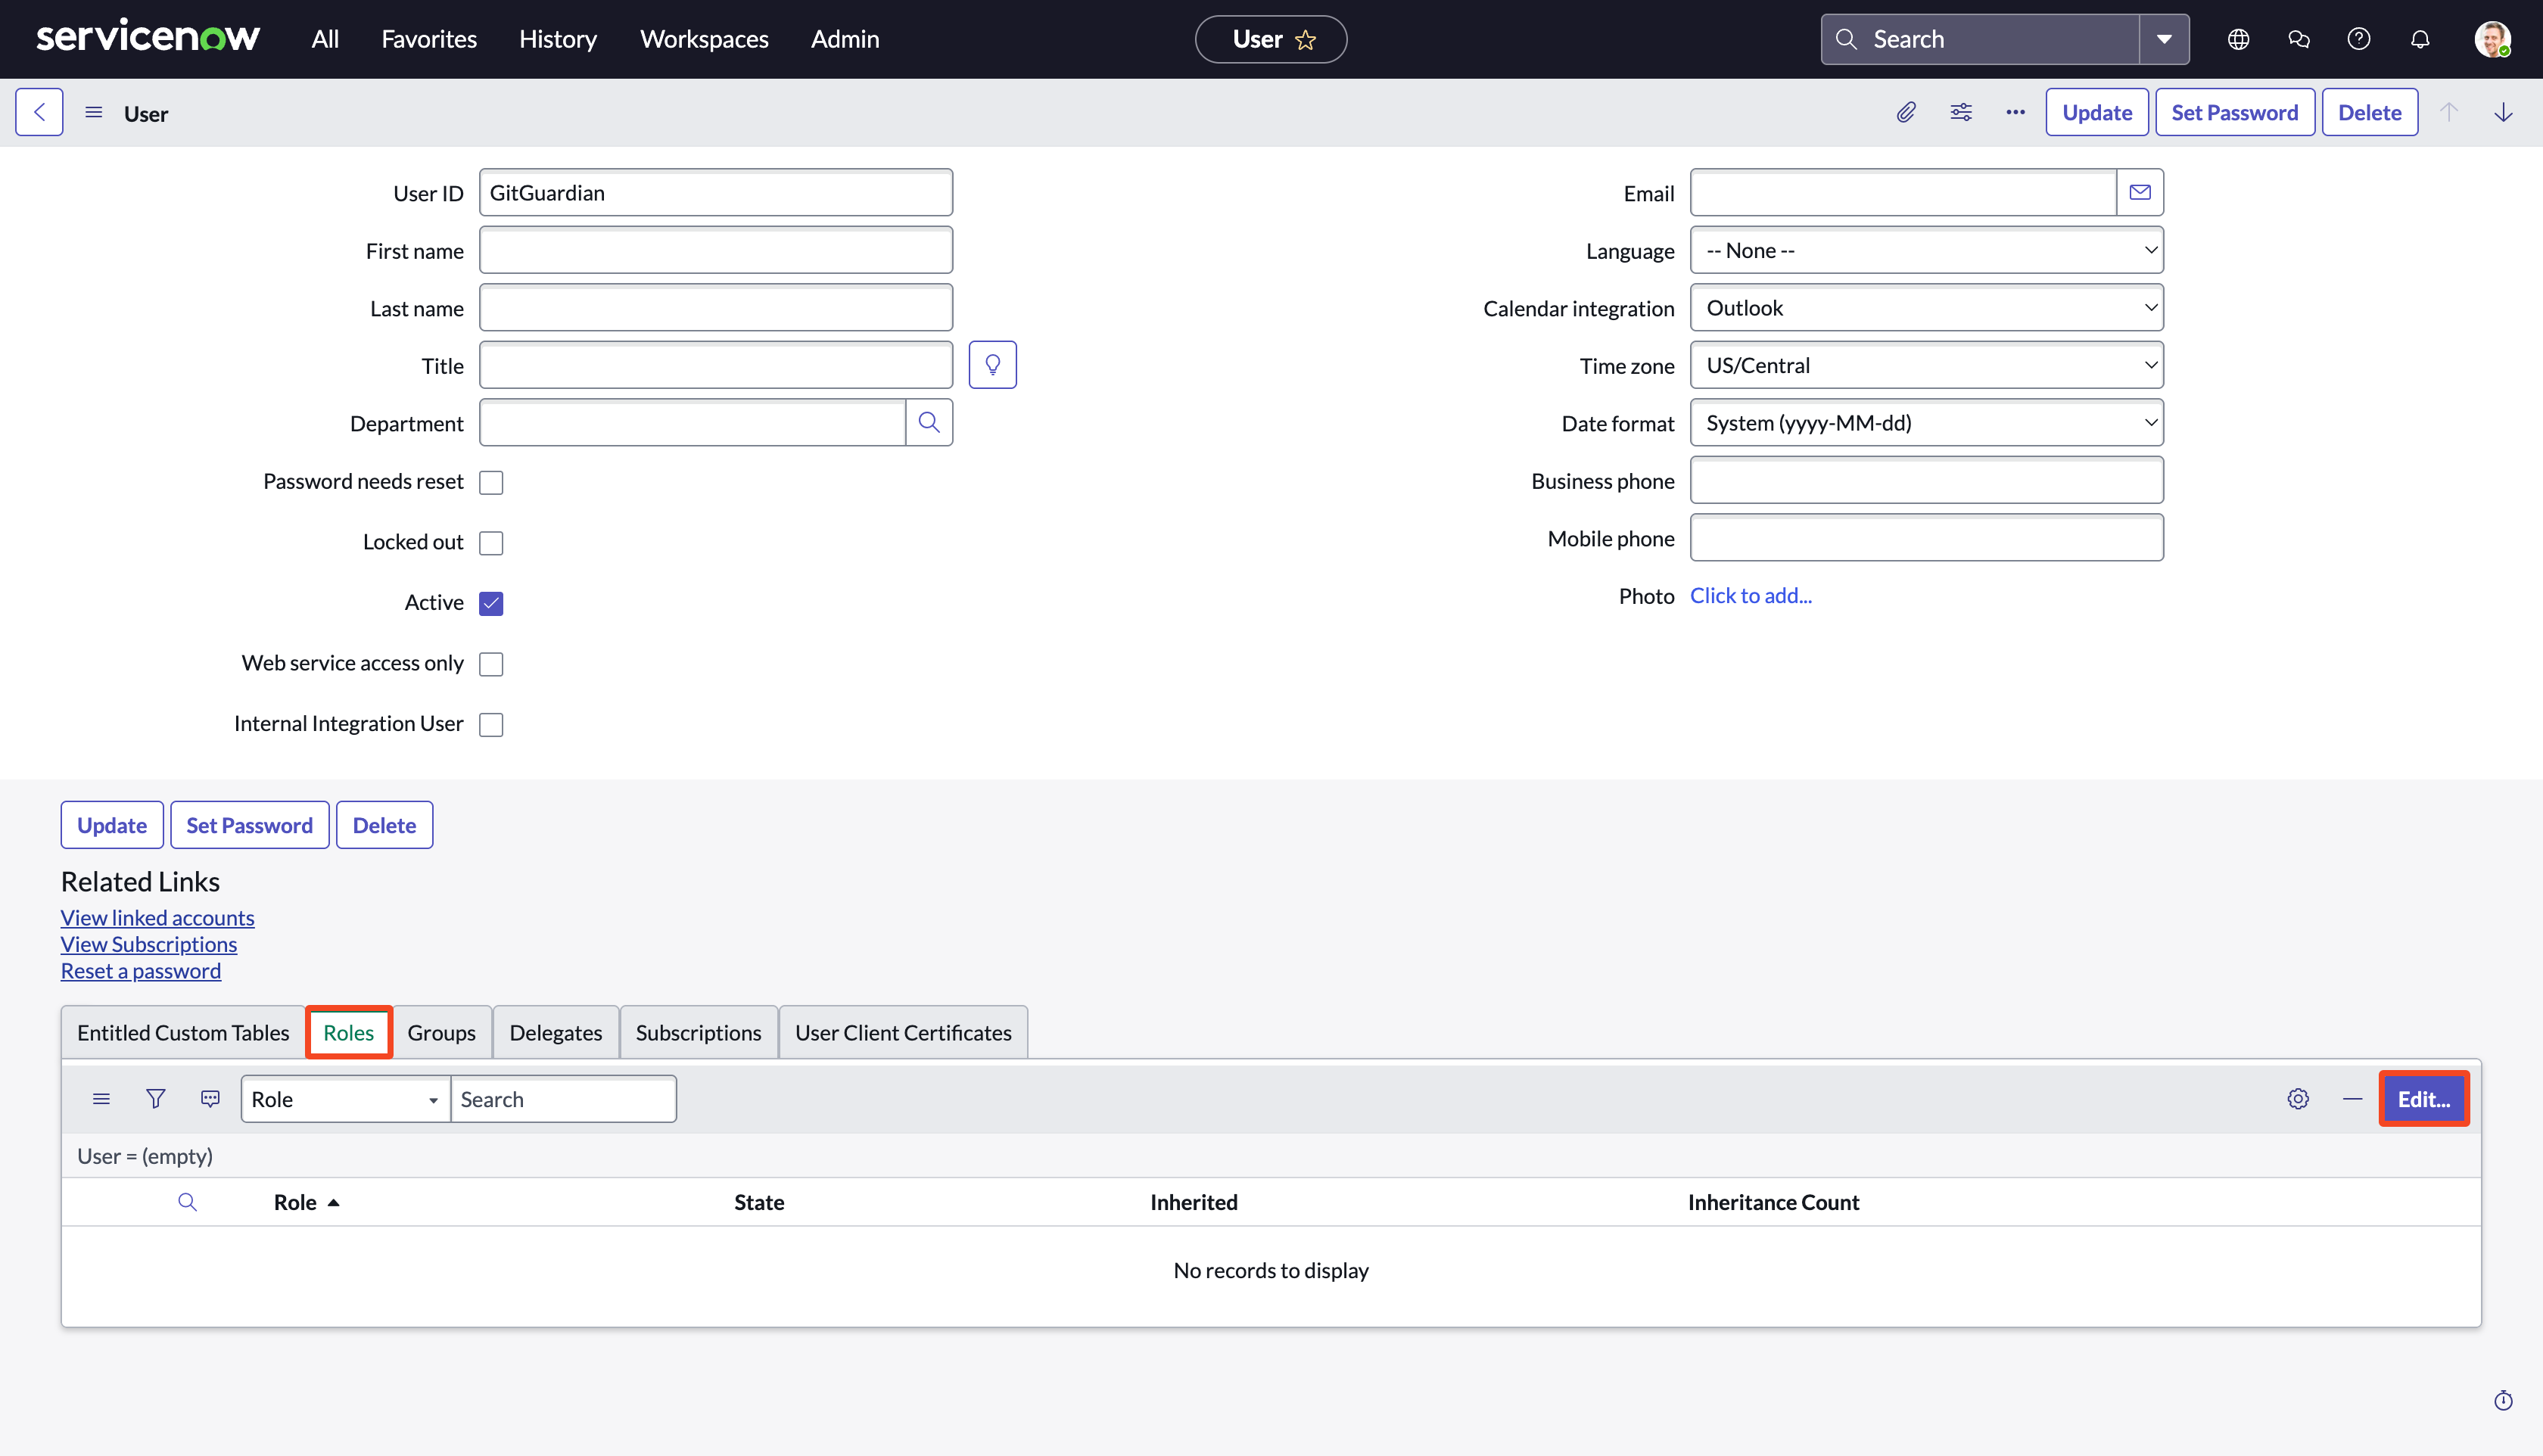
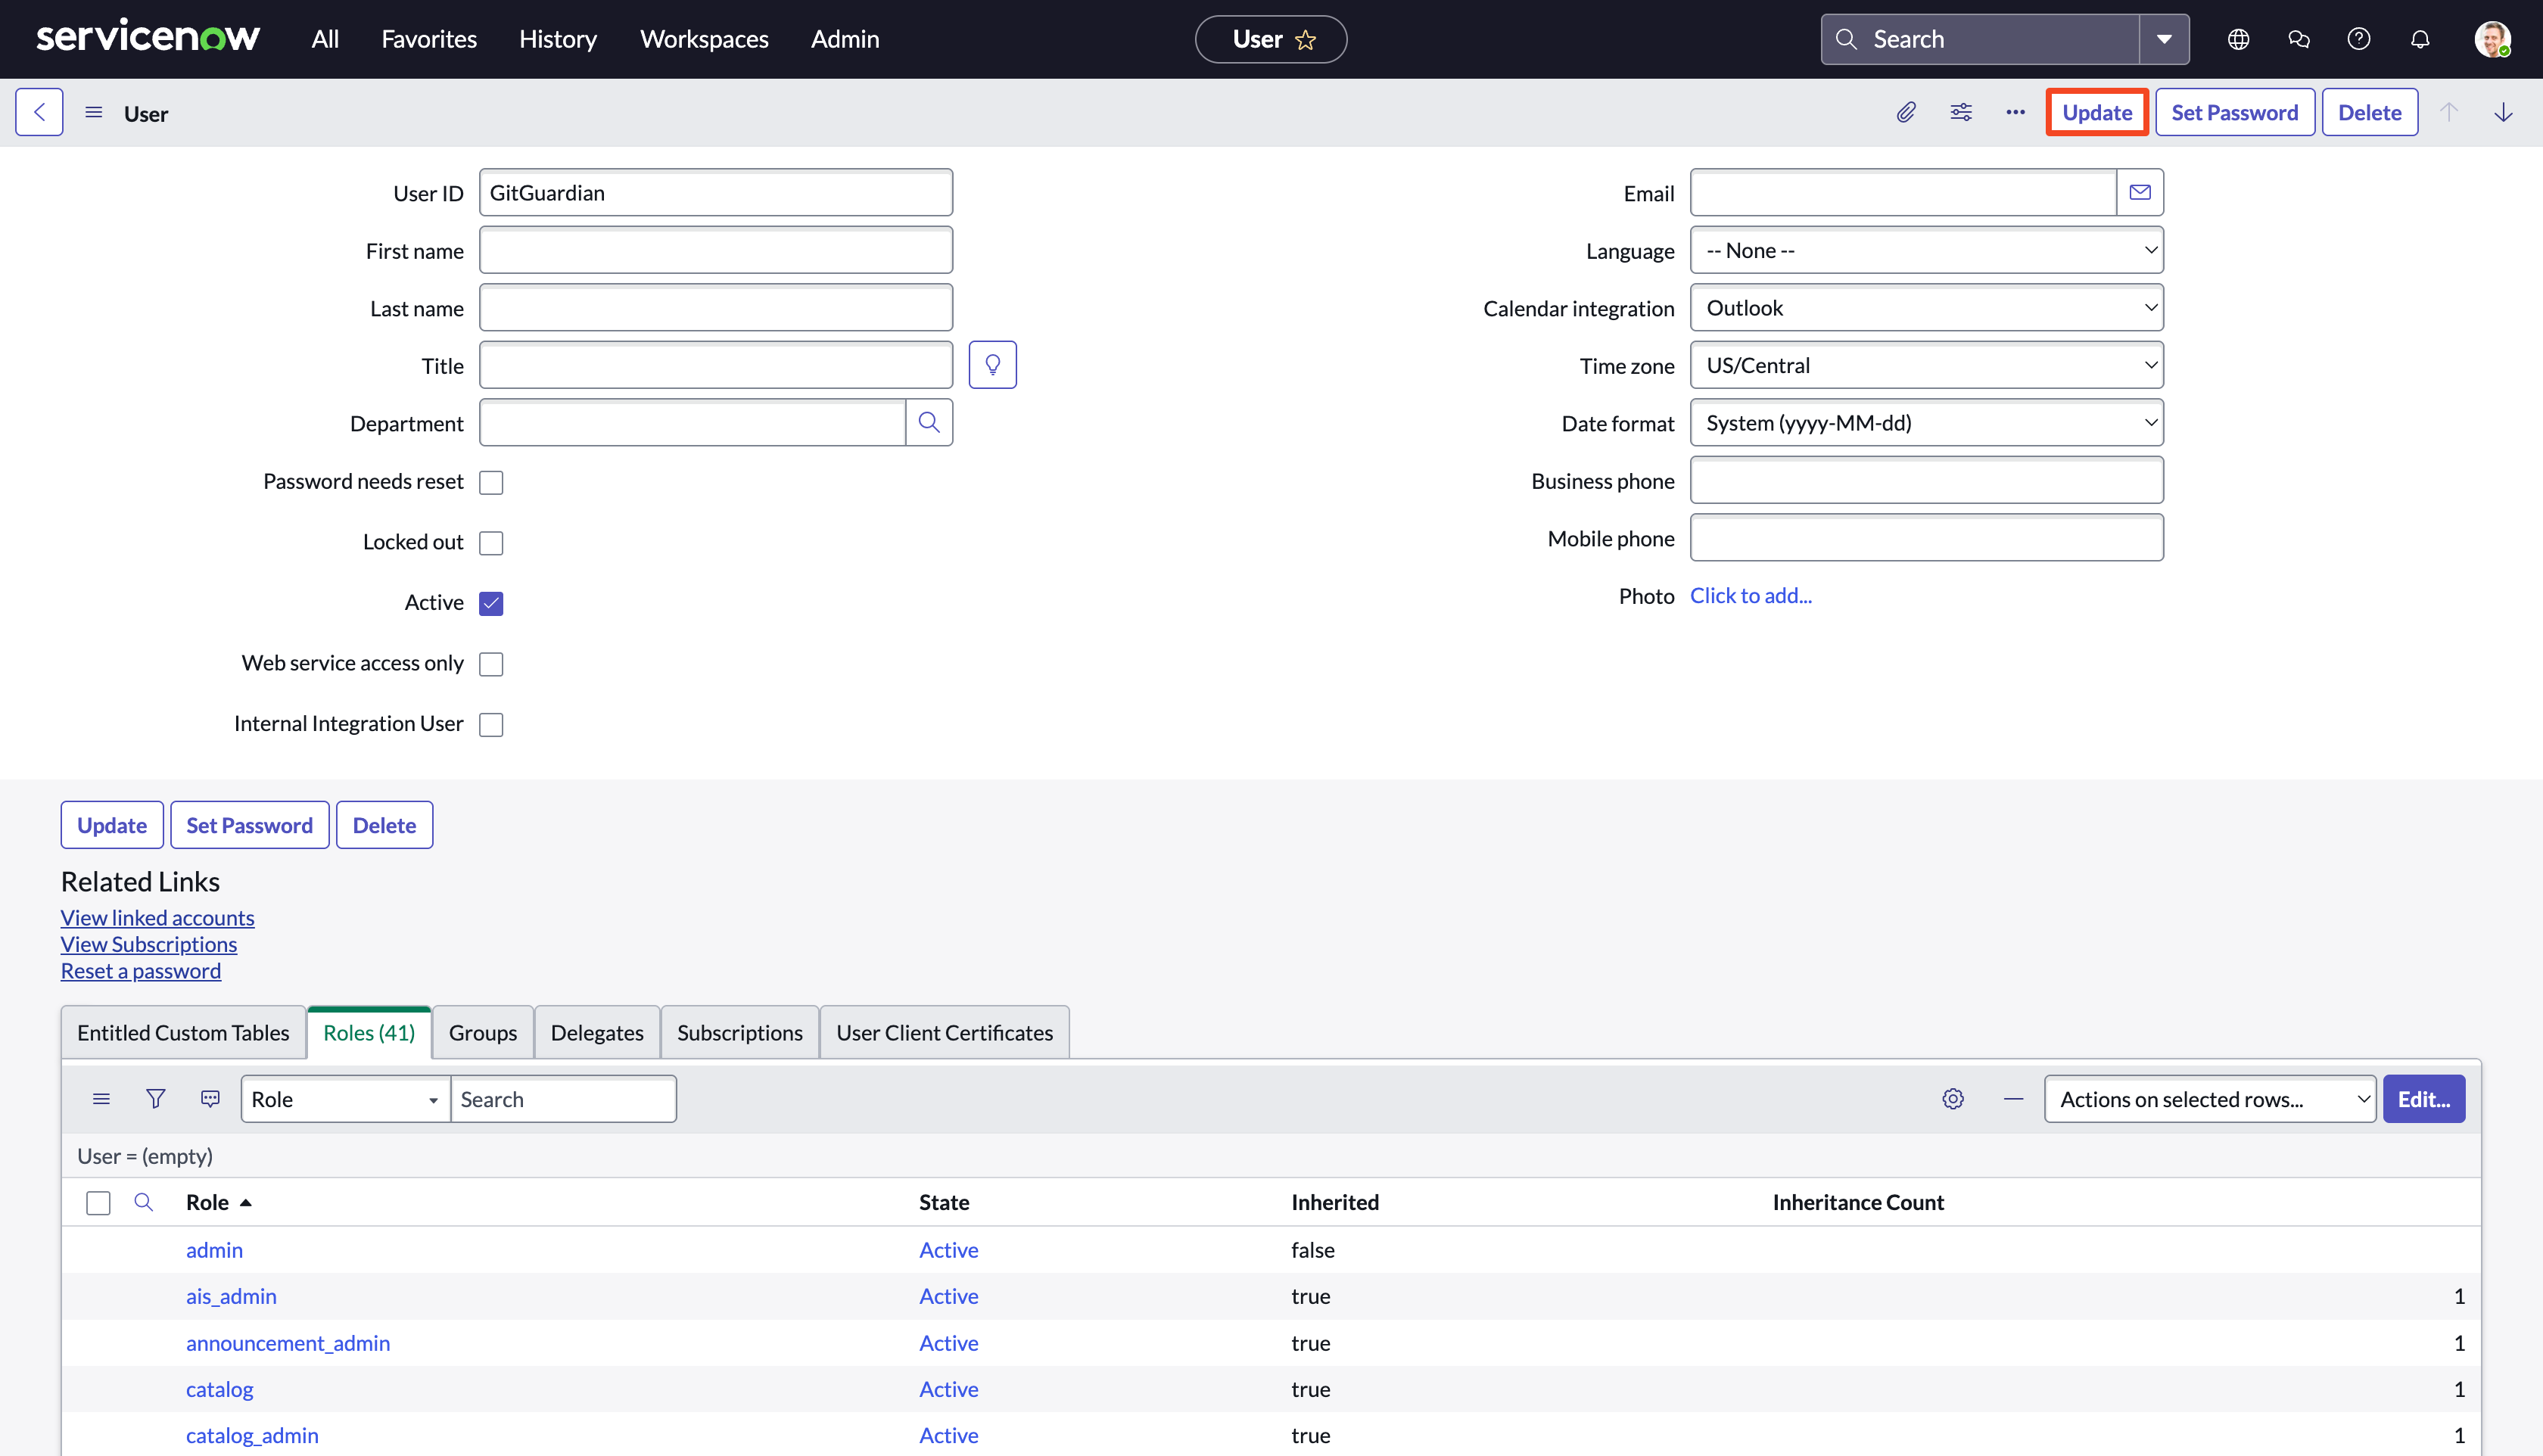
2. Give the required roles to the user
- Click on the User ID (e.g.:
GitGuardian) to edit it and add the required roles - Go to the Roles tab and click Edit...
- Add the following roles and click Save:
adminsnc_read_onlyTheadminrole will give the user access to all tables, while thesnc_read_onlyrole will restrict access to read-only.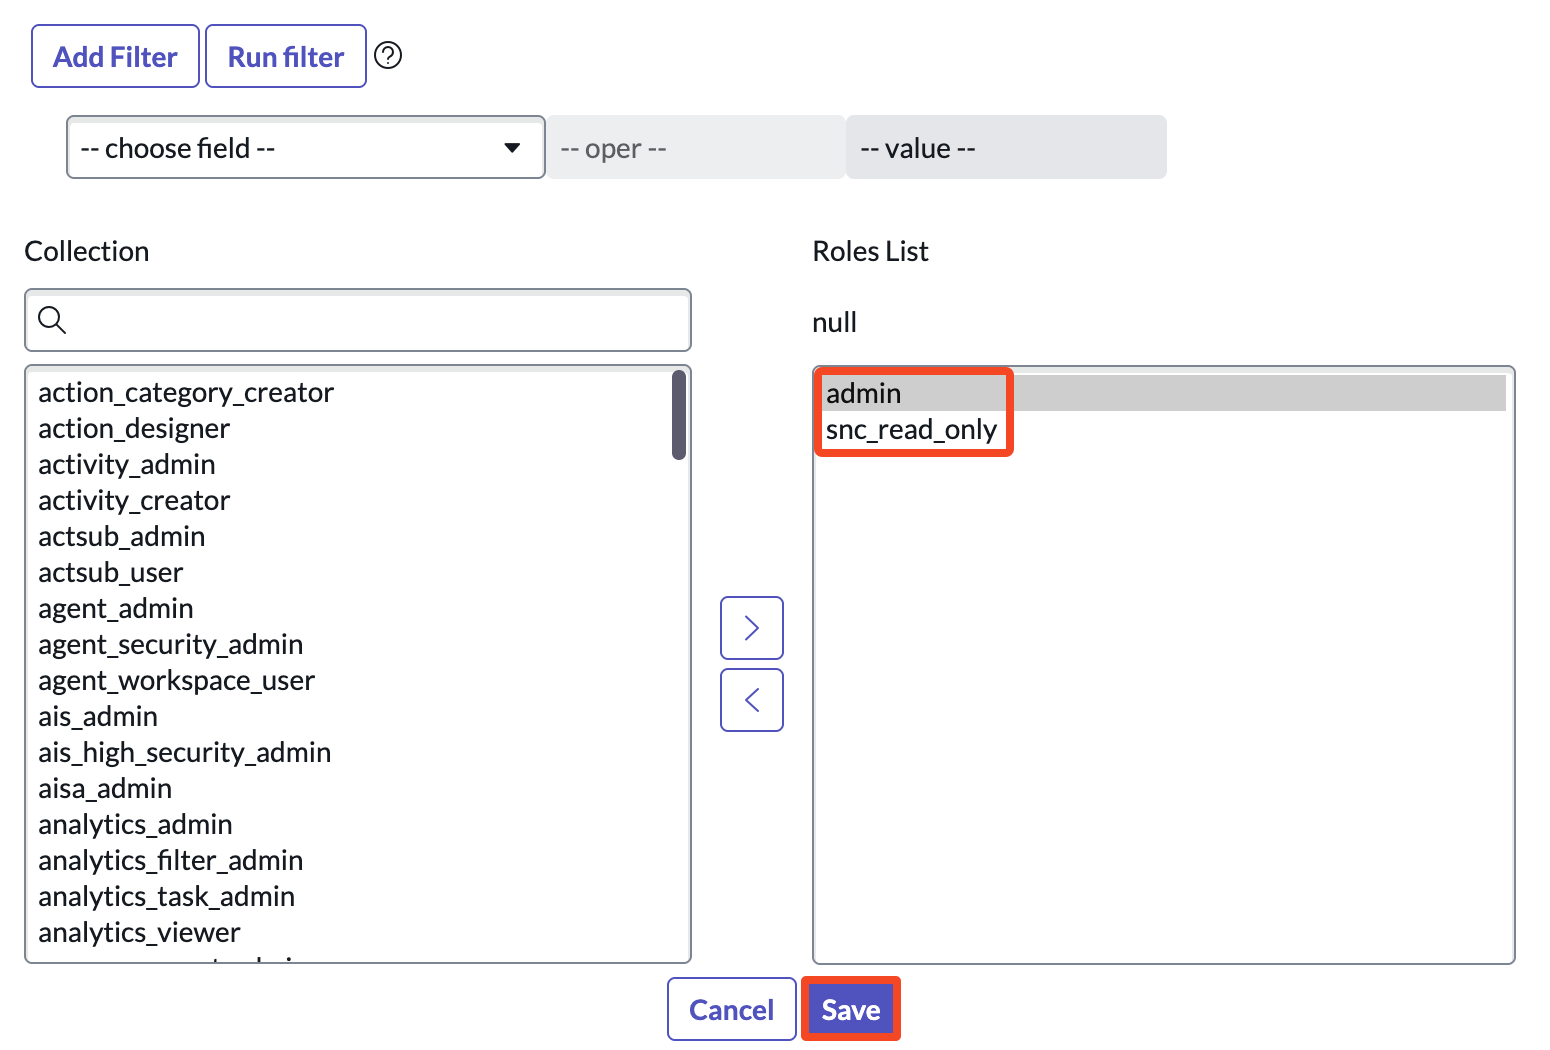
- Click Update to validate the roles added to the user
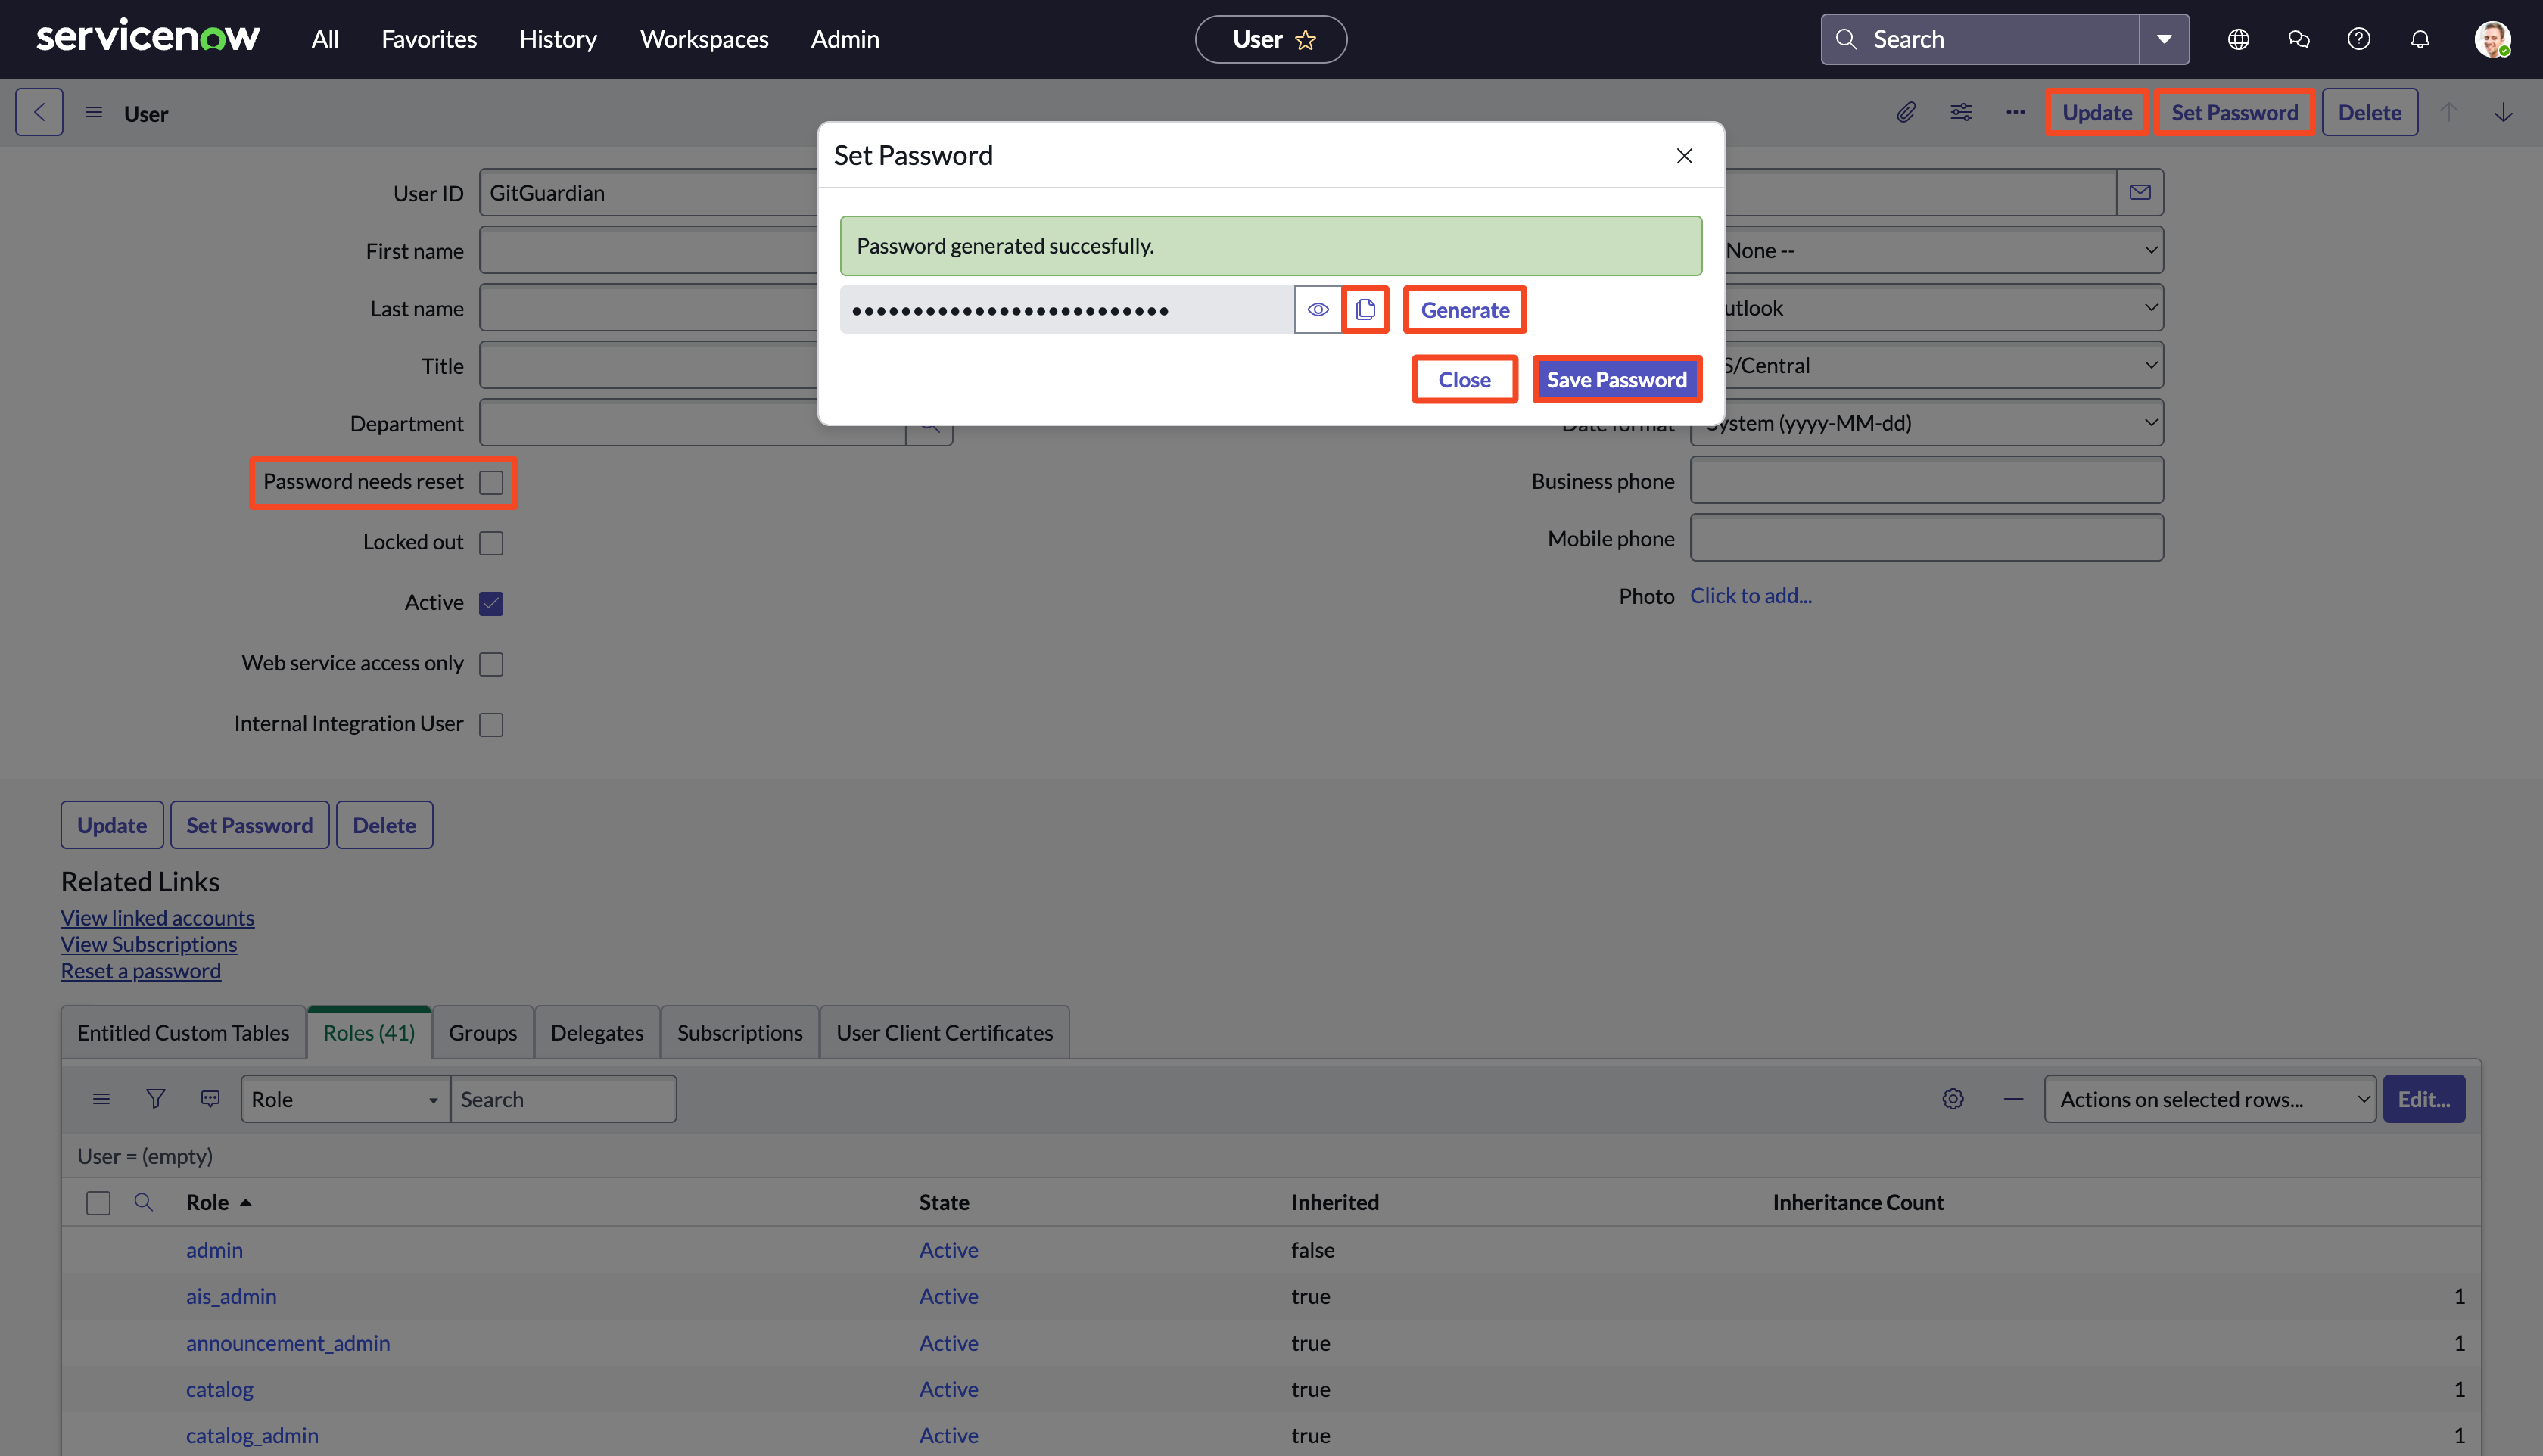
3. Set a password to the user
- Click on the User ID (e.g.:
GitGuardian) to edit it and set a password - Click Set Password
- Click Generate and copy the password
- Save by clicking Save Password and Close
- Uncheck Password needs reset option and click Update
4. Finalize the configuration in GitGuardian
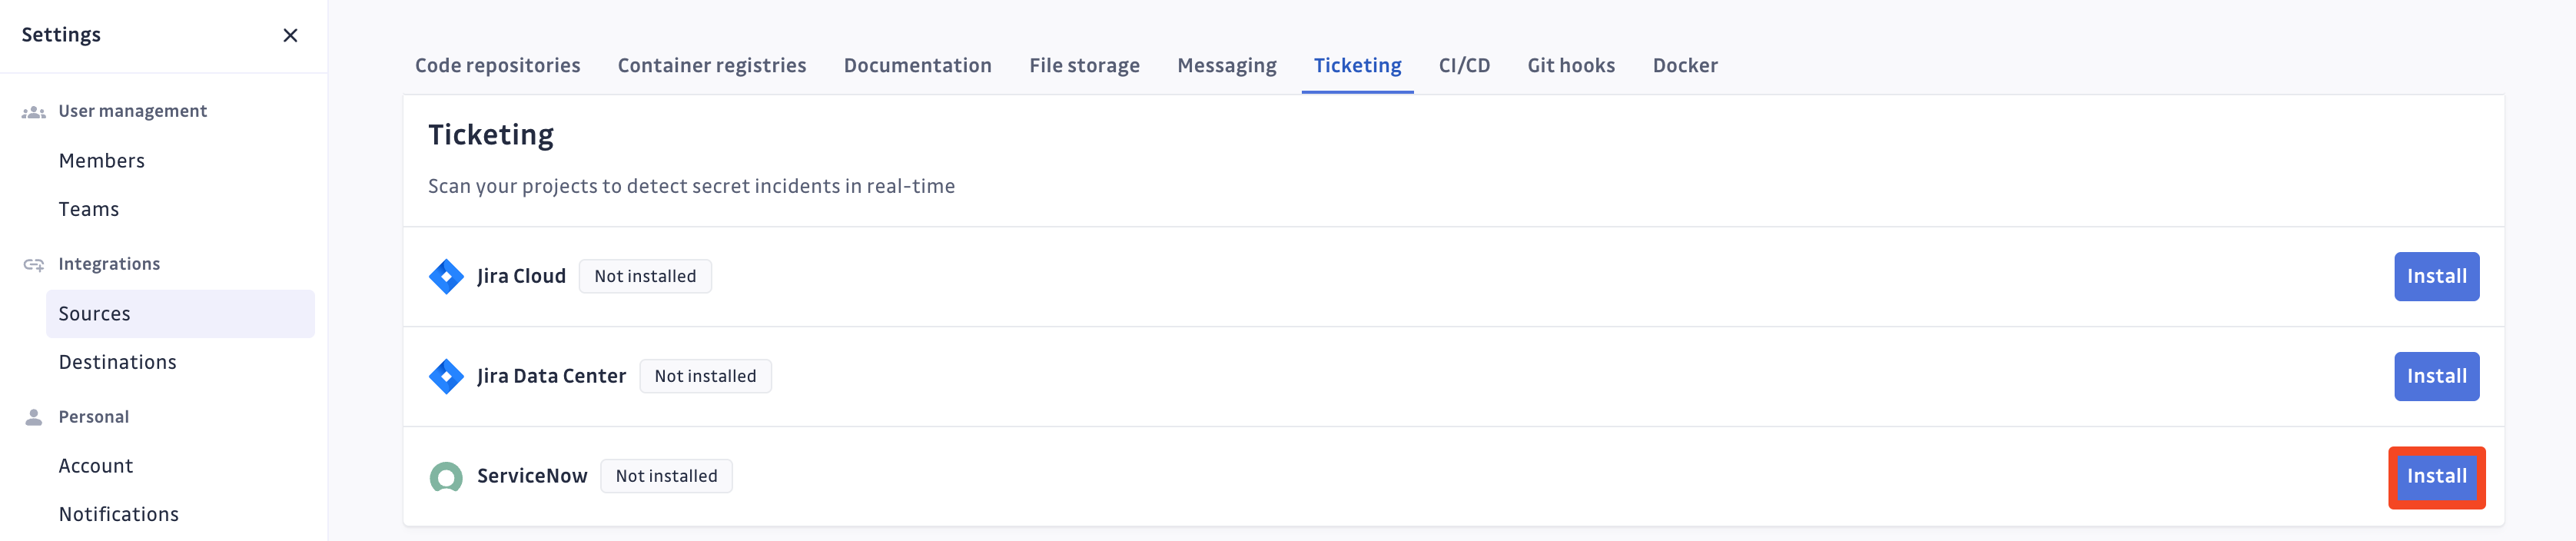
- In the GitGuardian platform, navigate to the Sources integration page
- Click Install next to ServiceNow in the Ticketing section
- Click Install on the ServiceNow integration page
- Paste your ServiceNow instance URL in the API endpoint URL field (e.g.:
https://acme.service-now.com/) - Paste the newly created Username (e.g.:
GitGuardian), its associated Password, and click Add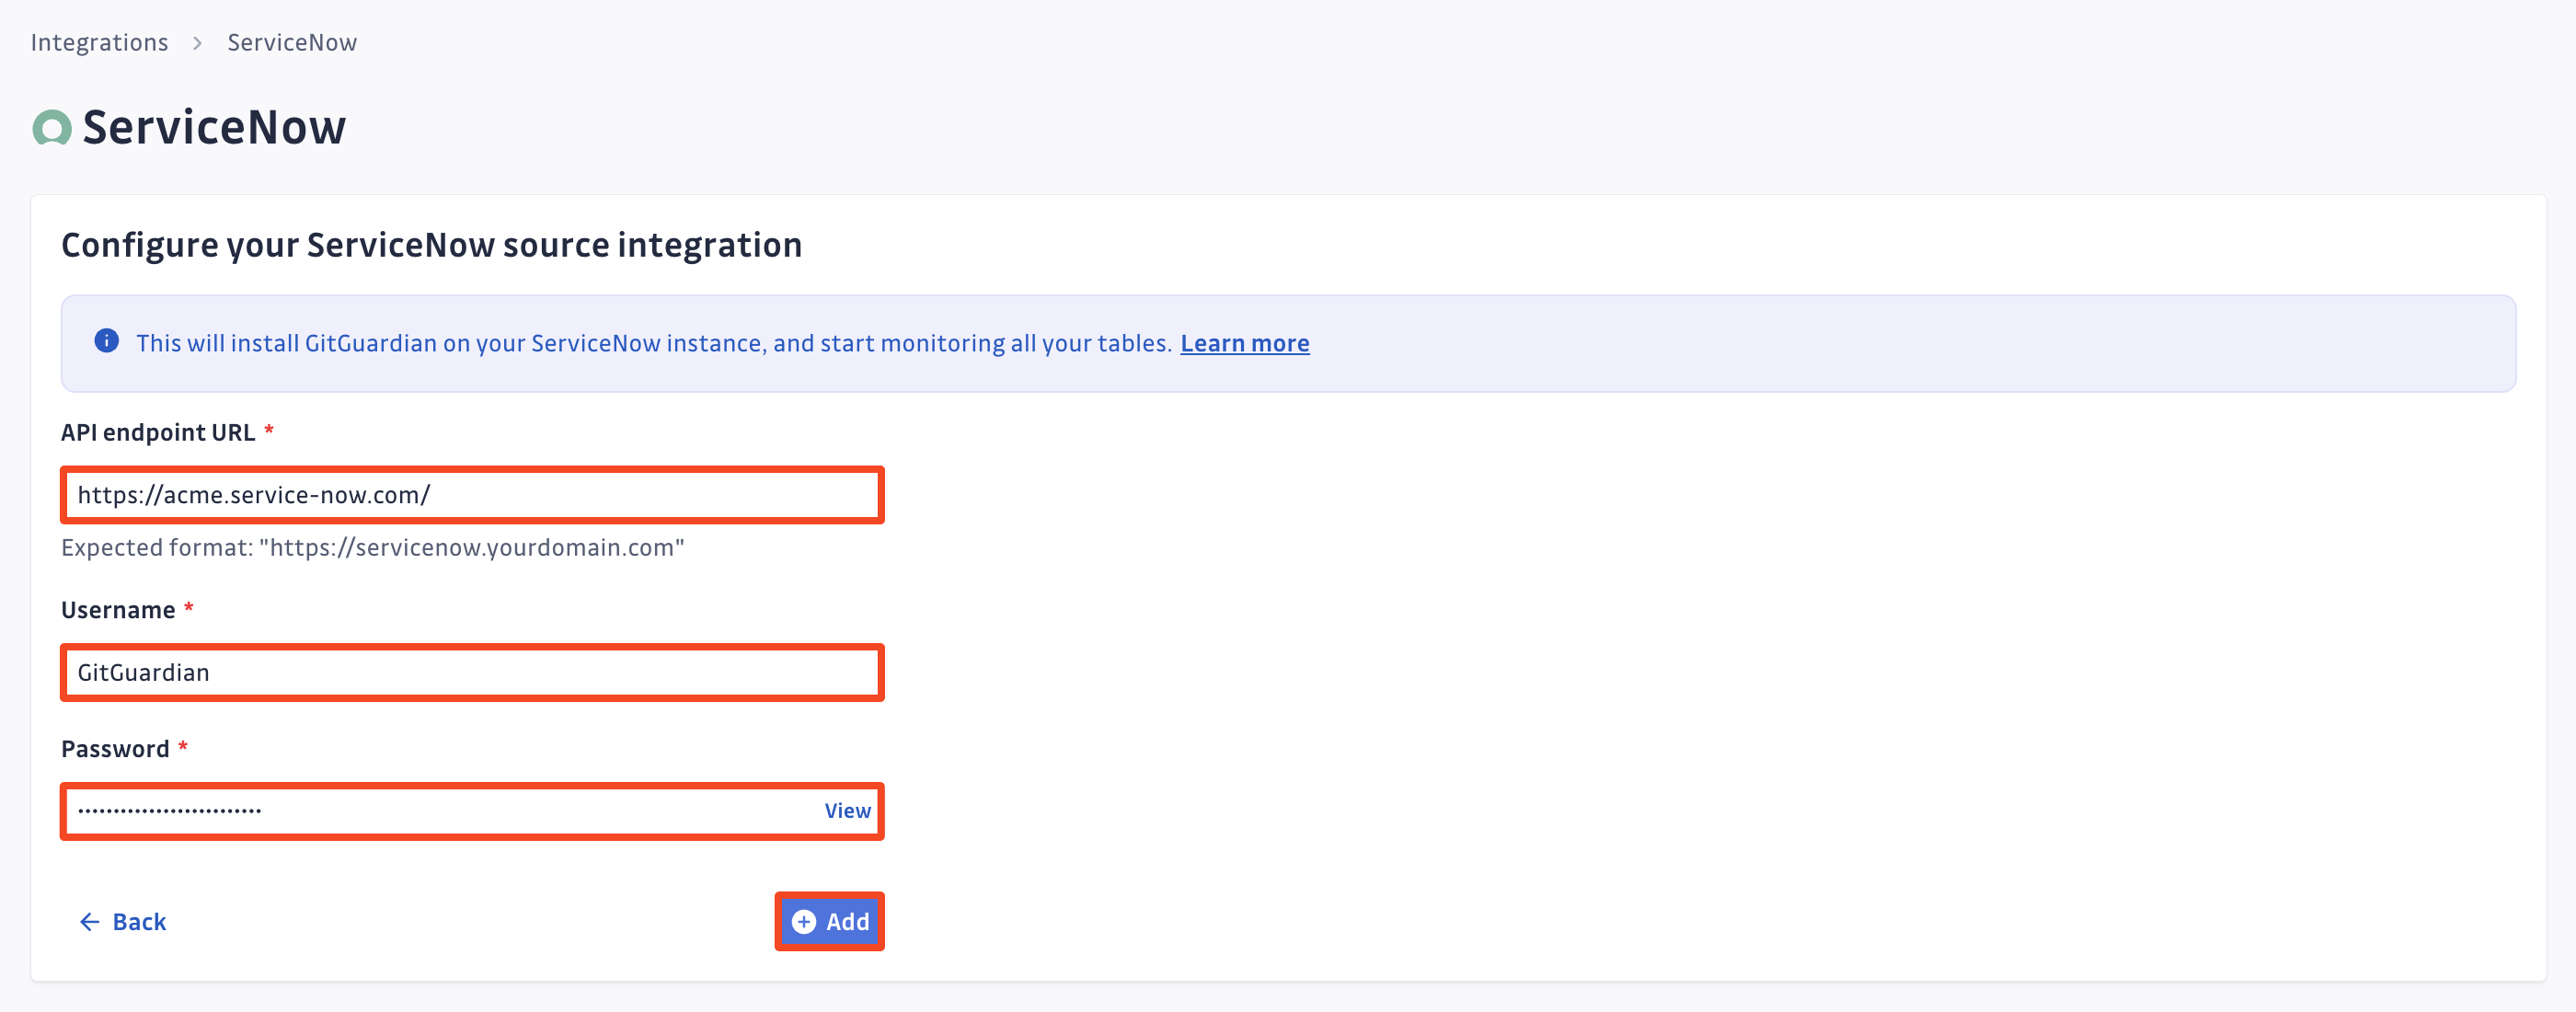
That's it! Your ServiceNow instance is now installed, and GitGuardian is monitoring all records of your tables for secrets.
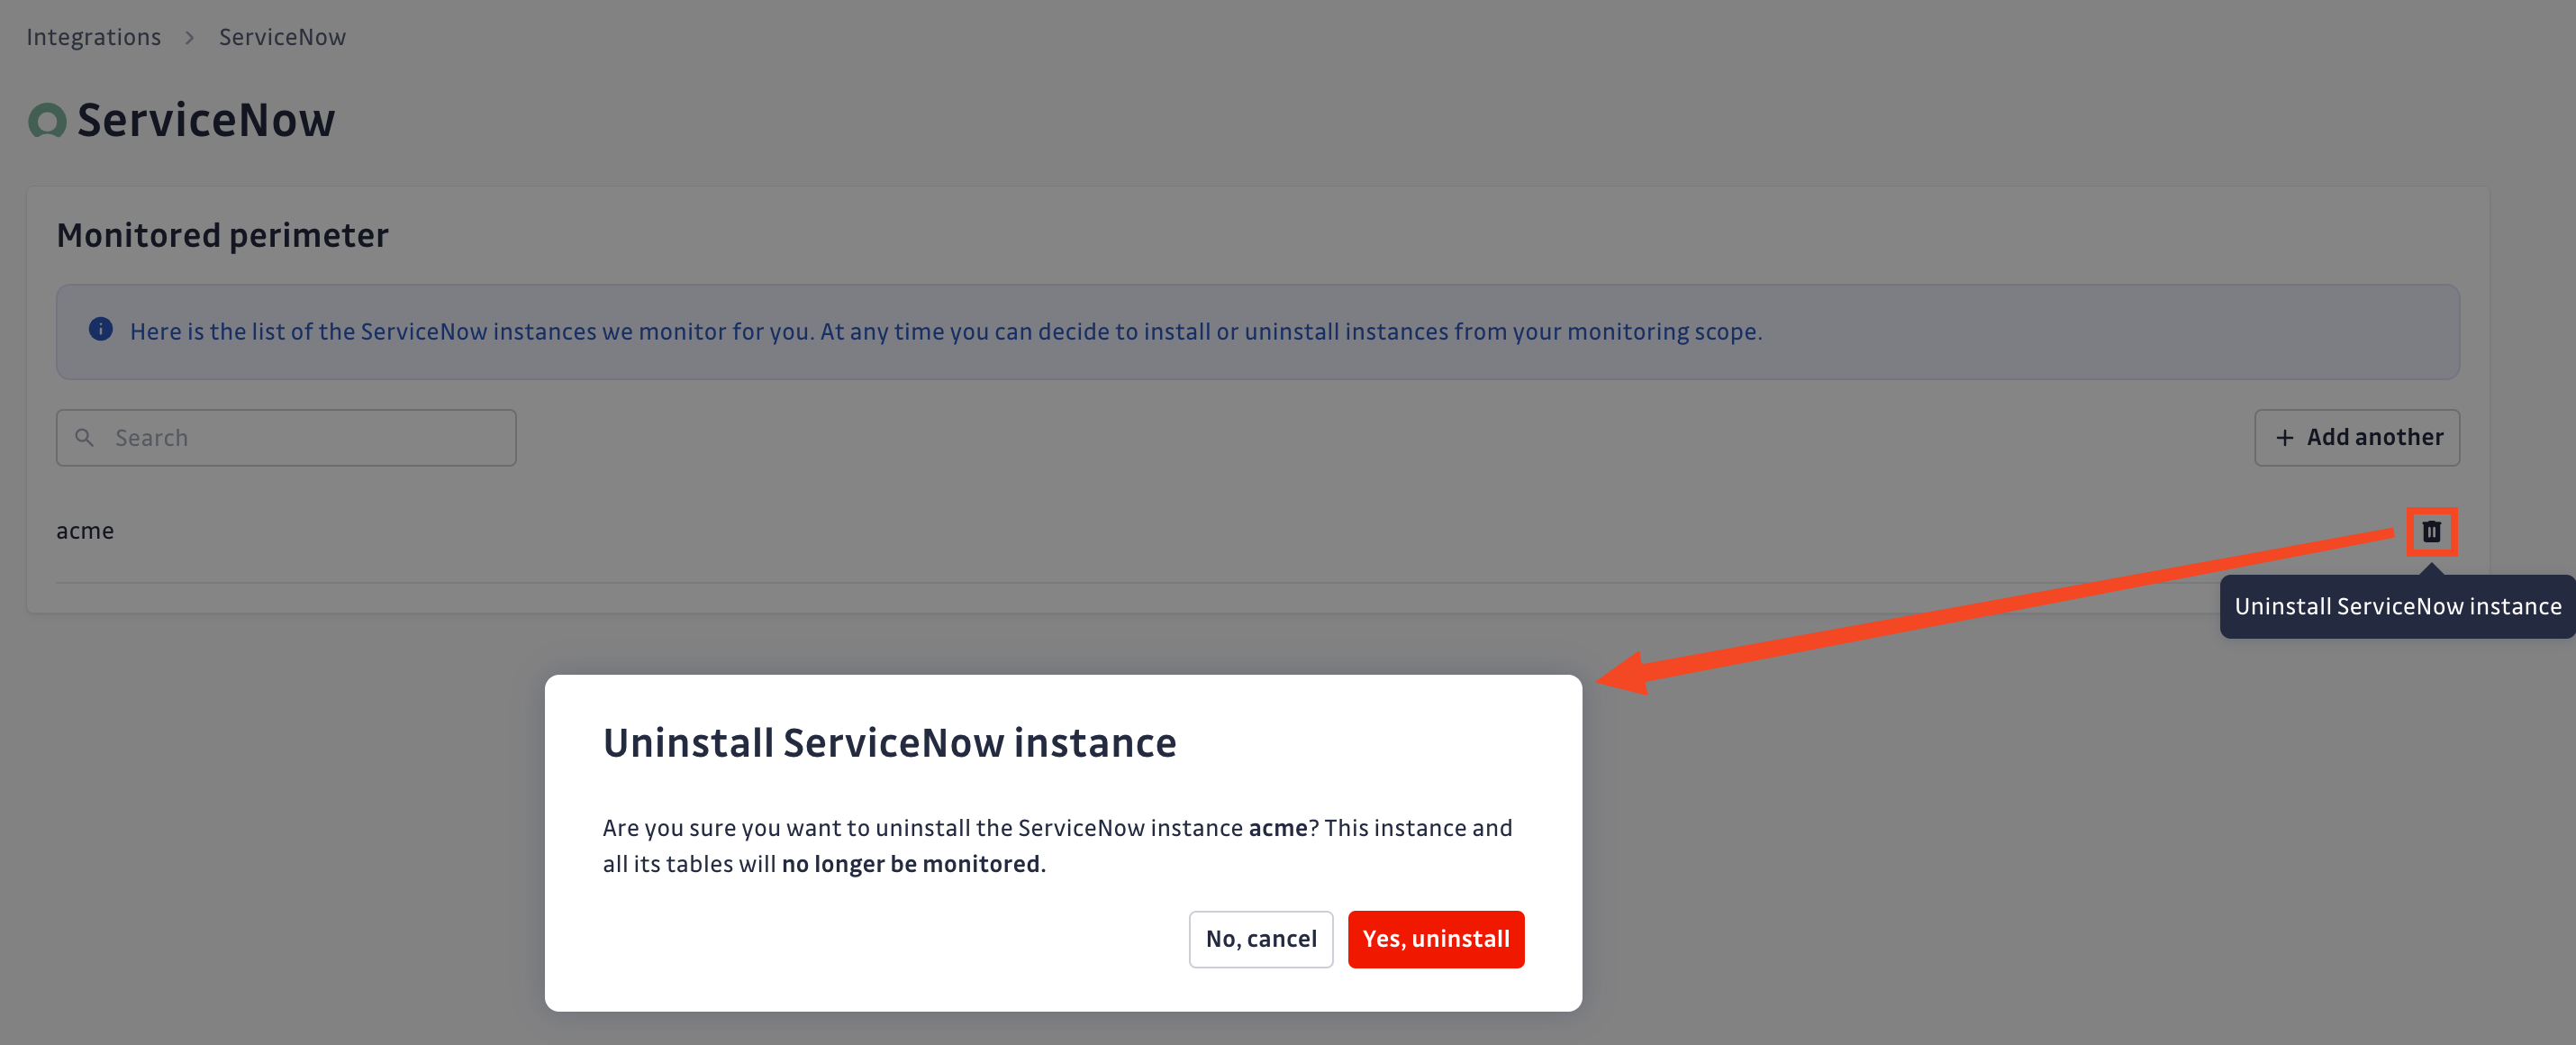
Uninstall your ServiceNow instance
To uninstall a ServiceNow instance:
- In the GitGuardian platform, navigate to the Sources integration page
- Click Edit next to ServiceNow in the Ticketing section
- Click the bin icon next to the ServiceNow instance to uninstall
- Confirm by clicking Yes, uninstall in the confirmation modal
That's it! Your ServiceNow instance is now uninstalled.
Additional Self-Hosted considerations
For GitGuardian Self-Hosted instances, scan frequency can be configured in the Admin Area:
- Time interval unit: seconds
- Default value: 3600 (1 hour)
- Minimum value: 1800 (30 minutes)
Privacy
Country-specific laws and regulations may require you to inform your users that your tables are being scanned for secrets. Here is a suggestion for a message you may want to use:
As part of our internal information security process, the company scans its tables for potential secrets leaks using GitGuardian. All data collected will be processed for the purpose of detecting potential leaks. To find out more about how we manage your personal data and to exercise your rights, please refer to our employee/partner privacy notice. Please note that only tables relating to the company’s activity and business may be monitored and that users shall refrain from sharing personal or sensitive data not relevant to the table’s purpose.

