Auth0
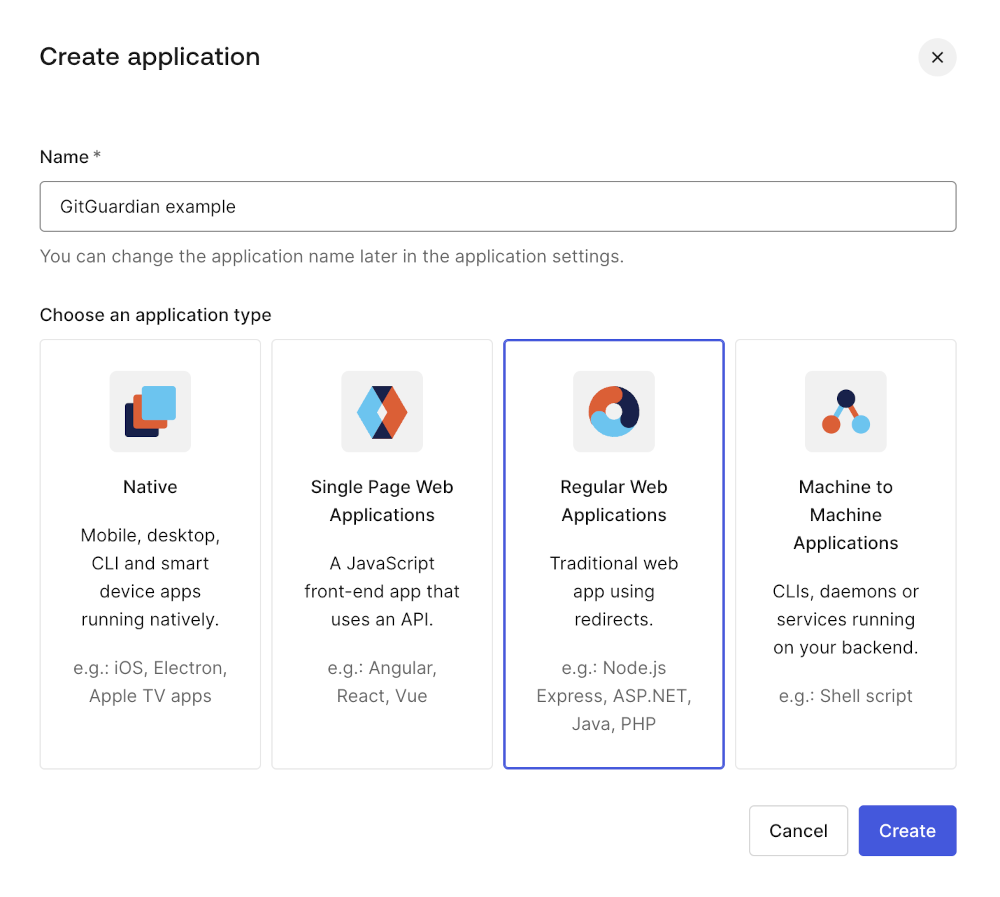
- First, go to your dashboard, select "Application", and click on "Create Application"
- Choose "Regular Web Applications" as type and a name.
- Go to your application addons. Click on "SAML2 Web App" and then on "Settings"
- Fill the
Application Callback URLwith theACS URLprovided in GitGuardian dashboard.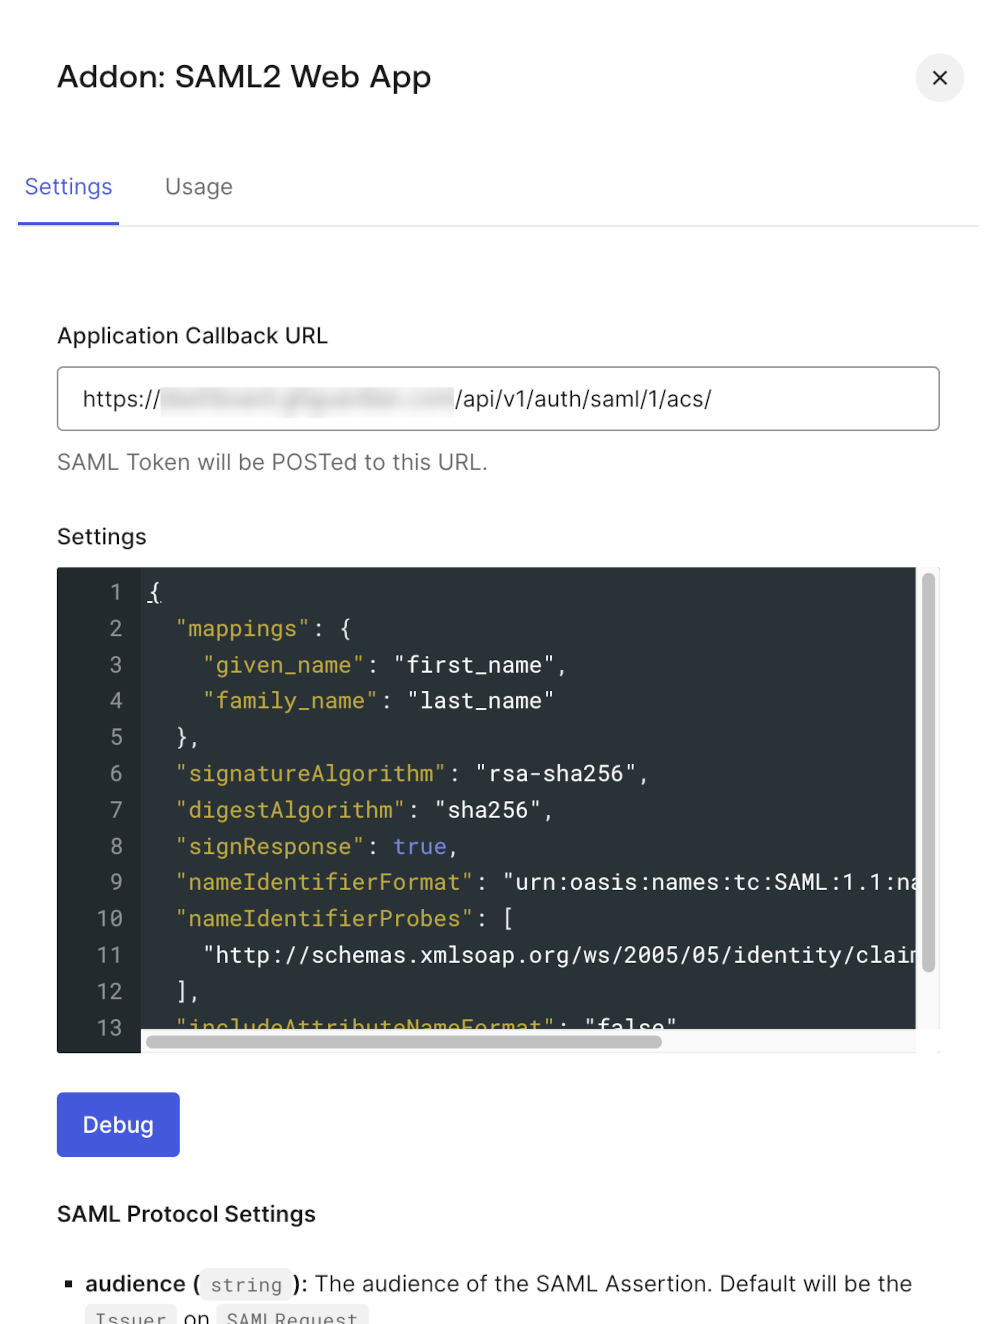
- Then, copy-paste these settings to configure mappings, name identifier and message signatures:
{
  "mappings": {
    "given_name": "first_name",
    "family_name": "last_name"
  },
  "signatureAlgorithm": "rsa-sha256",
  "digestAlgorithm": "sha256",
  "signResponse": true,
  "nameIdentifierFormat": "urn:oasis:names:tc:SAML:1.1:nameid-format:emailAddress",
  "nameIdentifierProbes": [
    "http://schemas.xmlsoap.org/ws/2005/05/identity/claims/emailaddress"
  ],
  "includeAttributeNameFormat": "false"
}
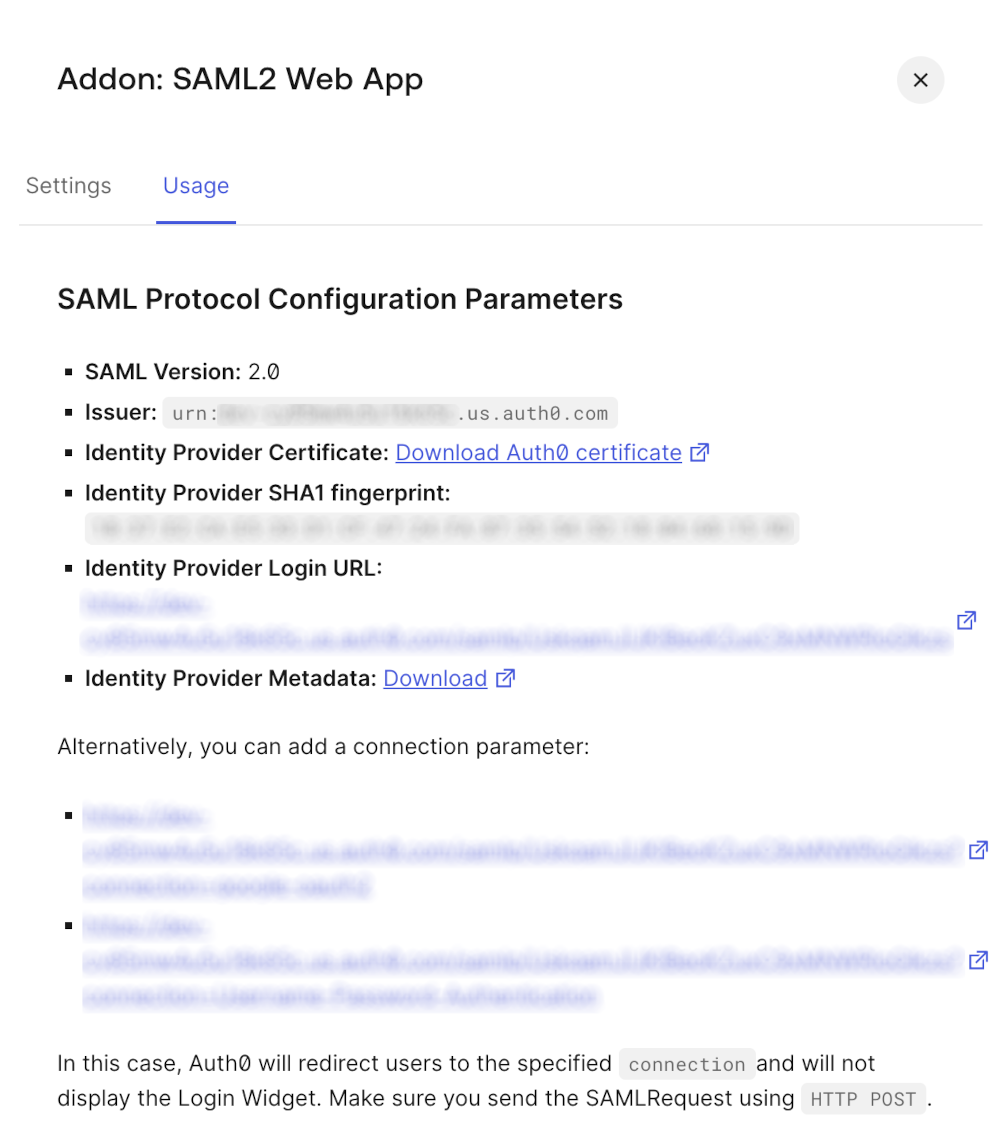
- Finally, we need to configure the Identity Provider in GitGuardian dashboard. First, click on "Usage", then use these values:
Entity idfield is filled with theIssuervalueSingle Sign-On URLfield is filled with theIdentity Provider Login URLvalueX509 Certfield is filled with the plain text value of the Identity Provider Certificate- Ensure that the checkbox I have mapped the attributes first_name and last_name in my IdP is checked
- Ensure that the checkbox I have specified that the response assertions with RSA_SHA256 as signature algorithm and SHA256 as digest algorithm is unchecked
- Important: Don't forget to reserve your email domain to enable automatic SSO discovery.

