Microsoft Entra ID
tip
GitGuardian also supports SCIM provisioning for Microsoft Entra ID. See the SCIM configuration guide for setup instructions.
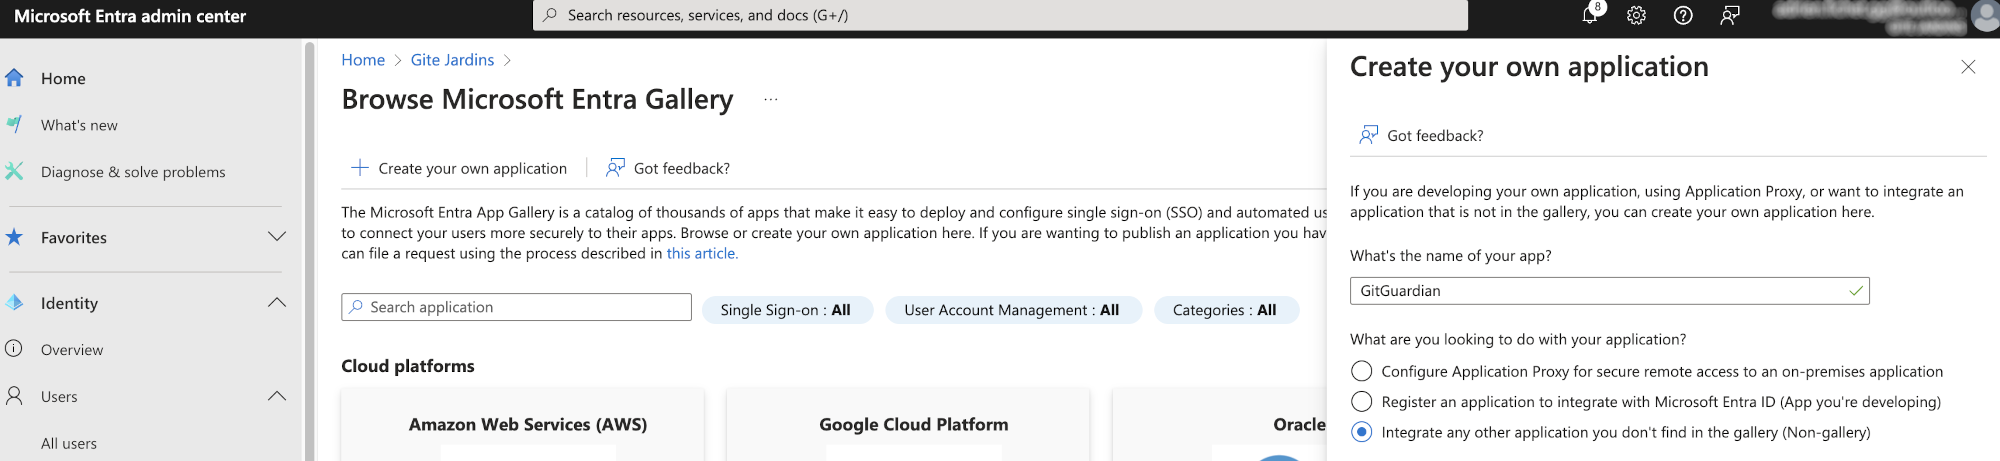
- First, go to the Microsoft Entra admin center, click on "Add enterprise application" at the bottom of the page, then "Create your own application".
- In the new panel that appears on the right, provide a name (e.g. "GitGuardian") and select "Integrate any other application you don't find in the gallery (Non-gallery)". Finally, click on the "Create" button.
- After a few seconds, you will be redirected to your newly created application. Click on "Set up single sign on" and choose the SAML sign-on method.

- Now, you need to configure the Service Provider in Microsoft Entra ID. Click on Edit in the "Basic SAML Configuration" box. Use these values:
Identifier (Entity Id)field is filled with theSP Entity IDvalue on GitGuardian dashboard.Reply URL (Assertion Consumer Service URL)field is filled with theACS URLvalue on GitGuardian dashboard.
Don't forget to click on "Save".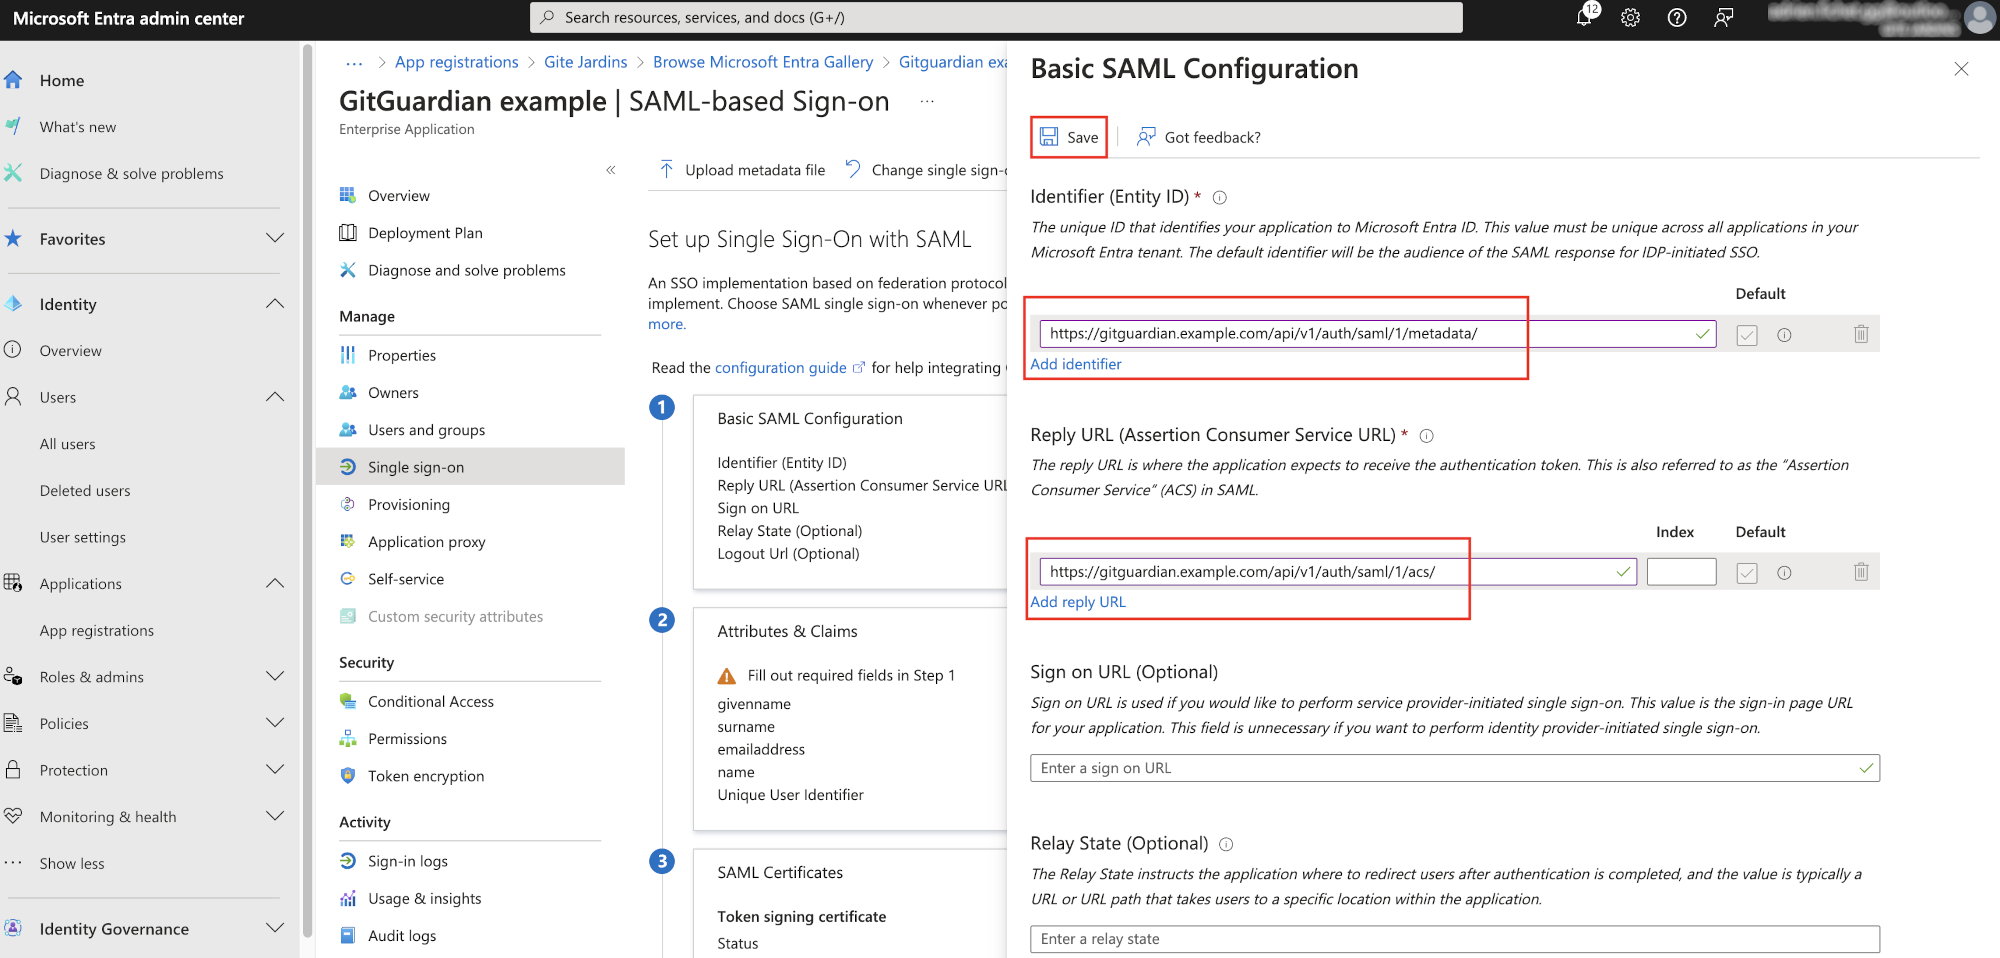
- Now, some mappings need to be done. Select 'Edit' on the 'Attributes & Claims' box. Click on 'Add new claim'. Leave 'Namespace' empty and use these values:
- Name:
first_name+ Source attribute:user.givenname
Don't forget to click on "Save".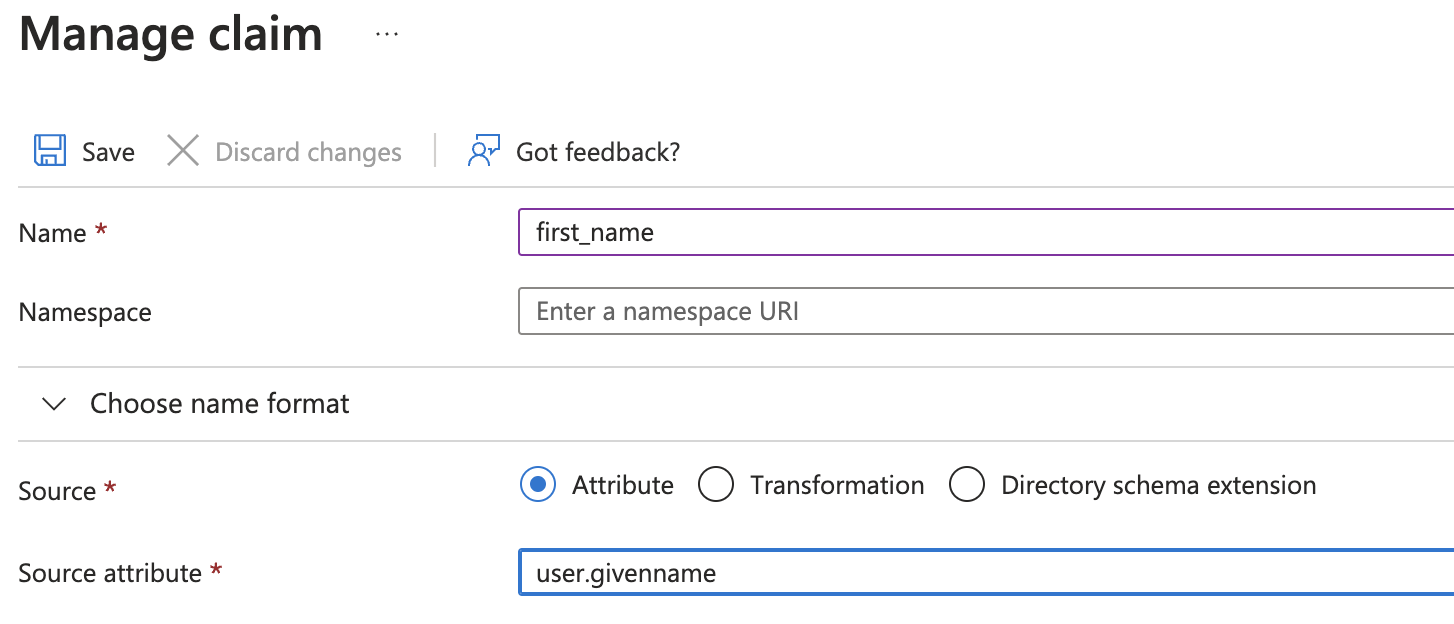
- Name:
last_name+ Source attribute:user.surname
Don't forget to click on "Save".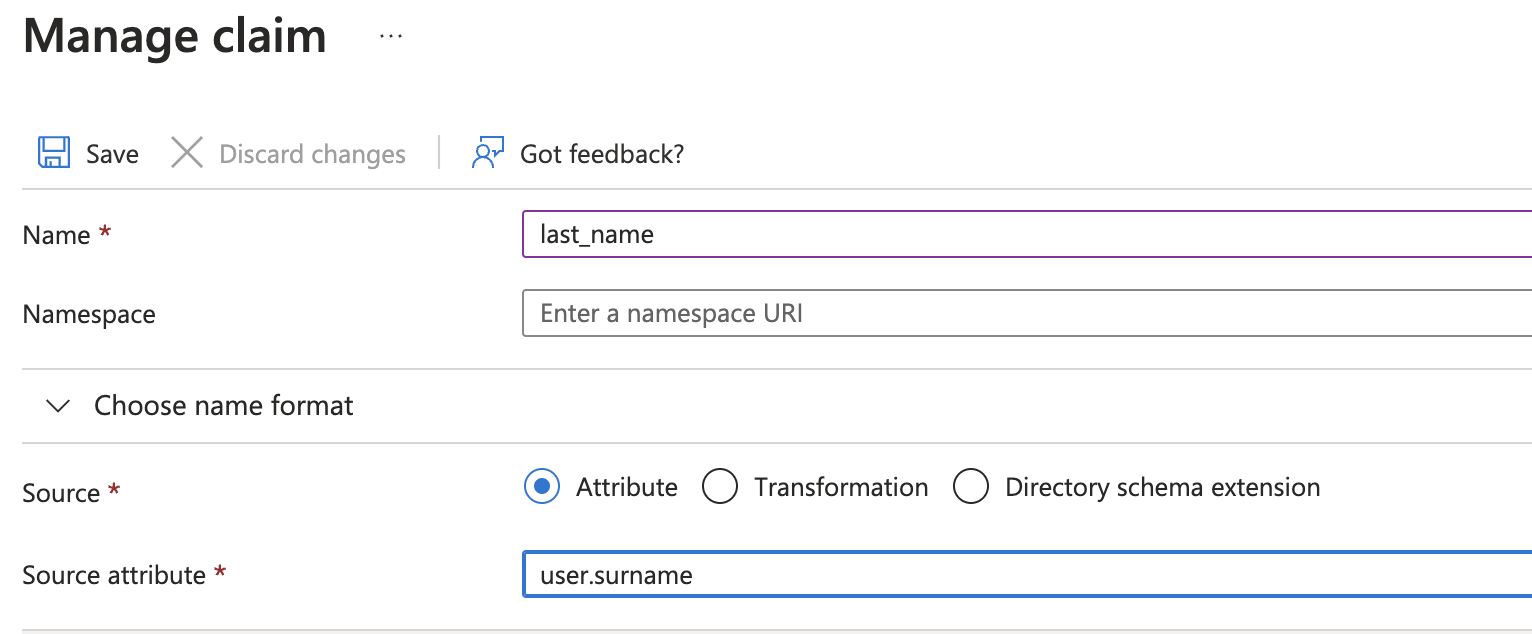
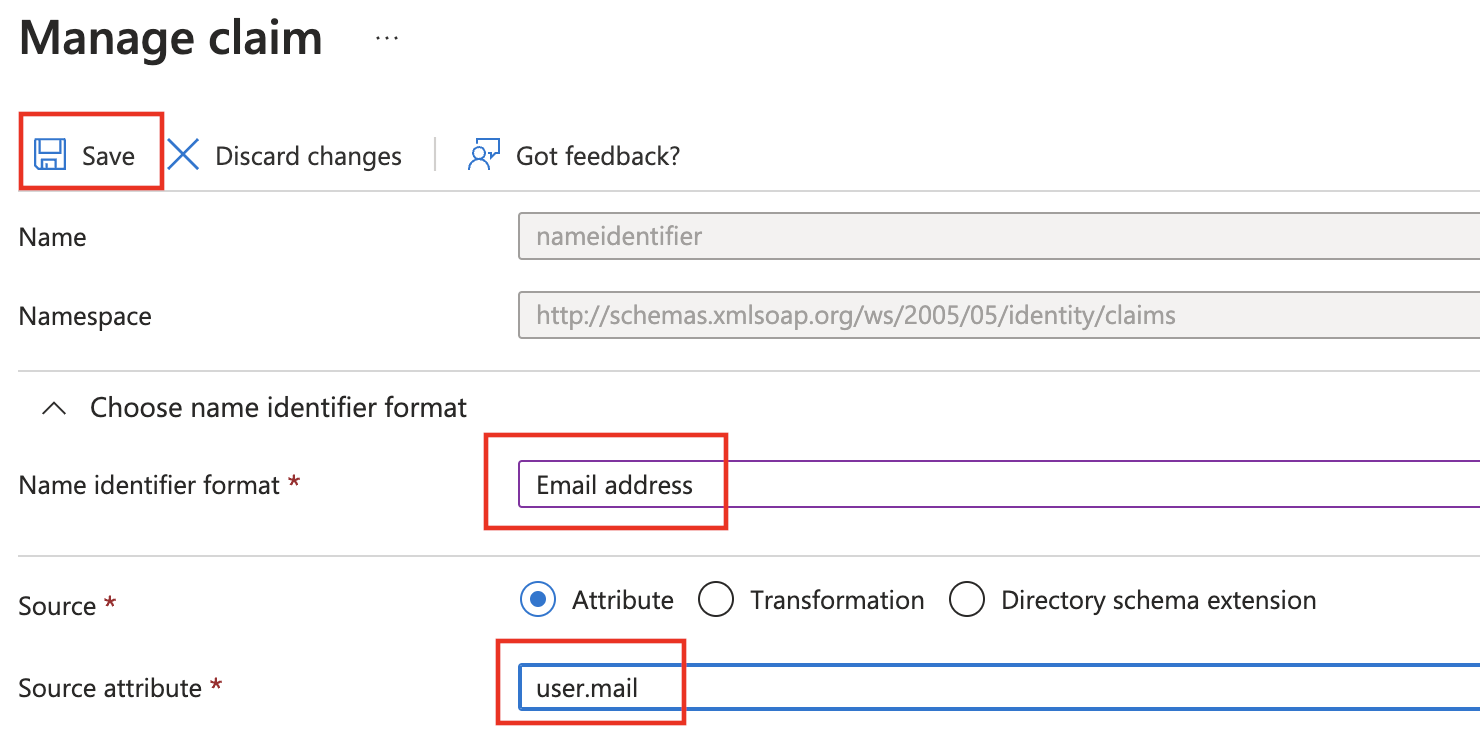
- Name:
- You also need to make sure that the Unique User Identifier (Name ID) claim is set to user.mail.
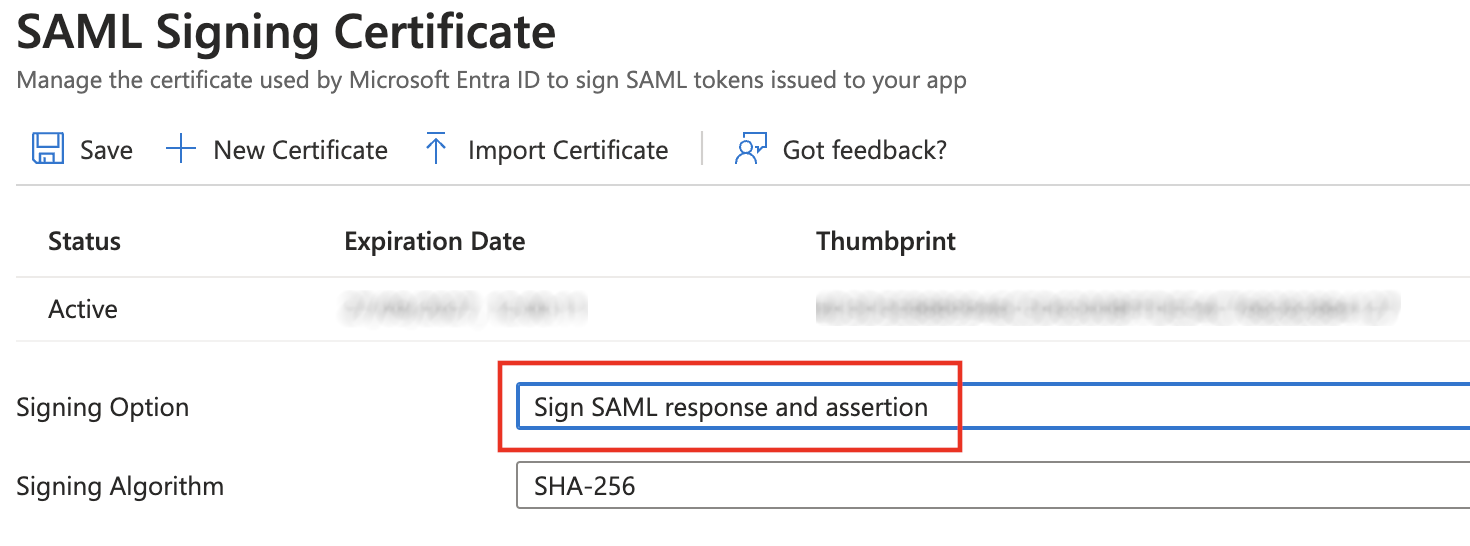
- Then, setup how responses and assertions are signed: Select 'Edit' on the 'SAML Certificates' box and choose 'Sign SAML response and assertion' as Signing Option and 'SHA-256' as Signing Algorithm:
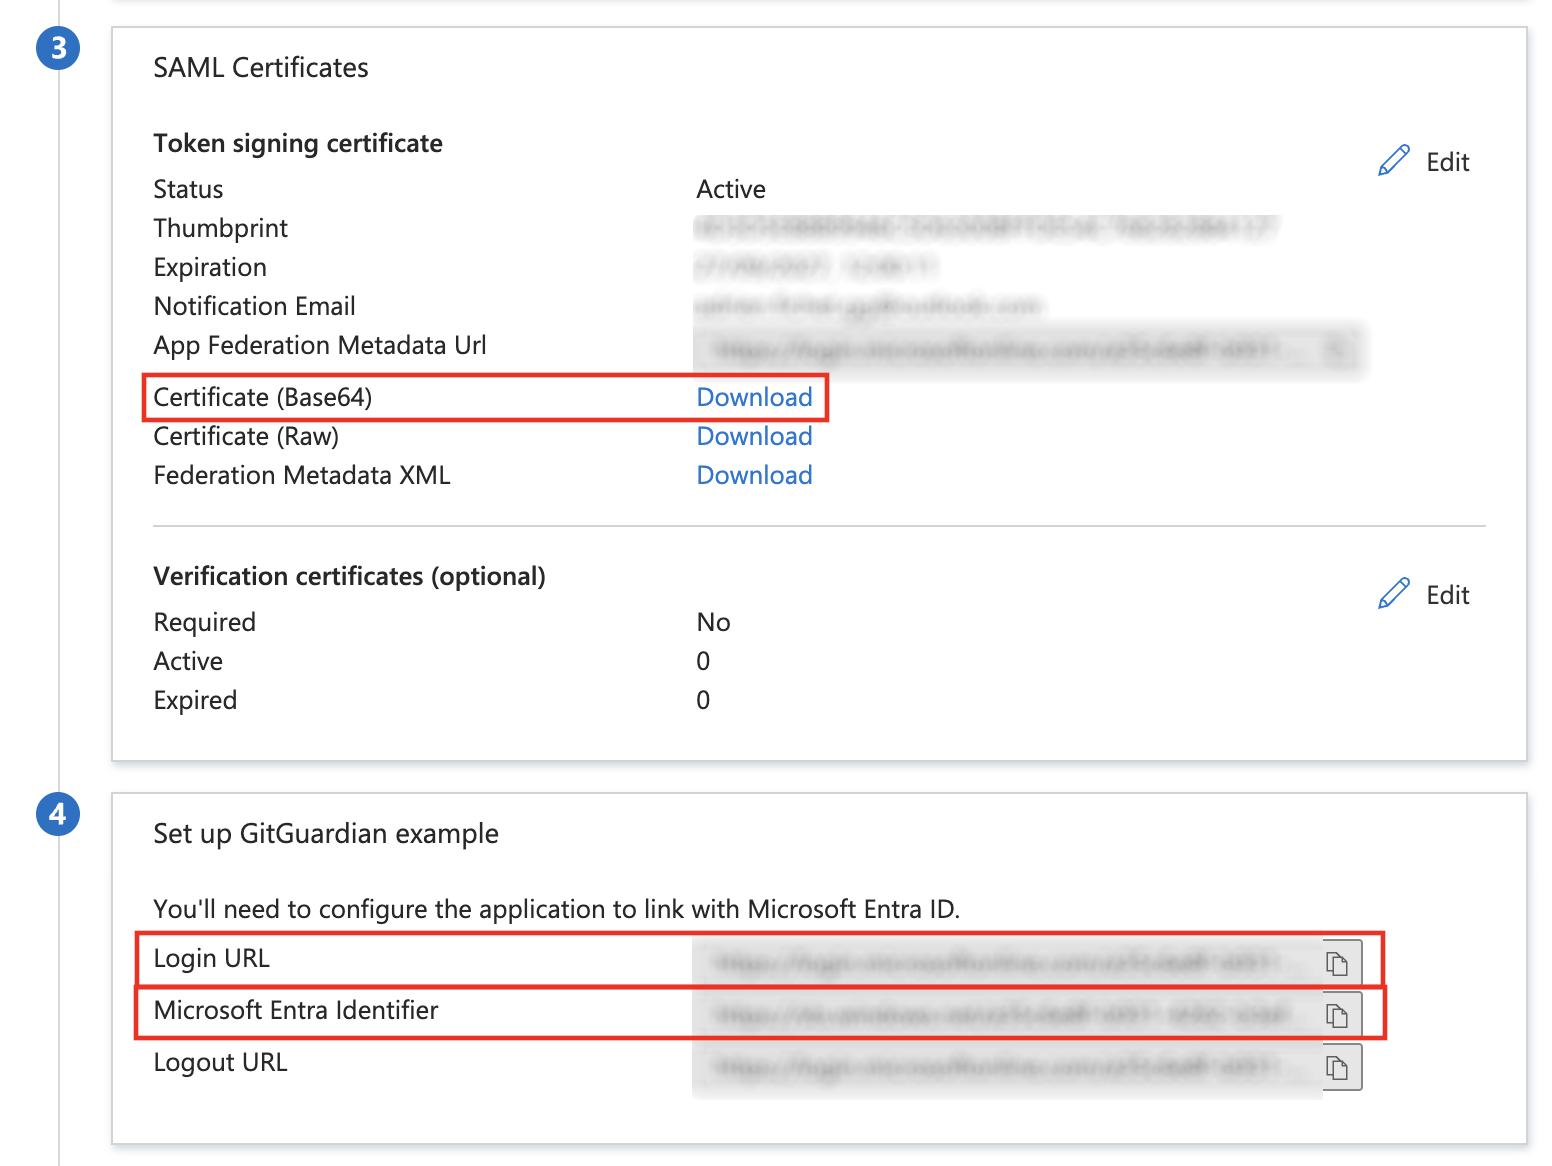
- Now, you need to configure the Identity Provider in GitGuardian dashboard. Use these values:
Entity Idfield is filled with theMicrosoft Entra IdentifierSingle Sign-On URLfield is filled with theLogin URLX509 Certfield is filled with the certificate. Download the Base64 certificate, usecatand copy/paste the plaintext value.- Ensure that the checkbox I have mapped the attributes first_name and last_name in my IdP is checked
- Test your app configuration by clicking on "Test".
- Important: Don't forget to reserve your email domain to enable automatic SSO discovery.

