Keycloak
-
Navigate to "Realm Settings" under the "General" tab in Keycloak, and copy the 'SAML 2.0 Identity Provider Metadata'. For example:
https://$YOUR_KEYCLOAK_DOMAIN/realms/master/protocol/saml/descriptor.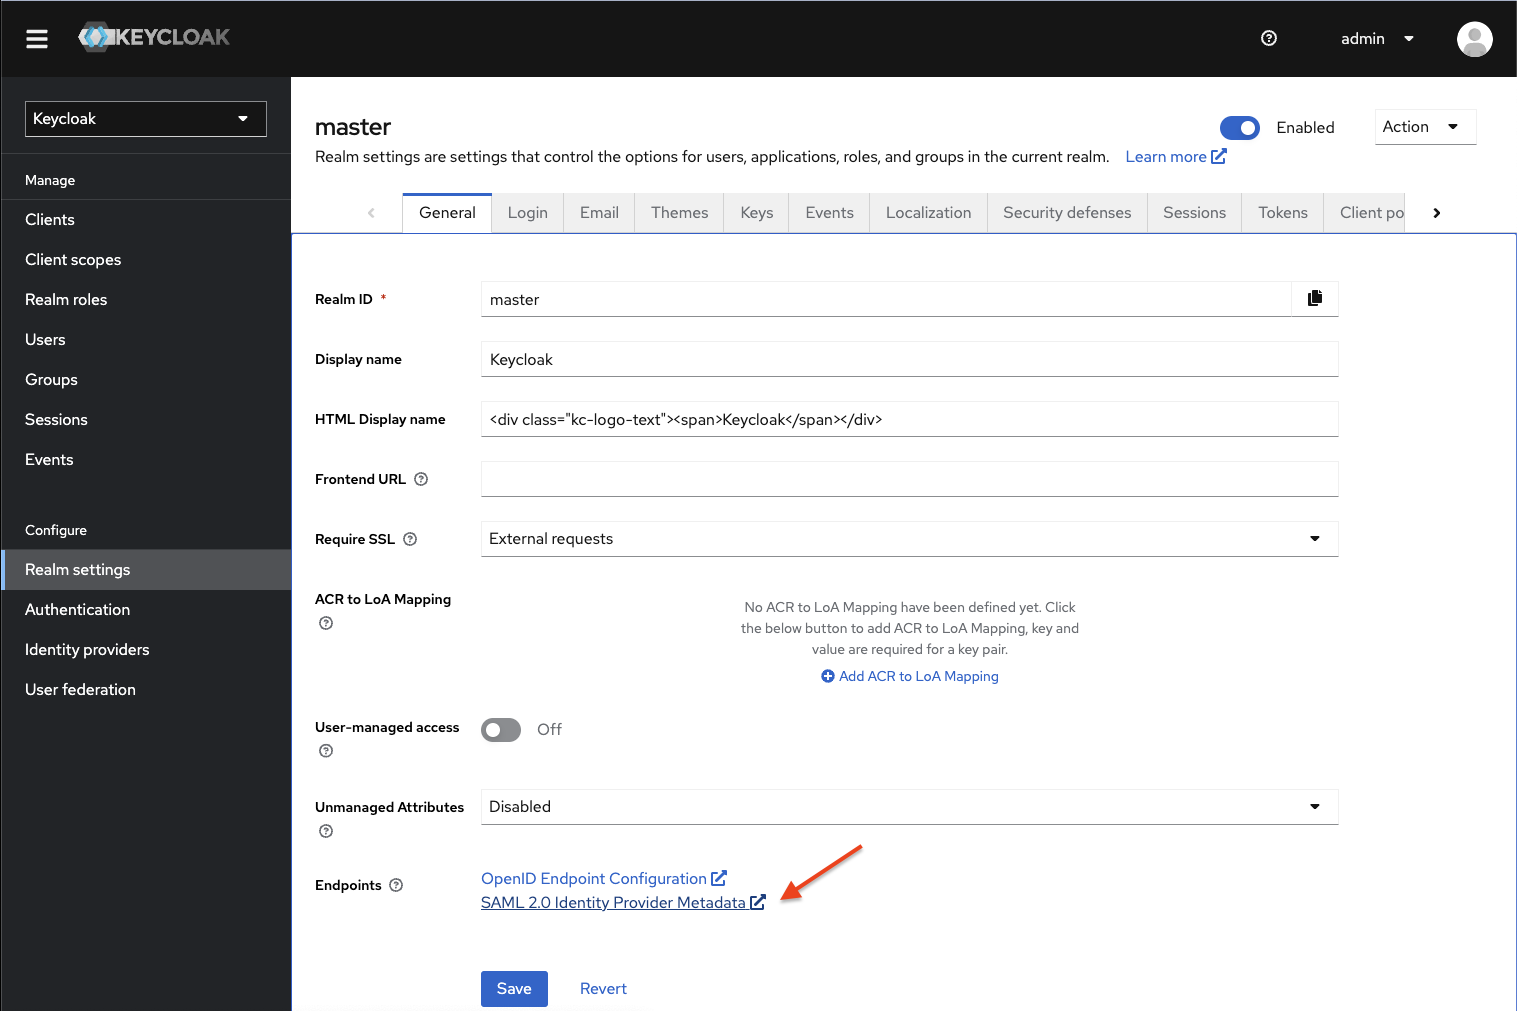
-
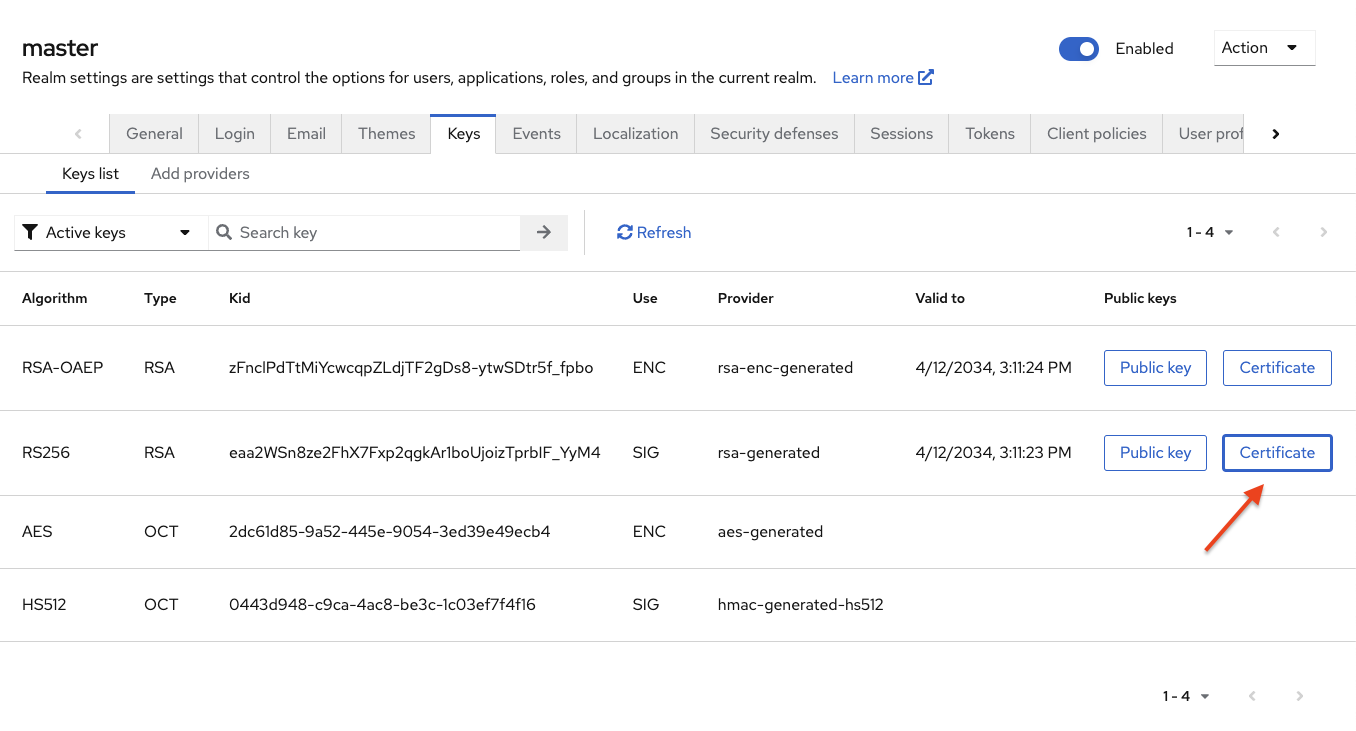
Go to the "Keys" tab, and click on the 'Certificate' button next to the RS256 algorithm. Copy the displayed certificate.
-
To configure the Identity Provider in the GitGuardian dashboard, use the following values:
- The
Entity Idfield should be filled with the Keycloak SAML 2.0 Identity Provider Metadata URL, excluding/protocol/saml/descriptorfrom the end. Example:https://$YOUR_KEYCLOAK_DOMAIN/realms/master. - The
Single Sign-On URLfield should include the Keycloak SAML 2.0 Identity Provider URL, excluding/descriptorfrom the end. Example:https://$YOUR_KEYCLOAK_DOMAIN/realms/master/protocol/saml. - In the
X509 Certfield, paste the certificate copied in the previous step. - Ensure that the checkbox I have mapped the attributes first_name and last_name in my IdP is checked.
- The
-
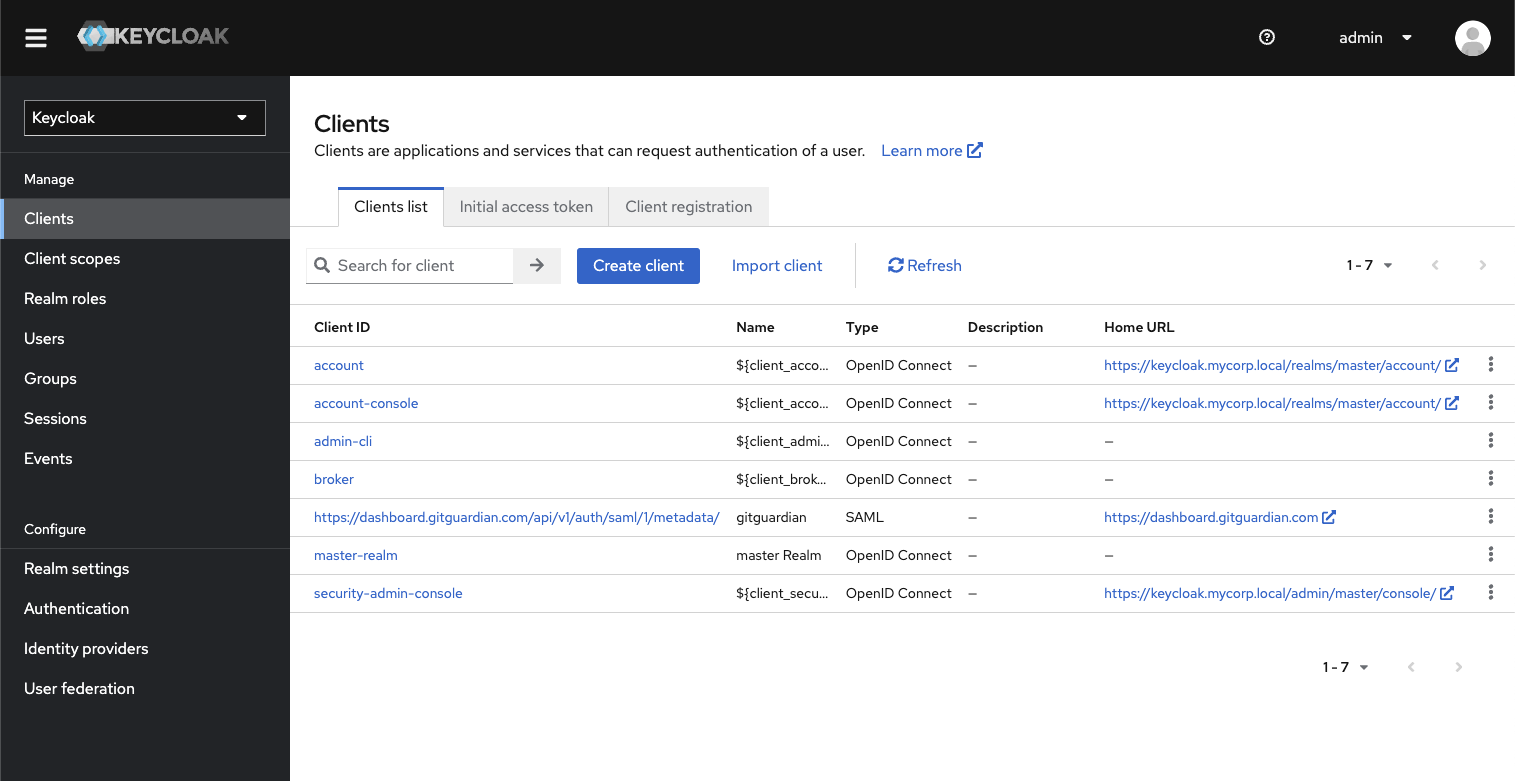
To configure the "Client" (Service Provider) in Keycloak:
- Navigate to the Clients menu and click on 'Create client'. Use the following values:
- Set the
Client typefield toSAML. - Fill the
Client IDfield with theSP Entity IDfrom the GitGuardian dashboard.
- Set the
- Click on 'Next', then:
- Fill the
Home URLfield with the URL of your GitGuardian dashboard. For example:https://dashboard.gitguardian.com(SaaS) orhttps://gitguardian.mycorp.local(Self-Hosted). - Fill the
Valid Redirect URIsandMaster SAML Processing URLfields with theACS URL.
- Fill the
- Navigate to the Clients menu and click on 'Create client'. Use the following values:
-
Click on 'Save', then configure these settings on the newly created client:
- In 'SAML capabilities', set the
Name ID Formattoemail. - Set
Force POST BindingandInclude AuthnStatementtoON. - In 'Signature and Encryption', set
Sign documentsandSign assertionsfields toON. Signature algorithmshould beRSA_SHA256.- Set
SAML signature key nametoNONE. - In 'Logout settings', set
Front Channel LogouttoON. - Click on 'Save'.
- In the 'Keys' tab, set
Client signature requiredtoOFF.
- In 'SAML capabilities', set the
-
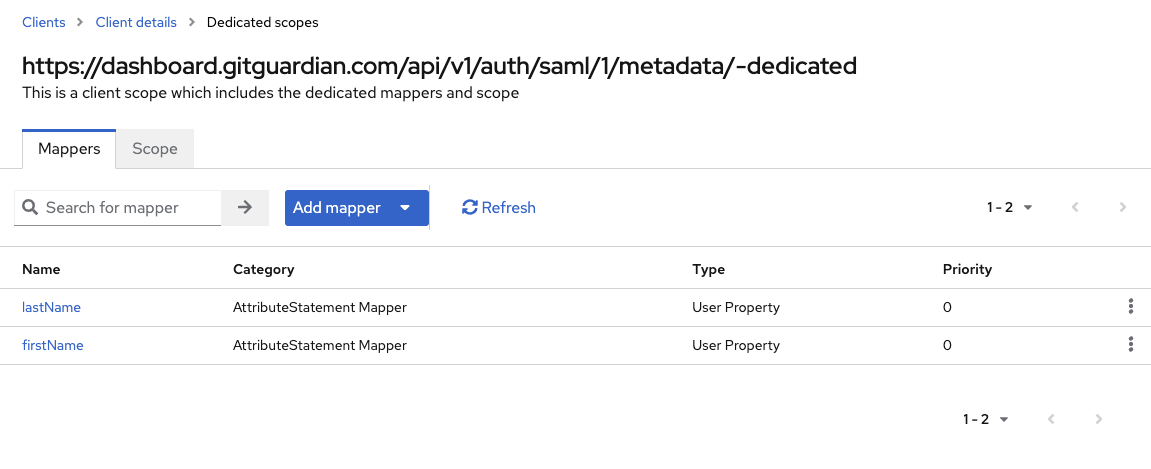
Still in the same client, under the 'Client scopes' tab, edit the 'Dedicated scope and mappers for this client' and configure a new mapper for the first name:
- Choose
User Propertyas theMapper Type. - The
Namefield should befirstName. - The
Propertyfield should befirstName. - Set the
SAML Attribute Nametofirst_nameand theSAML Attribute NameFormattoBasic.
- Choose
-
For the last name, create a second mapper:
- Again, select
User Propertyfor theMapper Type. - The
Namefield should belastName. - The
Propertyfield should belastName. - Set the
SAML Attribute Nametolast_nameand theSAML Attribute NameFormattoBasic.
- Again, select
-
In the "Client Scopes" tab, note the 'Assigned Default Client Scopes'. For example,
role_list.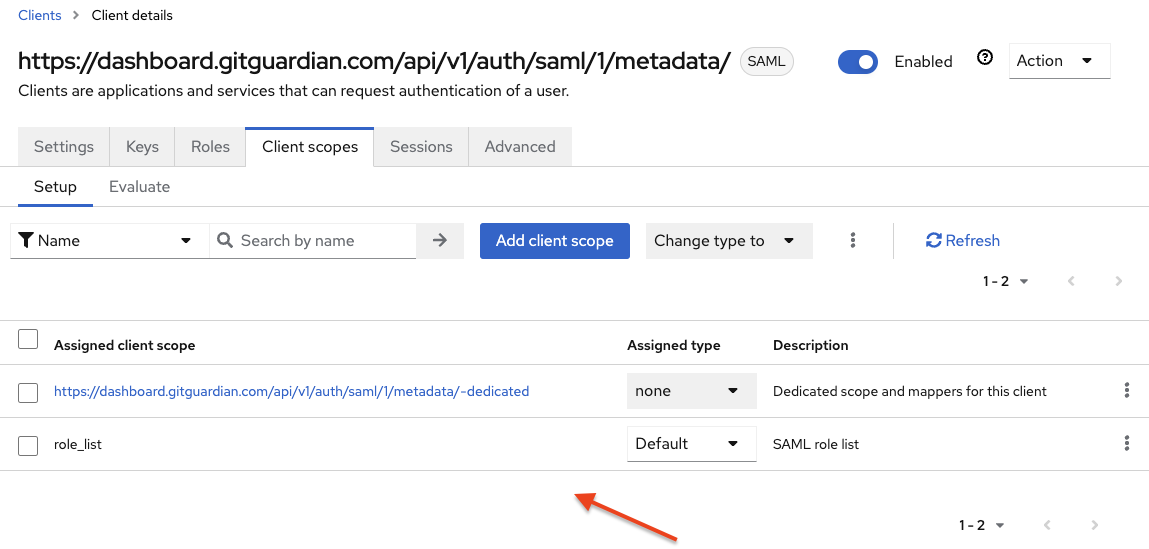
-
Edit the client scope(s) listed in the previous step by navigating to the "Client Scopes" menu. Go to the "Mappers" tab, edit the Role list mapper, and ensure the
Single Role Attributefield is set toON.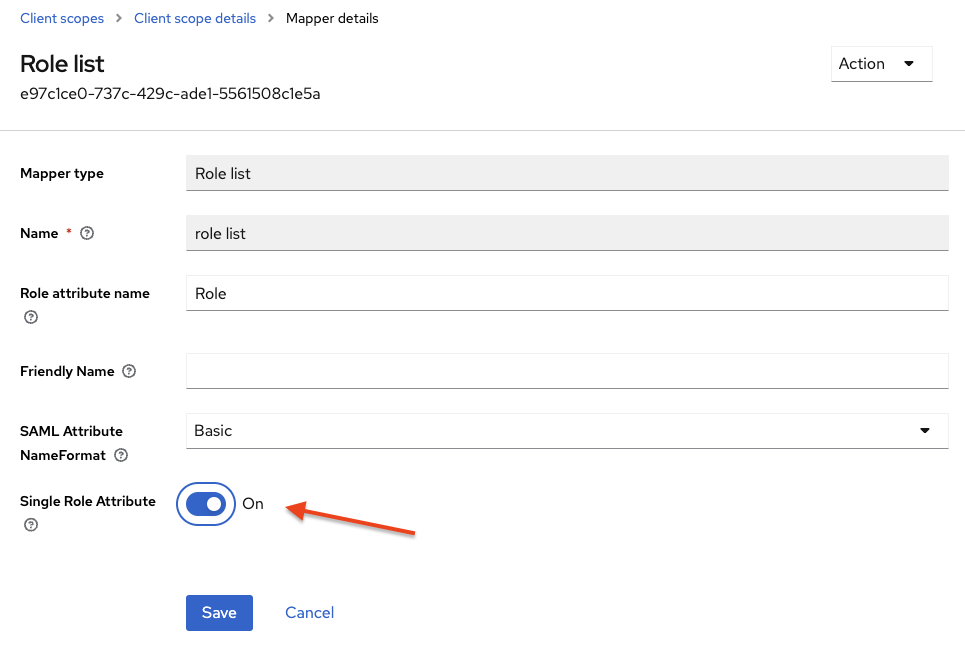
-
Finalize your setup by testing the SSO authentication using the
Login URLprovided in the GitGuardian dashboard SAML configuration page. -
Important: Don't forget to reserve your email domain to enable automatic SSO discovery.

