GitGuardian Bridge
GitGuardian Bridge enables secure connections between GitGuardian SaaS and your self-hosted services in private networks without requiring inbound firewall rules or exposing internal resources to the internet.
Built with security at its core, GitGuardian Bridge uses outbound-only connections, mutual TLS authentication, end-to-end encryption, minimal attack surface with distroless container images, and provides complete audit logging for full compliance.
Only workspaces under Enterprise plan can use GG Bridge.
What is GitGuardian Bridge?
GitGuardian Bridge creates an encrypted, outbound-only tunnel from your private network to GitGuardian SaaS, allowing you to:
- Scan private repositories without exposing them to the internet
- Monitor self-hosted services while maintaining network isolation
- Meet compliance requirements by keeping sensitive infrastructure private
- Support multiple networks with separate bridge configurations
Supported Integrations
GitGuardian Bridge works with:
| Service | Type |
|---|---|
| GitHub Enterprise Server | Version Control |
| GitLab Enterprise Edition | Version Control |
| Bitbucket Data Center | Version Control |
| Azure DevOps Server | Version Control |
| JFrog Artifactory | Container Registry |
| Azure Container Registry | Container Registry |
| Confluence Data Center | Documentation |
| Microsoft OneDrive | Documentation |
| Microsoft SharePoint Online | Documentation |
| Jira Data Center | Ticketing |
| ServiceNow (on-premise) | Ticketing |
| Bring Your Own Sources | Custom Sources |
| Custom webhooks | Notifications |
| Splunk Enterprise | Notifications |
| Custom validity endpoints | Secret Validation |
How to Set Up GitGuardian Bridge
Step 1: Request Bridge Access
Contact support@gitguardian.com to request bridge functionality for your account. Specify how many bridges you need (typically one per isolated network segment).
Step 2: Create Your Bridge
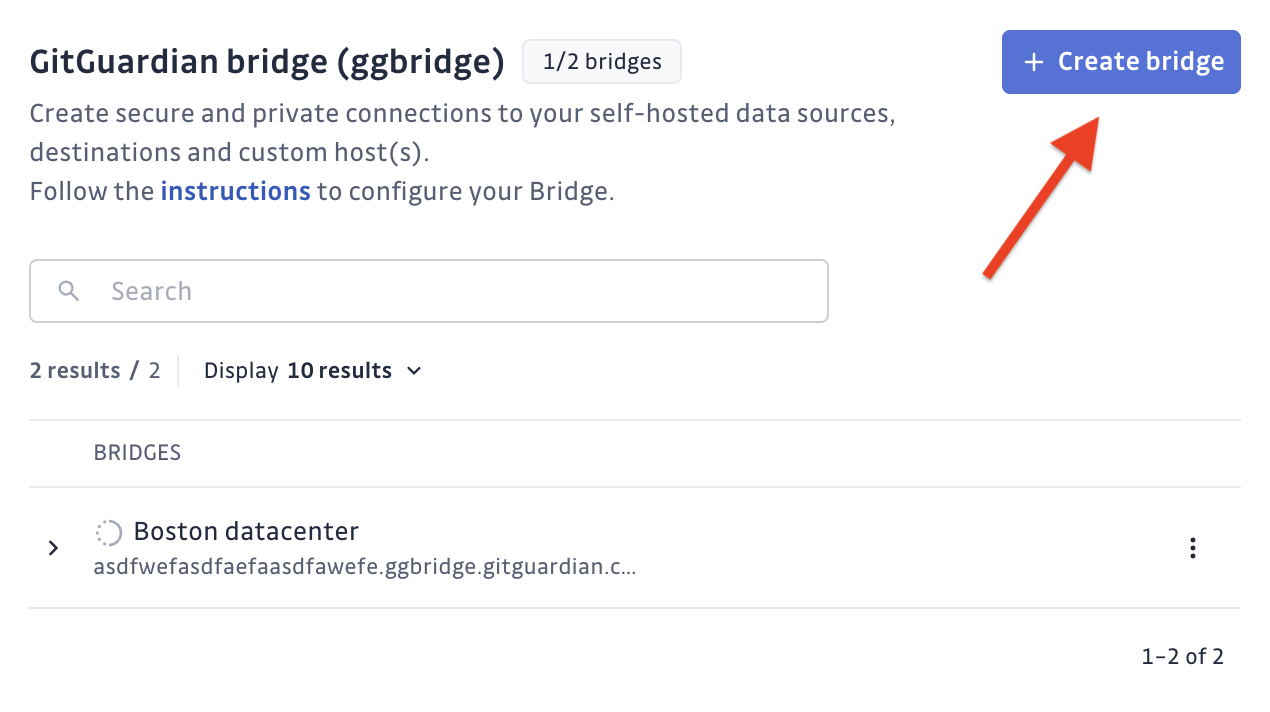
- Log into GitGuardian Dashboard and navigate to Settings > Security > GitGuardian Bridge
- Click "Create Bridge"
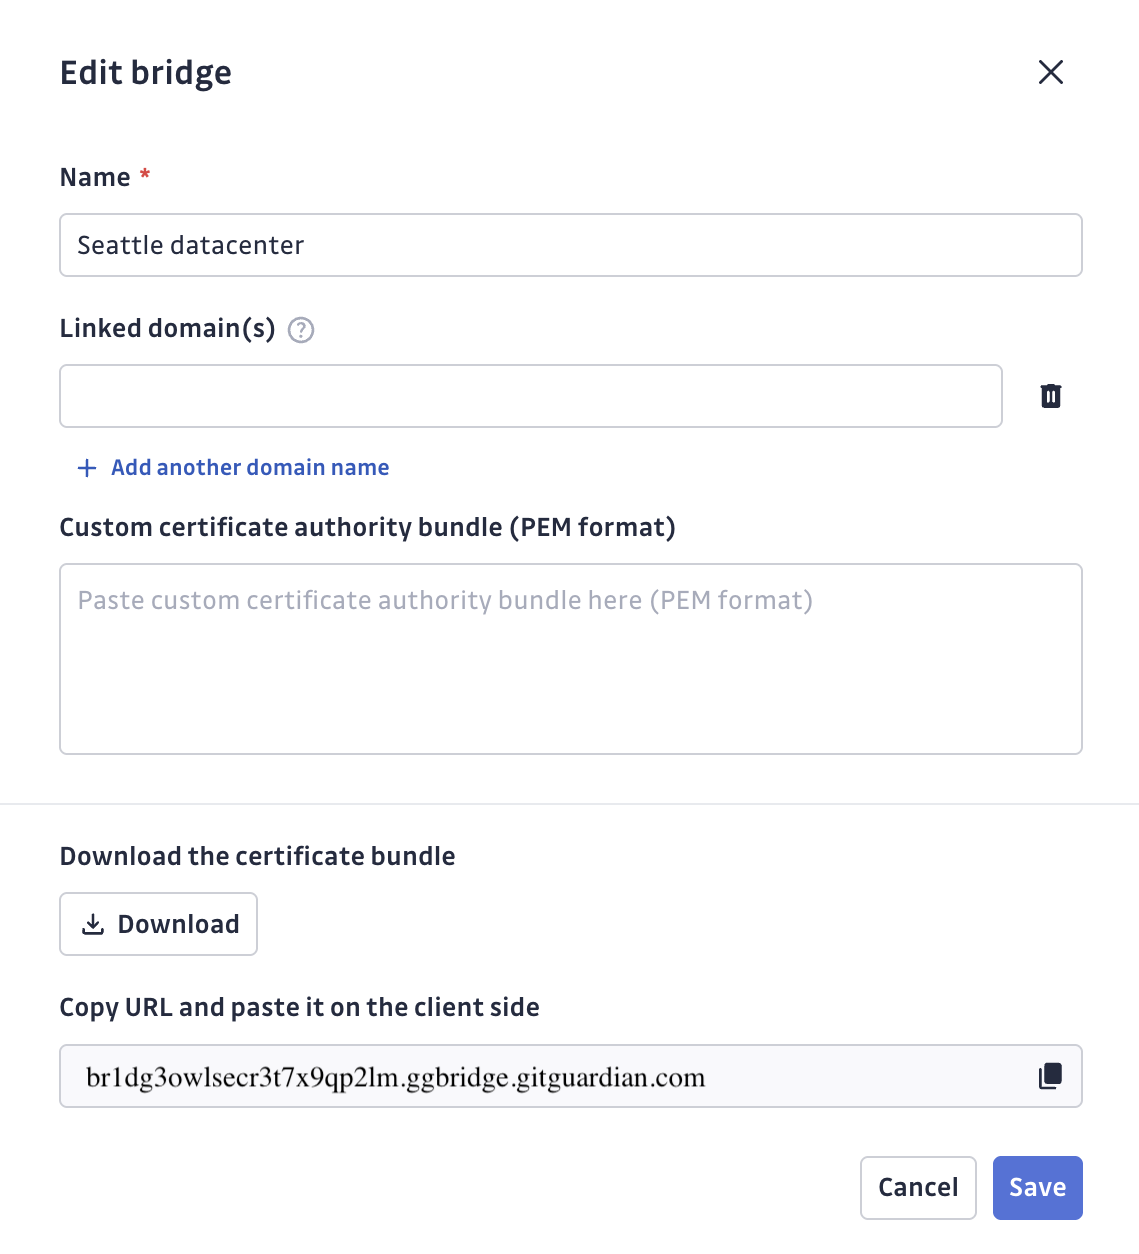
- Configure your bridge: Name your bridge (e.g., "Production Network", "Dev Environment"), optionally add a Custom CA if your internal services use custom certificates, and add domain names of internal services (you can also do this later). Then download the certificate bundle and copy the bridge URL.
The Custom CA field is required when your target services use certificates signed by a custom Certificate Authority (CA). You must provide the complete certificate chain in PEM format, including:
- The Root CA certificate
- All intermediate CA certificates (if any)
To export the certificate chain from your service:
openssl s_client -showcerts -connect your-internal-service.com:443 -servername your-internal-service.com </dev/null 2>/dev/null | sed -ne '/-BEGIN CERTIFICATE-/,/-END CERTIFICATE-/p' > bundle.pem
Example PEM format:
-----BEGIN CERTIFICATE-----
MIIDXTCCAkWgAwIBAgIJAKoK/OvD... (Root CA)
...certificate content...
-----END CERTIFICATE-----
-----BEGIN CERTIFICATE-----
MIIDbTCCAlWgAwIBAgIJAKoK/OvD... (Intermediate CA)
...certificate content...
-----END CERTIFICATE-----
Without the proper Custom CA configuration, GitGuardian Bridge will not be able to establish secure connections to your internal services and will fail with SSL verification errors.
Step 3: Configure Bridge Client
Deploy the bridge client in your private network using the certificate bundle and bridge URL from Step 2.
📋 Follow the detailed installation guide: github.com/GitGuardian/ggbridge
The repository provides complete instructions for:
- Docker deployment
- Kubernetes/Helm deployment
- OpenShift configurations
- Troubleshooting guides
Step 4: Configure URL Mapping (if not done during creation)
If you didn't add domain names during bridge creation, go to your bridge settings and add the domain names of internal services that should route through the bridge:
gitlab.internal.company.combitbucket.team.localartifactory.dev.internal
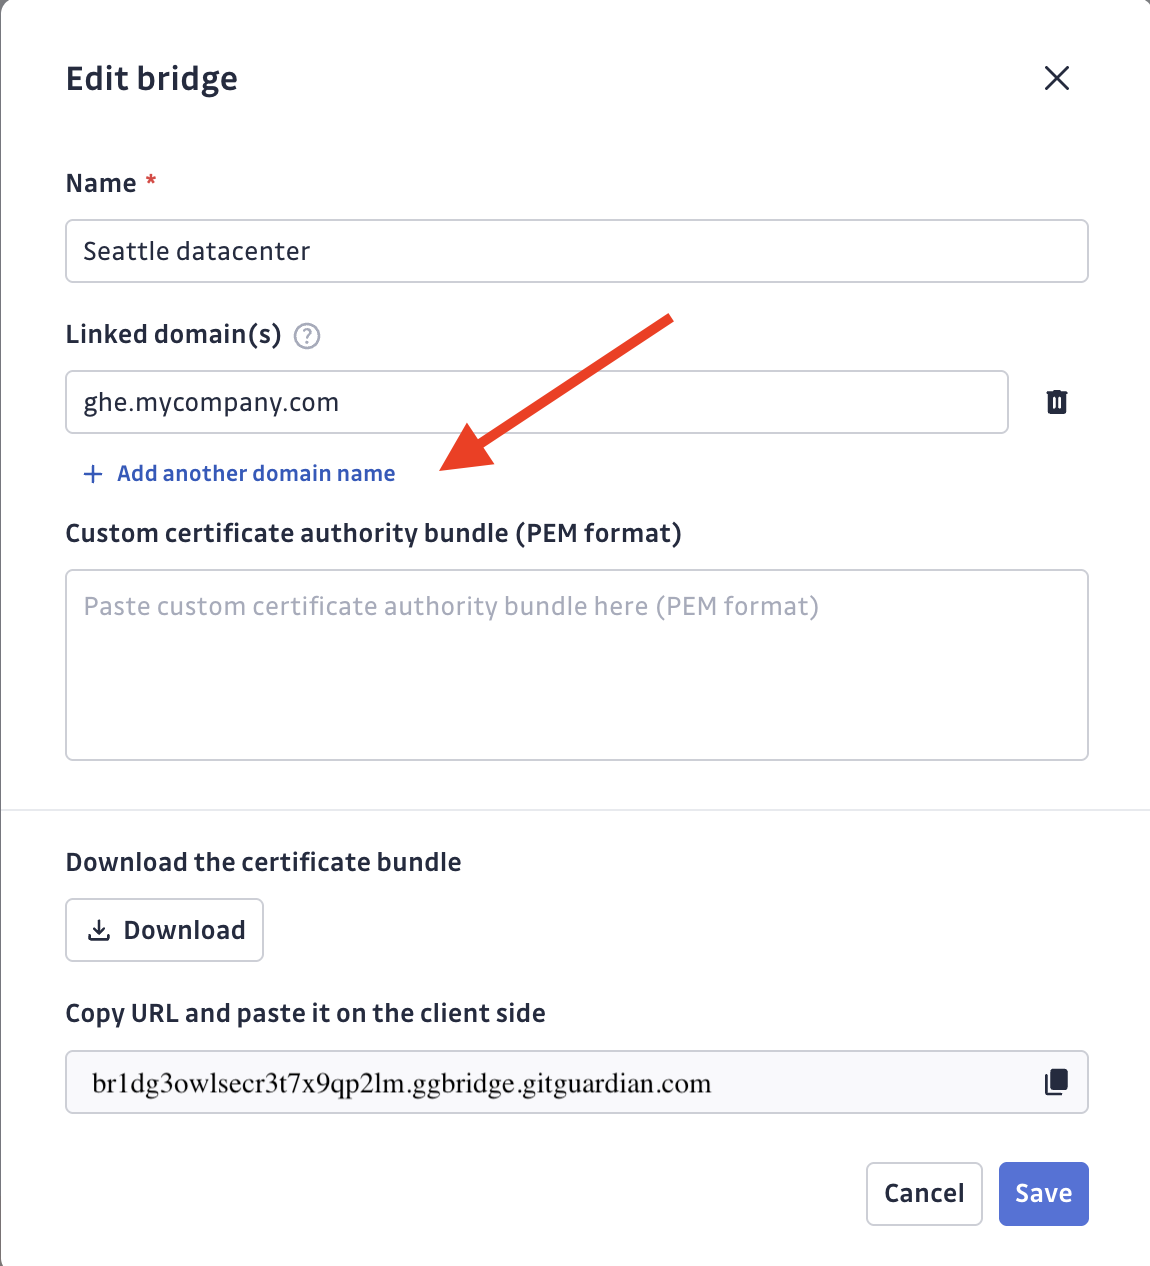
GitGuardian will automatically route traffic to these URLs through your bridge.
Step 5: Configure Your Integrations
Set up your self-hosted services in GitGuardian Dashboard:
- Sources: Navigate to Settings > Integrations > Sources
- Destinations: Navigate to Settings > Integrations > Destinations
- Custom Hosts: Navigate to Settings > Secrets > Detectors.
Example with GitHub Enterprise:
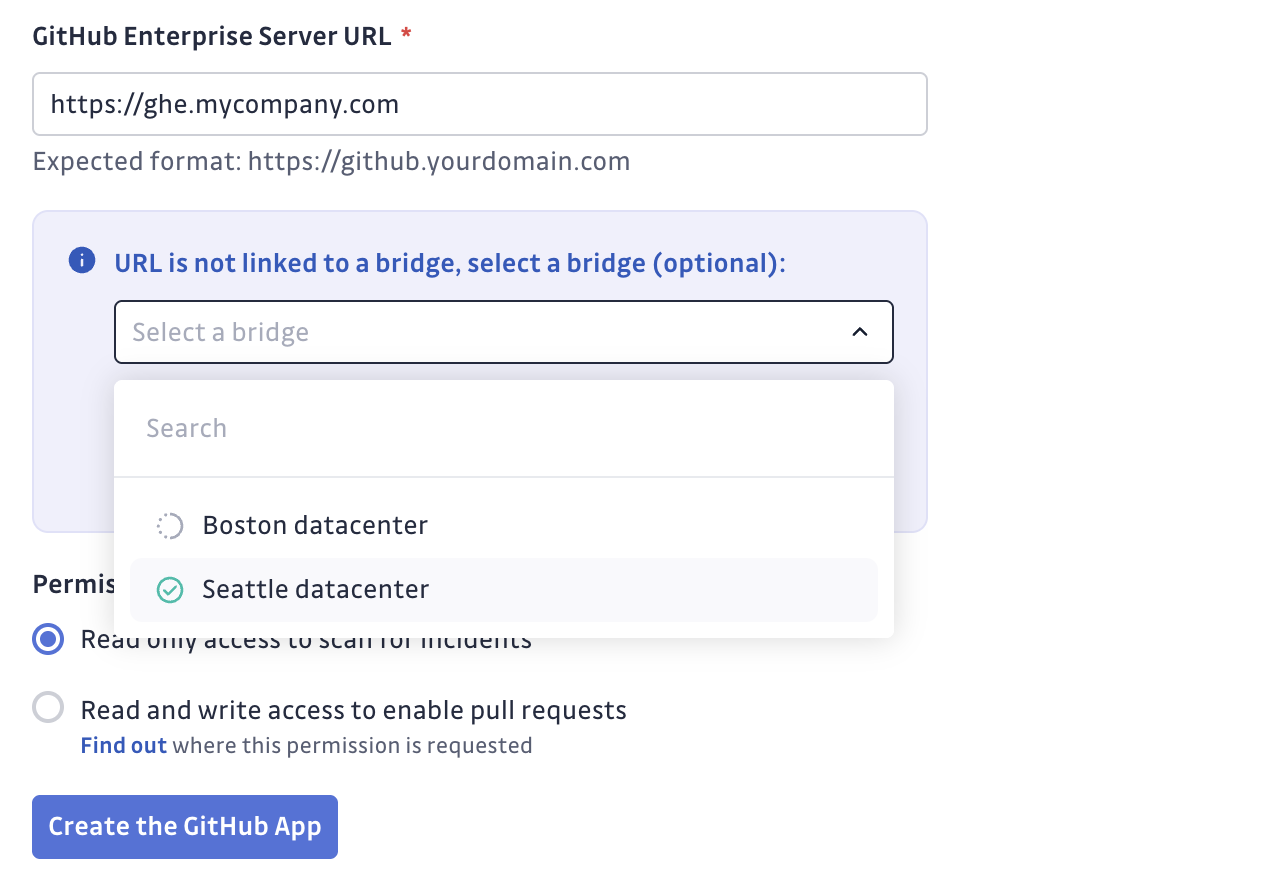
When you enter URLs that match your bridge configuration, GitGuardian automatically uses the bridge connection.
Verify Everything Works
- Bridge Status: Check Settings > Security > GitGuardian Bridge for connection status
- Integration Health: Monitor your source/destination health checks
- Test Scans: Run a test scan on a private repository
For assistance, contact support.

