Install on an Embedded cluster
Introduction
�⚠️ Note that embedded installations are not recommended for production use and are better suited for trial or Proof of Concept (PoC) purposes. More information here.
GitGuardian can be installed with an embedded Kubernetes distribution packaged with it and supports deployment on bare metal, private, or public clouds.
Prerequisites
Required Infrastructure
-
Linux Virtual Machine: See system requirements for detailed hardware and OS specifications, including the Small / Medium / Large sizing tiers for PoCs.
Size the VM according to the volume you plan to scan during your PoC. Example VM instances per tier:
Tier AWS GCP Azure Small m7a.4xlarge(16 vCPU / 64 GiB)n2-standard-16(16 vCPU / 64 GB)Standard_D16s_v5(16 vCPU / 64 GiB)Medium m7a.8xlarge(32 vCPU / 128 GiB)n2-standard-32(32 vCPU / 128 GB)Standard_D32s_v5(32 vCPU / 128 GiB)Large m7a.16xlarge(64 vCPU / 256 GiB)n2-standard-64(64 vCPU / 256 GB)Standard_D64s_v5(64 vCPU / 256 GiB)
The single-node embedded cluster cannot scale horizontally. For high-volume PoCs (many repositories, or document sources such as SharePoint and OneDrive), provision a Large VM or use an existing cluster installation. To quickly stand up PostgreSQL and Redis on an existing cluster for a PoC, you can use the helm-pg-redis-poc presets, which provide Small/Medium/Large configurations aligned with the Scaling guide.
Additional Requirements
-
License File: Download your GitGuardian license from the portal. See license management for instructions.
-
Network Access: Ensure your cluster meets the network requirements.
-
Domain Name: A Fully Qualified Domain Name (FQDN) for accessing the application. See system requirements.
Installation
Embedded cluster
Contact the GitGuardian team at support@gitguardian.com to obtain your license ID. The license is embedded directly in the installer bundle, eliminating the need for a separate license file download.
To begin the installation, execute the following commands on your host system. The installation process takes approximately 5 minutes to complete. Consider using a terminal multiplexer like screen or tmux to prevent interruption due to connection loss. Replace your_license with the license ID provided by the GitGuardian team.
LICENSE_ID=your_license
curl -f "https://replicated.app/embedded/gitguardian/stable" -H "Authorization: $LICENSE_ID" -o gitguardian.tgz
tar -xvzf gitguardian.tgz
sudo ./gitguardian install --license license.yaml
Airgap
To use in airgap mode, use this instead:
LICENSE_ID=your_license
curl -f https://replicated.app/embedded/gitguardian/stable?airgap=true -H "Authorization: $LICENSE_ID" -o gitguardian.tgz
tar -xvzf gitguardian.tgz
sudo ./gitguardian install --license license.yaml --airgap-bundle gitguardian.airgap
HTTP Proxy
To use an HTTP proxy, use this instead:
LICENSE_ID=your_license
curl -f https://replicated.app/embedded/gitguardian/stable -H "Authorization: $LICENSE_ID" -o gitguardian.tgz
tar -xvzf gitguardian.tgz
sudo ./gitguardian install --license license.yaml \
  --http-proxy http://proxy.example.com:8080 \
  --https-proxy http://proxy.example.com:8080
For proxies with authentication, include credentials in the URL:
sudo ./gitguardian install --license license.yaml \
  --http-proxy http://username:password@proxy.example.com:8080 \
  --https-proxy http://username:password@proxy.example.com:8080
For detailed proxy configuration instructions, including troubleshooting authenticated proxies, see the HTTP Proxy documentation.
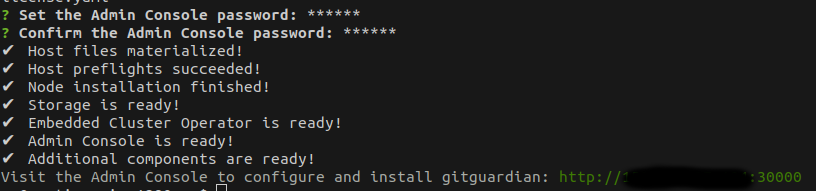
You will be prompted to enter the Admin console password. This password is used to manage the GitGuardian application and is different from the GitGuardian dashboard password that you will configure later.
If you are prompted to select from multiple network interfaces, choose the one connected to your private network.
This will install a single node-managed Kubernetes cluster with everything it needs to run the GitGuardian application.
Once the installation is completed, instructions will appear on how to access the Admin Console.
The deployment namespace for KOTS (and GitGuardian) cannot be changed at this time.
Application
With the embedded Kubernetes cluster now set up, let's move on to installing the GitGuardian application.
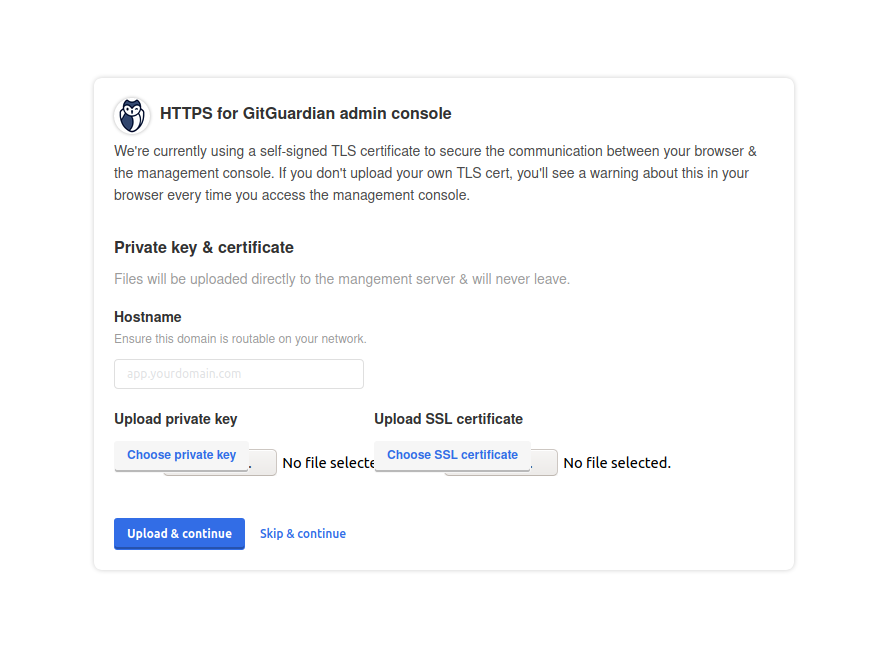
- Access the Admin Console with the link provided and configure TLS. You have the option to upload your TLS certificates or use self-signed ones.
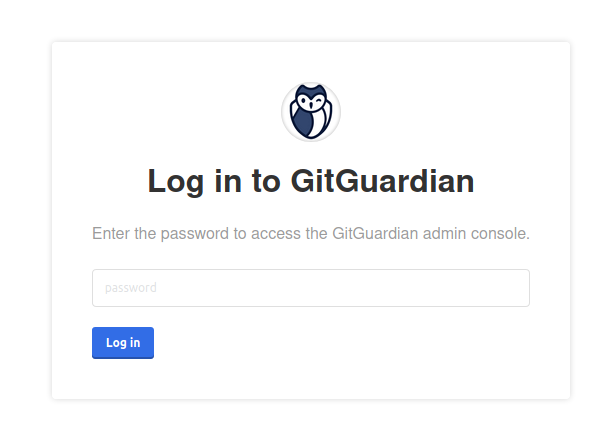
- Enter the password provided at the end of the cluster installation.
- You can see cluster status (with one node currently). Then click continue.

-
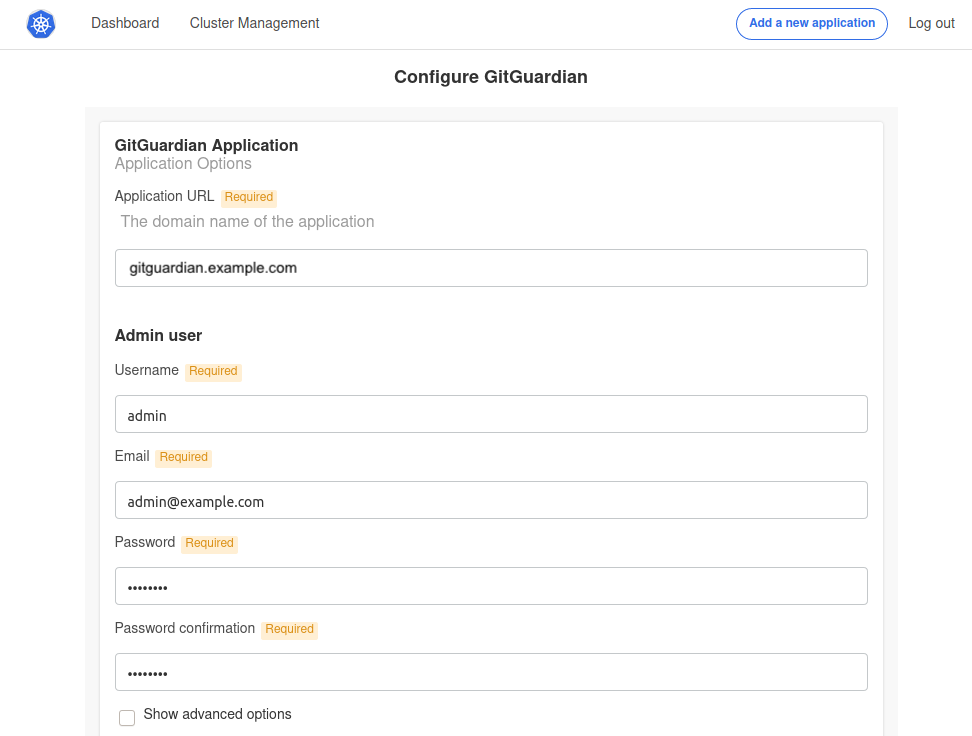
Configure the application by completing all the required fields:
- Application Hostname: Enter the Fully Qualified Domain Name (FQDN) for the GitGuardian application.
- Admin User Fields: These fields are used to create the first GitGuardian user. You'll need to change the password upon the first login.
Additional configuration options include:
- Scaling: Adjust the number of replicas for each application component. For more details, visit the Scaling page.
- Prometheus: Activate an exporter for Prometheus.
- TLS Certificate: This is for the GitGuardian Application. You can either use auto-generated self-signed certificates or upload your own. For self-signed or private CA certificates, disable SSL verification for the GitHub webhook. Learn more on the Configure TLS certificates page.
- Custom Certificate Authority: Provide a custom CA if necessary.
- HTTP(s) Proxy: Refer to the proxy section if needed.
- Databases/Datastores: Choose between using embedded PostgreSQL/Redis or an external one. For more information, see Configure your database.
- Load balancer considerations: To use the embedded cluster behind a load balancer, please read Configure your instance to work behind a load balancer.
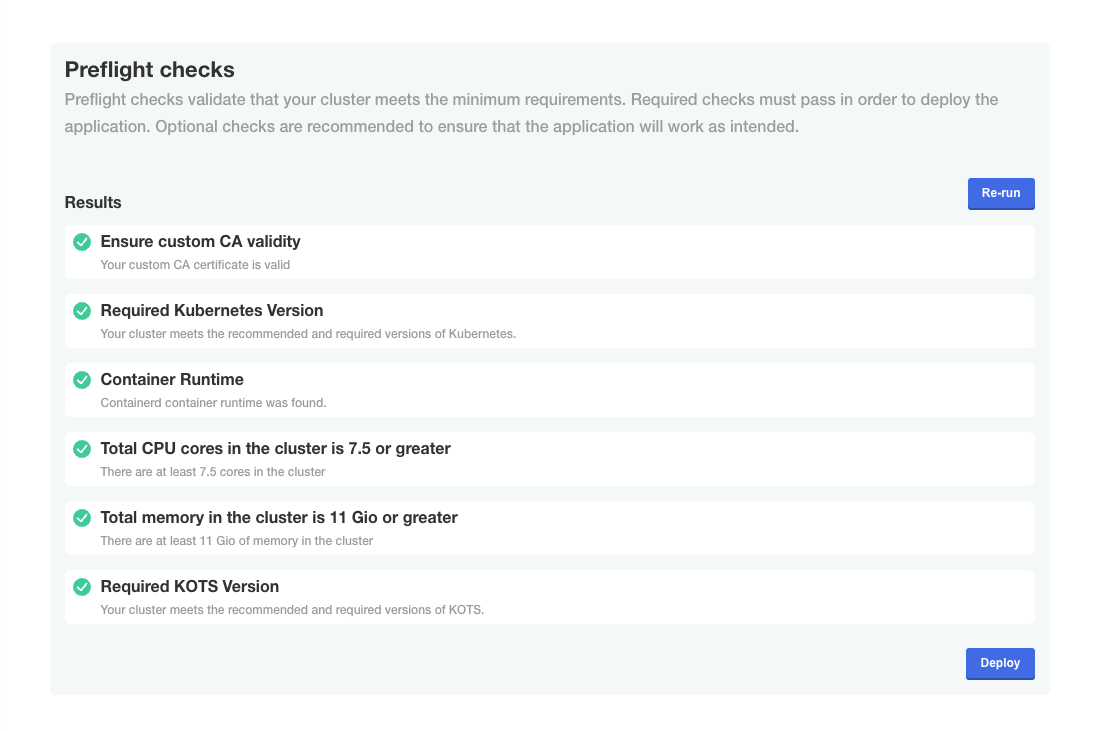
- Check if preflight checks pass.
Preflight checks are critical for a successful installation. The following rules apply:
- ❌ Preflight Check Failures: If preflight checks fail, the installation must not continue until the targeted environment meets all requirements. Please reach out to our support team if needed.
- ⚠️ Preflight Check Warnings: If preflight checks return warnings, the installation can proceed, but it is recommended that you address these warnings to comply with our recommendations.
- Launch
The first installation of the GitGuardian application requires a few minutes to create all database objects. Once the process is completed, you will be able to log in to the dashboard using the administrator user you defined.
Save the Data Encryption Key
GitGuardian encrypts all sensitive information in the database using an encryption key (aka Django Secret Key). In case of disaster recovery, this key will be needed to restore your data.
You should save it and keep it in a secure location. Use the following command to display the key:
sudo ./gitguardian shell
kubectl get secrets gim-secrets -o jsonpath='{.data.DJANGO_SECRET_KEY}' | base64 -d
Troubleshooting
If you encounter issues during the installation process, you can generate a support bundle for the GitGuardian team to diagnose and resolve problems more efficiently. See the support bundle documentation for detailed instructions.
Next Steps
After successful installation:
- Access your GitGuardian instance using the hostname you configured
- Log in with the administrator credentials you set up (change the temporary password on first login)
- Configure email settings for notifications
- Set up SSO and SCIM integration (optional)
- Integrate your first repositories to begin secret detection

